Hi everyone! Welcome to the special edition of my blog post today!
Those of you who’ve been following me know that I usually post an article about creativity and motivation every Sunday. Even though I’m on a mini sabbatical this week, I get to show up for you twice… How cool is that?
For those of you who just discovered me through Kelly Johnson’s Draw Yourself Back to Nature Blog Hop, it’s so nice to meet you 🙂 Thanks for taking the time to stop by! NOTE: There is an announcement about a cool giveaway at the end of this post, so don’t miss it 🙂
Before we dive in to today’s nature drawing tutorial, let me take a moment to introduce myself! My name is Yuko Miki, and I’m an illustrator, print-maker, and a blogger in Seattle, Washington. I was born and raised in Himeji, Japan.

Himeji is a pretty big city, but I grew up in a rural part of the city surrounded by rice patches and mountains. My grandparents grew rice and many of the vegetables we ate. I used to take it for granted and didn’t really think it was anything special. I even thought farming and growing up in a rural area were kind of uncool!

I moved to Seattle about 19 years ago to study English and ended up staying here for good. Seattle is a great city, but I was pretty disconnected from nature and growing food for many years. I re-discovered the wonders of nature and re-connected with the soil when I met my husband, Dave, almost 9 years ago. Dave is a permaculture designer/teacher/author and helps people create an ecologically sustainable life. He inspires me and many others to choose a way of living that is kind to people and the earth. Yea I know, he’s pretty cool 🙂

My journey as an artist has taken kind of an unconventional route, too. As a child, I enjoyed drawing but moved on to other interests in my pre-teens and didn’t engage in any visual art for a long time. About 5 years ago, at my day job I was doodling some cartoon during a meeting, and my co-worker really liked it and wanted me to draw more. I started drawing here and there for fun and for friends, and I loved being appreciated for what I can create on paper.

I grew to like drawing more and more, but I never thought I could make it as a professional artist. I never went to an art school, and my drawings are pretty wonky. So I enrolled myself in a Graphic Design program at a local college in hopes to become more creatively employable and finished a certificate in 2014.
But in my last portfolio review class, I started freaking out a little bit. My work didn’t really look like other designers’. My design was pretty wonky and focused a lot on my illustrations. Oh no, I thought, I’m a bad designer!!
I nervously finished my final presentation to the class. Then our instructor, Susan, said to me, “You know, you’re not a bad designer. But you obviously are more passionate about illustration. Why don’t you just pursue illustration?” And I knew then and there that’s what I needed to do. I’d been so concerned about how unpractical my dream was and didn’t have a lot of confidence in my work even though people around me saw my potential. It’s so funny how you sometimes feel like you need a permission to follow your dream!
Anyway, then I started a daily drawing project back in April of 2014 where I made a drawing about happiness and shared it on the internet every day for 365 days. It helped me gain some traction, and I developed a daily creative practice helped me grow as an artist.
A lot of my daily happiness drawings were inspired by nature.
And somehow the universe aligned, and I was able to quit my day job at the end of July 2015! If you’re interested in learning more about how and why I quit my day job, you can read it here!
I’ve been enjoying being my own boss and hustling to take my art business to the next level for the past two months. I talk a lot about my journey and share my learning on my blog here, so do follow if that’s something you’re interested in 🙂
OK I think you got a good sense of who I am and what I’m about… Now, back to our topic for today!
I was stoked when Kelly Johnson from the Wings, Worms, and Wonder approached me to join her Draw Yourself Back to Nature Blog Hop! She’s asked the participating artists to provide a nature drawing tutorial, and I was so excited to join because I’ve been wanting to create tutorials for a while and hadn’t done one yet.
My tutorial is loosely related to Kelly’s nature journaling tutorial prompt No. 1 from her ECourse (which by the way is packed full of awesome resources and tutorials, easily worth more than what you pay!) where she teaches you how to draw nature by breaking them down to simple shapes.
I like using simple shapes and lines, and most of my work is pretty flat as opposed to photorealistic.
So here is my brand new Fall Leaf Doodle Tutorial I created for you! Follow along the steps and create your own nature-themed doodles. Have fun!
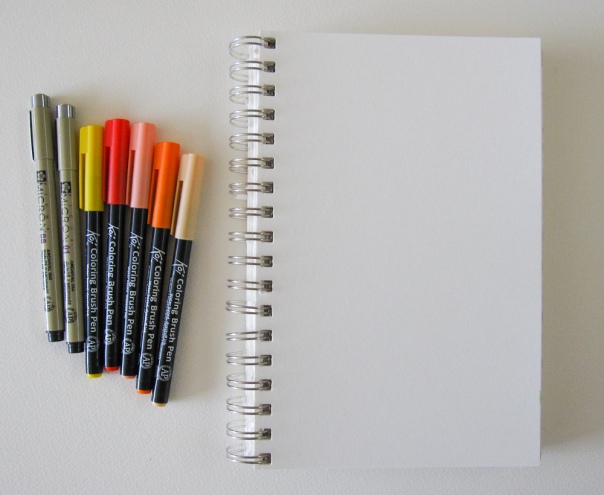
1) Materials you need for this tutorial: sketchbook, coloring markers & drawing pens.
I used Bee Paper Super Deluxe sketchbook, Sakura Koi Coloring Brush Pens, and Pigma Micron Pens (size 01 and 08 in black are my favorite!) in this tutorial. Of course this is not a requirement to use these specific brands/products, and you can use what you already have and are comfortable with.

I enjoy drawing with different mediums (watercolor, gouache, colored pencils, etc), and I like the portability of the markers when you’re on the go. Since you can layer and draw without worrying about the colors bleeding into each other, you have more control over the piece as well.
For this tutorial, I used Pale Orange, Yellow, Vermilion, Coral Red, Woody Brown, Orange, Fresh Green, Light Sky Blue, Light Warm Gray, and Ice Green Koi Coloring Brush Pens.
2) Gather your inspiration and references!
For this tutorial, I’m drawing fall leaves that spread and fill one page of your sketchbook. Since I typically draw things in simple and stylized manner, I like to look at several different images to get the feel for what I’m going to draw. Like Kelly mentions in her tutorials, you can do a goodle image search and/or go out and pick up leaves from outside!


3) Pick a couple of leaves from your references and practice drawing them with a marker.
Like Kelly mentions, we’re not trying to be scientific botanical illustrators here. As a commercial illustrator, it’s more important to me that my drawings have my voice (a.k.a. my style) than how accurate or real they look. My style is simple and whimsical, and it makes my art fairly accessible to people.
You might be wondering, “I don’t know what my style is. How do I find it??” Well, unfortunately, there is no shortcut for finding your style. But you can find it by 1) paying attention to what you’re attracted to aesthetically, and 2) practicing a lot.
Whether you’re attracted to more realistic art or stylized illustrations, only way to get better and deepen your style is to practice.
So turn to your sketchbook or any scratch paper, and start making simple drawings of the leaves you chose with special focus on their shapes. Don’t worry about any mistakes or details. Draw it big. Draw it small. Maybe exaggerate certain aspects and see what you think. If it’s wonky, that’s OK. Nobody is going to see this, so just relax and have fun 🙂 Think of it as your visual brainstorming session! There is no need for judgement or order. Don’t be precious with this. Just go for it.
If you’re intimidated by more complex shapes (like the maple leaf), start with the basic oval-almond shaped ones!

4) Experiment with layering different colors.
One of the things I like about drawing with markers is that I can layer the colors in a very controlled way. Sometimes you have a good idea of what it looks like with multiple colors layered, but other times it can be a total surprise. Occasionally, you mix two colors (e.g. any complement color combo) that you thought were interesting and get a muddy mess. So just test them out on your sketchbook or a scratch paper.


On a side note, I like having a color chart of the makers I have so I don’t have to test it every time.

5) Once you practiced drawing some shapes and layering colors, let’s fill your sketchbook page with them, shall we?
STEP 1: Chose one base color. I prefer to start with a lighter color to make it easier to layer on later (I’m using Orange marker here). To make this tutorial simple, I’m going to use one basic leaf shape for this piece. Draw a few larger leaves with your base color. Don’t place them so tightly together as you’ll be filling the white space in the following steps.
I like to just go for it without drawing with pencils first, but if you’re nervous or have a specific pattern in mind, feel free to draw the shapes with the pencil first and fill it in with the marker.
STEP 2: Chose another base color (in this case, Yellow) and draw a few more leaves in the white space. Again, leave some space in between.
STEP 3: Using the same base colors, add in smaller leaves in the white space. Vary the directions, sizes, and shapes slightly to fit in the space. Leave some white space between the leaves.
STEP 4: OK, now it’s time to layer some colors on top of the base colors! I added Woody Brown color to some leaves. It’s a nice subtle fall color. Koi Brush Pens work sort of like watercolor so the base color still comes through the layers. For some leaves, I covered the entire shape, and for others I just layered on half of the leaf.
STEP 5: Then I added Vermilion on top of some of the leaves. This color really pops!
STEP 6: Then I went over the leaves with either Yellow, Pale Orange, or Coral Red. I typically layer 3 times (base + two layers) either with 3 different colors or same color multiple times to get the hue and depth I want.
STEP 7: Once you’re happy with the leaves, let’s decide on the background color! I wanted the warm fall colors to pop, so I decided to go with the blue-green hues (their complementary color scheme.) You can learn more about color theory here.
I picked Fresh Green, Ice Green, and Light Sky Blue for my background.
STEP 8: Fill in the background! I like to draw lines around the leaf shapes as I go so I don’t accidentally draw over the leaves. When I’m filling the larger space I can go faster in bigger strokes, and the lines around the leaves signal me to slow down. I like to leave a small white space between the leaves and the first background layer. I’ll tell you why in a minute.
First background layer is done! You can see the strokes pretty well. I like the look but if you prefer not to have stroke lines be so visible, you would need to pay more attention to the directions and length of your strokes.
STEP 9: Let’s add another layer to the background! I’m using Light Sky Blue here.
 So this is why I like to leave a small gap between the leaves and the background. As you add second and third background layers, you can come in a bit closer to the leaves than the first layer did to create a boarder with only two or one color layered.
This creates lighter colored boarder around the leaves, which helps the leaf shapes pop. You don’t need to be precise about this process. Play around with it to find what you like.
After two background layers.

STEP 10: Add the final layer. I used Fresh Green marker here. You can probably see that I layered it on pretty loosely. Again, if you prefer a more uniform or flat look, you just need to be more mindful of your strokes.
Close-up. At this stage, the background colors go up to the edge of the leaves to fill the white boarder around them. I still leave some white spot peeking through.
STEP 11: This is the final step! Add the veins with your drawing pen! I used the Micron size 01 in black.
You could try a few different styles of veins, like straight lines going all the way to the edge of the leaf, shorter ones, curved veins, tightly spaced vs. widely spaced etc.
I like to add the pen lines at the end because it sometimes runs if you go over it with the markers. And the black lines are sharper/crisper when you add them at the end.
Voilà!! And you’re done!!
I love this method of doodling because it’s really accessible and fun. My favorite time to doodle with markers is after dinner when my husband and I sit down to watch our favorite Netflix shows 🙂 Because I’m drawing simple shapes and not worrying about details so much, it’s a perfect activity to relax and unwind with.
You can also play with combining different shapes like this one below:
Or add interesting patterns to the leaves like this one:
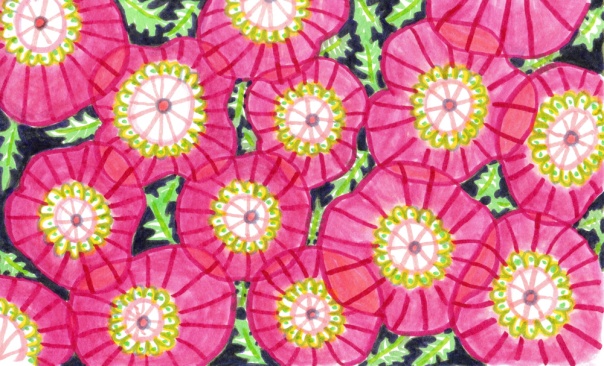
And this one is created entirely with markers:
Possibilities are endless!
I hope you enjoyed my tutorial! This was my first time putting together a tutorial, and I had a lot of fun and learned from it too.
OK, before you go off to create your own doodle masterpiece, I have a few quick announcements!
1) Tomorrow’s blog hopper is Carolyn Lucento of Magical Movement Company! Be sure to check out her blog here for another tutorial and a sweet giveaway!
2) Kelly Johnson’s hosting a live hour where she’s doing a simple journal making tutorial and having a Q&A on Friday the 9th at 1 pm EST. More info here.
3) And last but not least, I’m giving away the original drawing I made for this tutorial to one lucky winner!! To enter, simply comment on this blog post before the end of this Sunday 10/11 at midnight EST. I’ll pick one winner, and the winner will be announced on Tuesday 10/13 on Wings, Worms, and Wonder’s blog!

Thank you again for hanging out with me!! If you’re new to my work, let’s connect on Facebook, Instagram, or Twitter, and be sure to sign up for my monthly newsletter.
Have a wonderful week connecting with nature and creativity 🙂 Talk to you soon!
xoxo Yuko


Your work is beautiful Yuko. I really like your step-by-step guide of how you go about selecting your subject and how you use the Koi Brush Pens with all the stages when using them. It is brilliant how you share what colours to use with each other and how you talk about how you go about doing your backgrounds also. The step by step photos of your work is extremely helpful too as it gives me and others the idea of their quality and how they appear on paper. They certainly do look like watercolour paints when you see your photos. Your step-by-step guide is extremely clear and precise and most helpful not just to me, but to others who have not tried them yet or have – but need more help and information on the product.
Thank you and hope to see more wonderful colourful works by you with the Koi Brush Pens and hear more feedback from you. Is there anything about them that disappoint you? and how do you find the tip of the actual brush pen? (I have read some reviews where people have said that they are stiff and not quite like how they appear to be on first sight of them). We sell the Koi Brush Pens in our art shop http://iartsupplies.co.uk/drawing-materials/pens.html in Dundee, Scotland
Natalie
Hello Natalie!
oh thank you so much for your kind words! You made my day 🙂 I’m so happy you liked my tutorial post!
I love my koi brush pens. They’re so easy to use and the colors are wonderful! I can’t really think of anything that’s disappointing at the moment… They’re stiff when you first use them. My works are pretty small, so I don’t mind finer tipped markers, and I kind of prefer it, but they will get a little softer as you use them.
Hope that’s helpful! Thanks again 🙂
Yuko
Learned a lot! How beautifull! thank you!!!
oh wonderful! I’m glad it was helpful. Thank you Corine 🙂
I just love this, Yuko! Thank you for sharing your beautiful craft with us.
aw thank you Emily ❤ xoxo
Awesome tutorial, Yuko! It seems like you’ve been making them forever! I’m so pleased to have found you via Kelly’s blog hop and am definitely intrigued by your art and processes. I’m pulling out my sketchbook now, checking my supplies and am eager to try this. Congrats on a beautiful piece created. xoxox
Hi Debra! Thank you so much for your kind words! I’m so happy to connect with you and glad you enjoyed the tutorial. I feel lucky to have met Kelly, too. She’s wonderful. Keep in touch 🙂 xo
You bet I will. Just read your Sabbatical newsletter and am inspired! Thanks for introducing me to the concept, Yuko. Wishing you all the best!
I really appreciate this tutorial, simplicity is so beautiful and makes art accessible if we only get out of our own heads!!! You have made a great tutorial, I hope you do more!!
Hi Fran! Thank you so much for your comment! I’m so glad it was helpful for you, and I’d love to do more tutorials in the future 🙂 I believe that art can look like anything you want it to! Enjoy 🙂
What a great first tutorial! It makes me inspired to try it. I’ve never looked at markers quite in the way you use them in this tutorial in terms of blending the colors. (Or maybe it’s just that my exposure to markers has always been Crayola ones!) I really enjoyed discovering your illustrations.
Hi Amy! Thank you so much for your comment:) I’m glad you enjoyed my tutorial and it helped you see different side of markers! I love koi pens 🙂
Nice to meet you, Yuko!
Wonderful tutorial!
I love how you make it so accessible with lots of freedom.
I took Kelly’s course and loved it! It was very inspiring.
Thanks for sharing!
Hi Dawn! Nice to meet you too 🙂 thanks for your comment! I’m glad you enjoyed it and it was accessible. That was exactly what I was going for. Take care 🙂
Thank you Yuko, what a great first tutorial for you! It was so complete with all the materials you used, how you found the leaves, various examples of what a design could look like and the very clear step by step procedure. The result is so pretty and I like how you showed what colors to layer together to make the colors pop more. I will use this technique to make some home made greeting and birthday cards in the coming weeks. So fun!
Hi Patty!
thank you so much for your comment! I’m glad you enjoyed it. Yes, I think it’ll be perfect for greeting and birthday cards! I was thinking of mentioning that in my post and forgot… he he. Have fun creating 🙂 xo
Yuko, This tutorial is an absolute adventure in whimsy and reality! I had forgotten how lovely “doodling” can be for relaxation and creativity. Thanks for the fun reminder!
aw thank you Carolyn!! I’m glad it was helpful 🙂 I look forward to yours tomorrow 🙂 xo
Hello Yuko! I am a student/friend of Kelly and I love how I can be inspired by so many kinds of artists! And I particularly like your simple, fun style…as a beginner it seems very accessible and your tutorial is so personal. I haven’t used markers in this way and I will try it. Thank you so much!
Hi Peggy! Nice to meet you 🙂 thanks for stopping by and I’m glad to hear you enjoyed my tutorial. I love it when I can inspire people to try new things! Let me know how your marker drawings turn out!
Yuko!!! I love this!!!! I am always a little nervous with markers and your tutorial explains how to use them so well!!! This is amazing!! I can’t wait to make my own!!!! I’d say you are a tutorial creating master! I can’t wait for more in the future!!
Oh yay! Thank you Kelly!! 🙂 I should totally do this more regularly.