It was super relaxing, and I felt like it was one of the best sabbaticals I’d ever been on! What made it so successful was I didn’t schedule whole a lot of social engagements during my week off.
In the past, I’d cram in as many lunches and coffee dates as possible during my sabbatical (I mean, like 3 or 4 during the week :D) because I didn’t see my friends any other time. But this year I’m switching gears and trying to spread out my social engagements more evenly and make time to see my friends in small doses outside of my sabbaticals.
I’m an introvert, and being around people, while it can be a lot of fun, drains my energy. So, in order for me to really recharge my energy reserve during my sabbaticals, I decided not to schedule any get togethers with friends in advance, and it was super helpful! I still saw people, but it was more spontaneous (imagine that!!) and based on how I felt then.
Anyway, while on sabbaticals, I try to do things I normally don’t have the time to do. And here are some highlights!
1. I did my goal setting and planning for 2017.
I got this downloadable “2017 Goal and Intention Kit” from Jessica Swift and LOVE it! I did some intention setting earlier this year but finally dug into the actual goal setting during my sabbatical. It felt so good to have more clear directions for the year!
My business goal is to grow my wholesale side of business, partnering with more retail shops to carry my greeting cards! (BTW, If you know cute gift/stationery shops that may be a good fit for my work – do tell me in the comment! Both in and outside of US.)
But more generally, my goal is to be more focused – working on just one thing at a time, be more present with work and relationships, and getting more quality work done in a shorter time. I’m excited about this goal and will share more in another blog post!
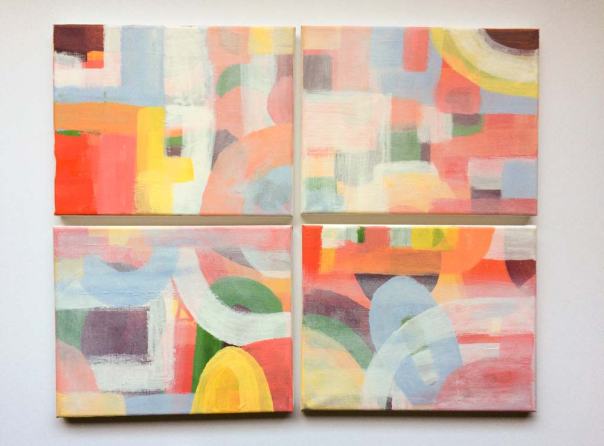
2. I created abstract acrylic paintings.
One of my intentions for this year is to try and explore different creative outlets. I feel it’s important for artists to stay curious and try something new! You might end up not liking something but will never know unless you try it, right?
I’ve been a little intimidated by painting with acrylics (I took a class once and found the medium hard to work with!) but I love the look of acrylic paintings, so I watched a couple of classes on Creativebug (I especially enjoyed this one and this one) and went for it!
I decided to paint some abstract pieces – just something different and intuitive .
I worked on 4 canvases at a time since they’re pretty small (8″x10″), and I didn’t want to wait around while the paint was drying.
I shared this process video on Instagram and thought you might like it, too! It’s good to document the process to see what steps I took to create an artwork and reflect on what I might do differently next time.
The hardest part of creating these paintings for me was to know when to stop. I felt like I over did the first paintings – I kept wanting to layer more and more hoping to make them look like something else… I’m letting them hang out for a while to see how I feel about them later.
And the second set, I went really simple just to see how I felt about them. I still did multiple layers but used just two colors and simple shapes. As my wise friend said, it takes guts to create something so simple! You keep thinking “this can’t possible be done…?” even though in your gut you know you should stop.
And the wonderful thing about acrylic paintings is you can totally paint over it if you don’t like something 😀
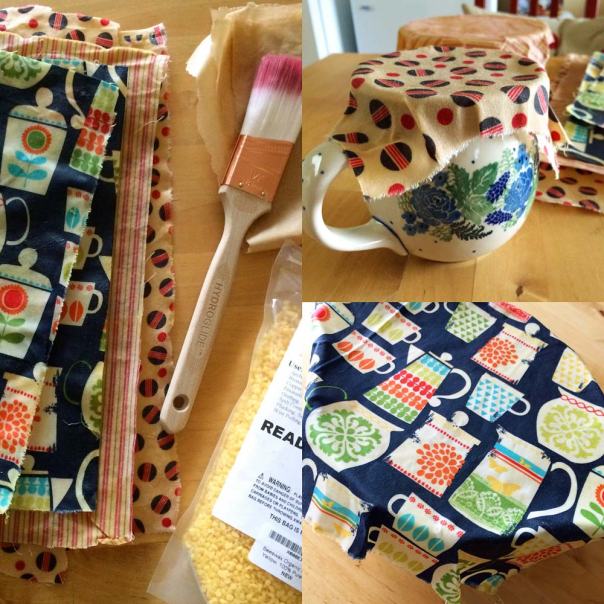
3. I made waxed fabrics to replace plastic wraps.
A small part of me dies whenever I use single-use plastic wraps, and I’ve been meaning to do a DIY project to replace them.
I found this tutorial on how to create waxed linen and made my own!
It was pretty easy, and they’re definitely prettier than any plastic wraps 😀 I can’t wait to use them and see how they do!
Taking a regular time off every 7 weeks has been so valuable to me. I’ve been taking mini sabbaticals since October 2015 and can’t imagine not doing it!
It gives me the chance to step back and reflect on how things are going. I often ask myself; How am I doing with my goals? How am I feeling about my business? Do I need to course correct or keep doing what I’m doing? And since I don’t have a deadline or pressing work issues to attend to during my sabbaticals, I can really focus on the big picture.
Focusing on the big picture often reenergizes me and gives me inspirations for the future. And, since I’m forcing myself to get done 7-week worth of work in 6 weeks, I feel more productive when I’m “on,” too!
I used to have major FOMO about taking a time off from work but have learned over time nothing went terribly wrong while I was taking a break.
The truth is, one week is not that long.
As long as you plan ahead (which is easy to do since the sabbaticals come every 7 weeks), you can totally have a regular time off without losing money or feeling guilty.
If you’re curious, I want you to try it and see how you feel!
I love teaching the class and get so inspired by all the beautiful student work!! Here is a fun picture from my last workshop… 🙂
I’ve been thinking about offering a workshop that’s similar but a little more accessible.
Though block printing tools and materials I use for the class are super easy to handle (no linocut or wood block because they’re tough for beginners), I think some students are still intimidated by the idea of carving a block.
So I picked up this gorgeous book by Andrea Lauren recently to learn about stamp making using art foam sheet, which requires no carving.
First of all, this books is beautiful! Her work is amazing and often very intricate – but she shares step-by-step instructions on how to create your own stamps and blocks in a very user-friendly way.
I became interested in the art foam stamp making because it requires no carving and is great for beginners or those who just want to experiment with block printing.
So as soon as I got my book, I created my own stamps using art foam sheets and documented the process for you!
1. Sketch your design for the stamps.
I wanted to design something pretty to print on an A2 size greeting card (4.25″ x 5.5″), so I drew the frame that’s the size of the card in my sketchbook first. Bold and simple designs work really well for block printing and definitely easier for beginners.
I really liked one of my watercolor painting of camellias, so I sketched the design based on the artwork using a pencil.
2. Trace the design with pencil on a tracing paper.
3. Transfer the image on to the art foam sheet surface.
Put the tracing paper down with pencil side facing the art foam sheet. (I grabbed this art foam at a craft store.) The pack of art foams I got came in variety of colors, and I just used this blue one.
On the hindsight, I probably should’ve used a lighter colored foam sheet because it was hard to see the pencil lines on the blue sheet.
These art foam sheets are handy because it’s got adhesive on the back, and it makes it really easy to mount the pieces on the board later.
To transfer the image, you rub the tracing paper from the back with a spoon or a bone folder. Be careful not to make an indent on the foam sheet because that will show up when you start printing.
4. I MADE A MISTAKE HERE – You’re supposed to do step 5 first before cutting all the pieces out 😀
But I wasn’t following Andrea’s instructions carefully and cut all the pieces apart before adding the lines and details. It’s easier to add lines (essentially drawing on the foam sheet) when everything is on one sheet.
Anyway, do that first, and then you can cut out the pieces with scissors or an exacto knife.
5. Add lines and details to your stamps.
So make sure you do this first before cutting all the pieces out. As you can see, it’s not the end of the world if you reverse the process, but it’s definitely easier if you do the detailing before cutting them apart.
To add indented lines, you go over your drawing on the foam sheet using a tool with a sharp tip – in this project, I used a skewer. You can also use knitting needles, dried-up ball point pen, and other tools for making an indent on a foam surface.
When printing, the indented lines will not get inked and the flat surface will get the ink. Again, be careful not to make a mark with your fingers/nails where not intended. If you do, it will show up in your prints. When accident happens, though, I try to be flexible and incorporate it into my design somehow 🙂
These foam pieces look cool just by themselves, don’t they?
6. Mount your stamp pieces on a piece of plexiglass.
I got a piece of acrylic sheet at an art supply store and cut them down using my exacto trimmer – it sort of worked but totally shattered the edges of the plates and aren’t very pretty!!
(I later ordered this cutting tool from Hyde and hope it does a better job.)
You place the plexiglass cut to size (mine is 5.5″ w x 4.25″ h) over your design and peel the backing from the sheet and stick them on to the plate.
By mounting the pieces on to the plexiglass, it makes it easier to print the same design over and over, and you’re able to apply even pressure on to your stamps when printing.
Again, be careful not to make an indent on your foam pieces while sticking them on to the plexiglass.
Since I wanted to print my design in two colors (one color for flowers and another for the leaves), I’m creating a separate plate for just the leaves. I didn’t quite like the layout of my original drawing, so I’m shifting some leaves around here.
7. Two plates with the foam pieces are done!
8. Here is the test print I made using stamp pads.
To ink the plates, I lay the stamps on the table and coat the foam sheet surface evenly using the stamp pads.
Then I pick up the mounted stamps, lay the plate down straight on to the paper and apply pressure using the palm of my hand. I marked the corners of my plate on the paper so it’s easy to match up the two plates.
I used the red ink for the flowers and navy blue for the leaves. Pretty, yes ?
You can wash, pat dry and fine tune any of the details on the foam and print more until you’re happy with the result.
It was a pretty quick project. It probably took me about an hour or an hour and a half from start to finish? And clean-up is pretty easy as there was no paint rollers or plates to clean up!
I want to experiment and create more fun stamps to play with! 🙂 Hope you’ll give it a try!
p.s. I’m offering a foam stamp making workshop on February 4th in Seattle. If you’re curious, head on over to my website and learn more 🙂
I took my sabbatical week off during the week of April 18. It’s been a couple of weeks, but I wanted to show you the block printing and sewing projects I worked on.
I take every 7th week off to relax and do things I don’t normally have the time to.
It’s kind of scary to take a week off so regularly, because, I often feel I need to be making $$ and can’t afford to take a time off. BUT, it’s important for me to make the time for reflection and recharge on a regular basis. It’s been one of the best business strategies I’ve taken! (You can learn more about what the mini sabbaticals are all about here.)
Sadly, I’d been sick with a cold for a couple of weeks and was behind on some work stuff, so I ended up working a little bit during my sabbatical.
But I also made sure to do something just for fun!
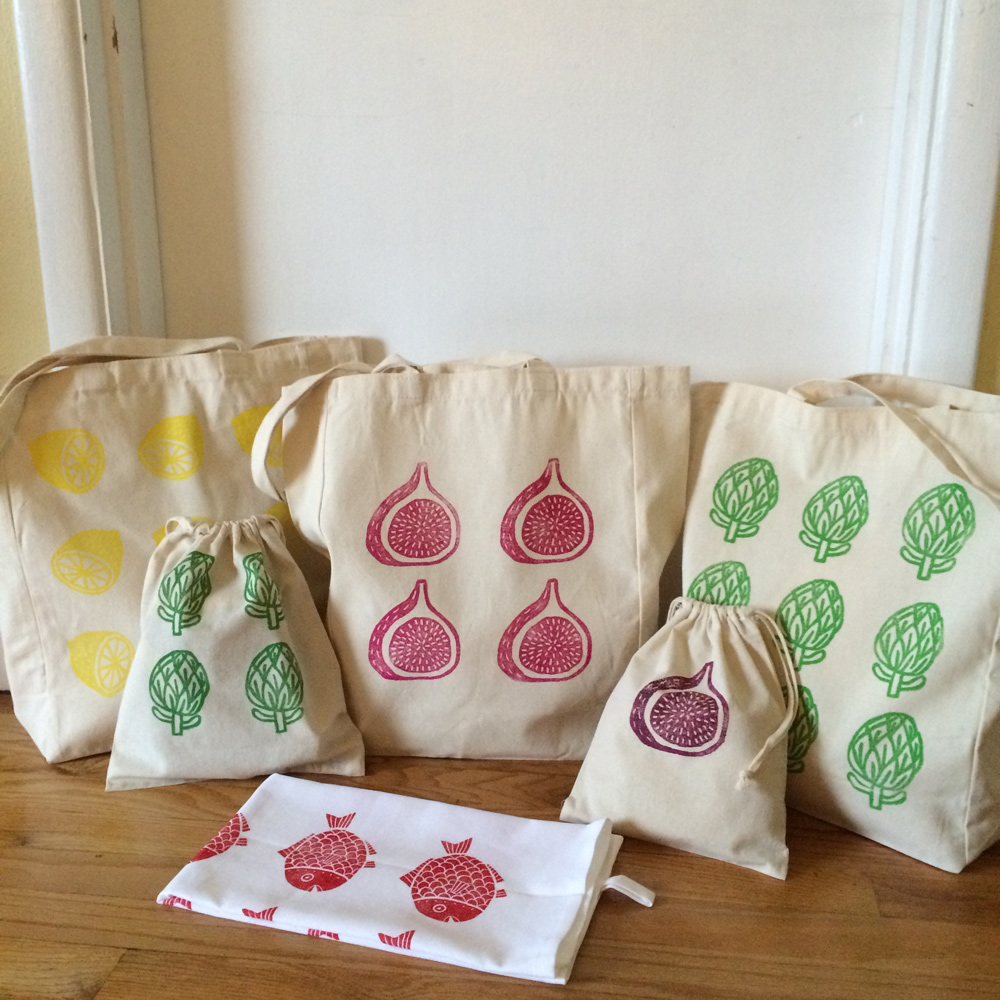
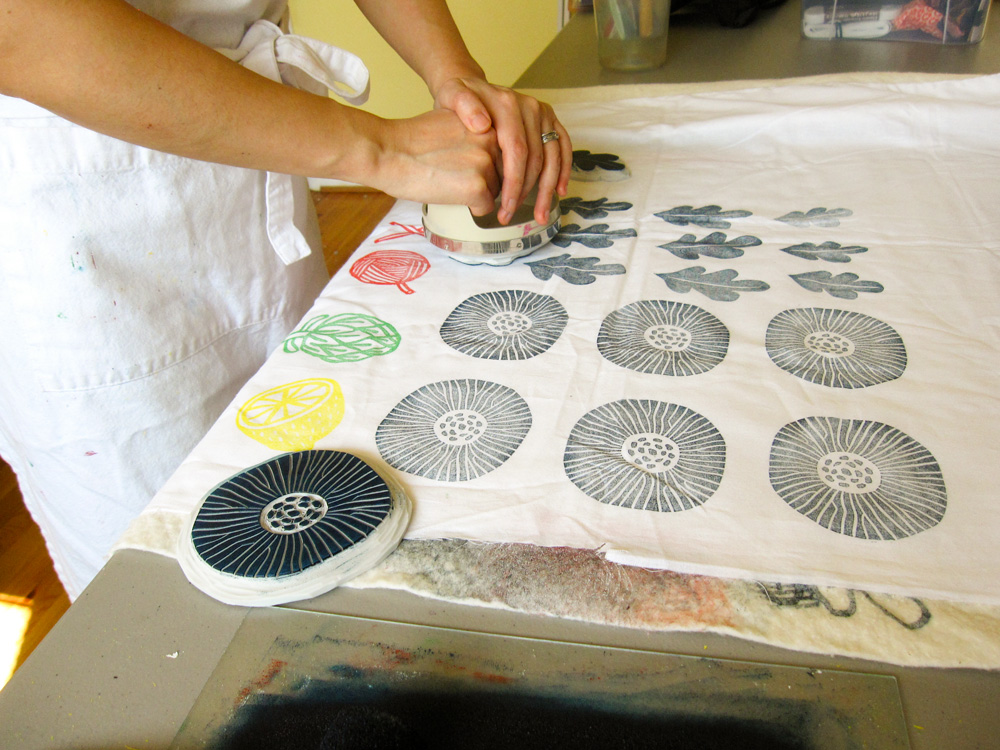
You probably know I’ve been practicing block printing on fabric for a while now.
I love the whole process of designing a block to seeing the prints on the fabric. Time just flies by when I’m engrossed in block printing!
My block printing family 🙂
But I’ve also been feeling a bit burnt out on making block printed products, like tea towels and bags.
Considering all the hard work that goes into it, it’s not very profitable, and frankly, printing the same things over and over got old pretty quickly.
I was afraid I was losing the joy of block printing.
While I continue to focus on developing my art product lines, I’ve been focusing more on producing things that are easily replicable, like art prints and greeting cards, and moving away from block printing for production.
But a lot of people like the block printing aesthetics, so I started teaching block printing on fabric workshops recently at a local art studio, and I really enjoy it!!
Beautiful student work from my first class!
By the way, if you’re in Seattle area and want to join my class this summer, I just posted new dates on my website 🙂
With that being said, I still love to do block printing and want to continue practicing. I think for now I’ll be teaching more and block print for personal enjoyment rather than making products.
For this sabbatical week off, I decided to make a garment from my block printed fabrics!
I’m not good at sewing – I’d hemmed my pants and made simple tote bags before. But beyond that, it seemed really intimidating.
Sewing a garment seemed particularly challenging because you can’t just wing it, right? You need to follow a pattern, cut the fabrics nicely, and all of your pieces need to match up…
I like to do all of my creative work very loosely and wasn’t confident that I could sew something I’d actually want to (and can) wear!
But, I was inspired by two of my printing/sewing heros – Sarah Golden and Jen Hewett (check out her Print, Pattern, Sew project from 2015 – It’s really gorgeous and inspiring!) and decided to finally tackle this!
Making garments by sewing straight lines? Yes please!
I got this Japanese sewing book, titled “Making Garments by Sewing Straight Lines” several years ago when I was visiting Japan. I was naturally attracted to the title 🙂 and all of the pieces looked adorable. I’d been just admiring the pictures until now and I’m glad I didn’t throw it away!!
I chose one of their patterns for a top that seemed pretty easy.
This one!
I didn’t want to spend a lot of money for the project, so I went fabric shopping at Goodwill as per my friend Sarah’s recommendation. If you’ve never gone fabric shopping at thrift stores, they’re awesome.
I looked around their fabric section, bed sheets, table cloth, and curtains. I saw so many cute fabrics there and was tempted to get them all! But I wanted to start small in case I hated sewing 😀 and bought two fabrics.
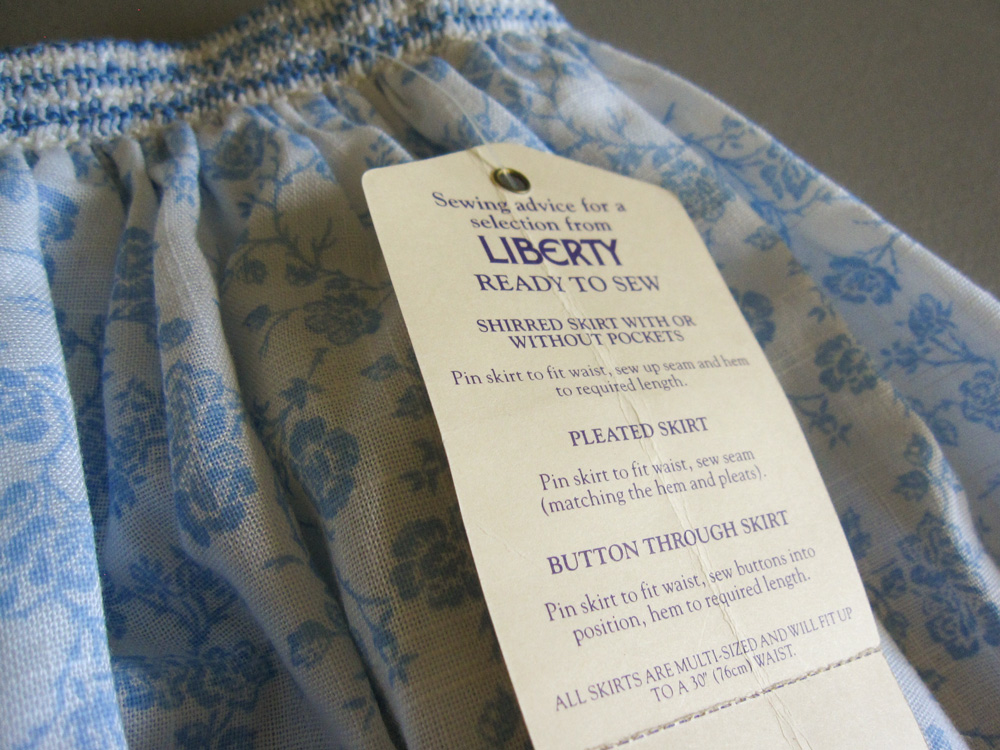
I wanted the color and pattern on the fabrics to work well with my block print design, not compete against it. So I picked a simple grey and white porka dot cotton bed sheet and a light weight cotton ready-to-sew blue flower pattern skirt.
And I got so much material for $5 each! Score!
Ready to sew? I like the sound of this…
For the block print design, I thought it would be fun to carve my recent obsession – poppies.
Can’t seem to stop drawing these lately…Hand carving poppy & leaves. I use Speedball linocut tool and Moo Carve soft rubber blocks.
After I hand carved the pieces, I test print on a white cotton fabric. This is where I see areas I want to tweak and refine.
Test printing on white cotton fabric. I print with water-based fabric screen printing ink.
Once I was happy with my blocks, I started printing on the actual fabric I was going to make my top with!
For the fabric design, I decided to do just a simple block pattern. I toyed with the idea of incorporating the leaves too, but it just got too complicated… I believe in simplicity!
Printing on upcycled bed sheet from Goodwill
It took forever to print my poppy design on enough fabric to make one top, y’all. Then I had to air dry it over night and heat set with the iron before cutting into it. Phew.
Though I picked a very simple sewing pattern, (and the book promised it was “easy” and “quick”) there were so many little steps, and it was still pretty challenging for beginner like me. I mean, I still can’t sew straight lines, you know? 🙂
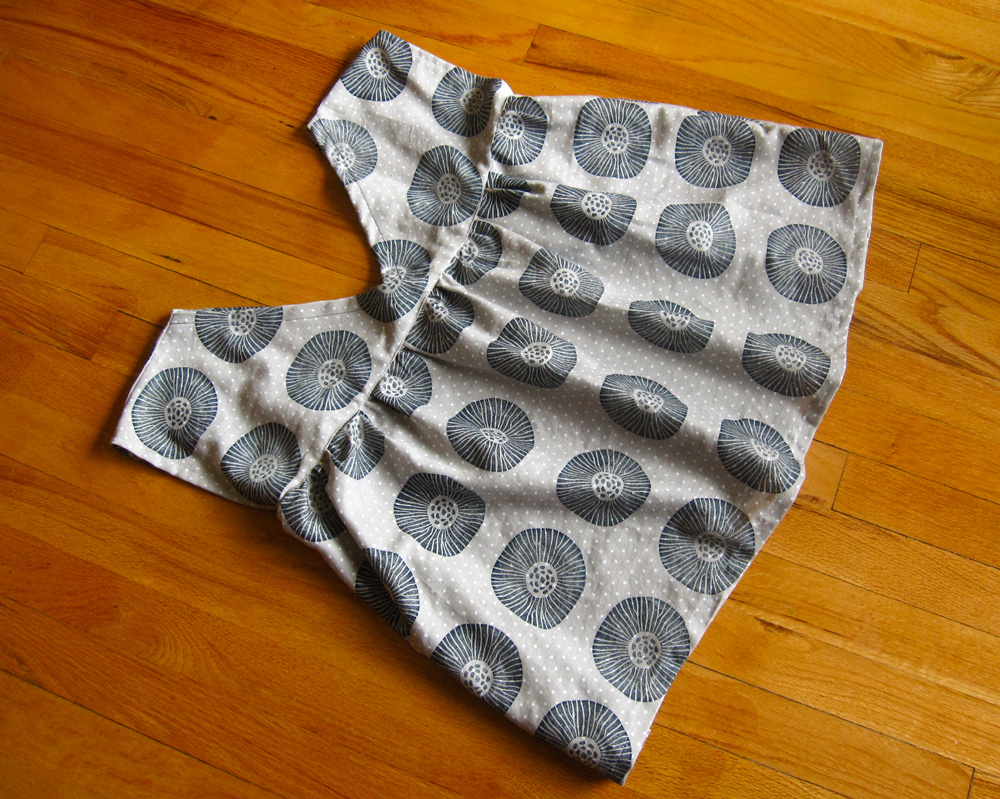
But, I didn’t quit and finished my very first hand printed garment!! Ta da!!
My very first block printed sewing project! It’s so cute ❤
And, I love how it turned out! ❤
Not bad, right?❤
Of course I see all the flaws and mistakes, but it’s good enough to wear around the house 🙂 It fits quite loosely, so it would be perfect during the hot summer months.
I just hope it won’t come apart when I wash it in the washing machine… 😀
For the ready-to-sew skirt, it was a lot easier because all I needed to do was to adjust the waist and the length. No pattern required!
I printed the poppy and leaves along the bottom. Honestly, I didn’t have the time or energy to print all over on another big piece of fabric and thought it would be a cute design anyway.
Since this was going to be a more dynamic design, I incorporated the leaves to add visual interest and movement.
I sewed and attached the shoulder strap and made it into a multi-purpose dress and a skirt!
It’s super light weight and again perfect for hot summer days ahead.
2 ways to enjoy one skirt! p.s. Modeling is super awkward… 😀
It was a lot of work but (or maybe because of it) it was also very satisfying to make my own clothes with my hand printed fabrics!
I always had respect for people who can sew, but this experience definitely made me appreciate the craft 100x more!! Bravo, you sewists out there!
I’d love to continue practice sewing and deepen my block printing practice in the future.
And I can’t wait to share my process with you on this blog 🙂
Like many of you creative people, I love to learn. I love learning new skills and tools to create something new. Sometimes I set goals to learn specific skills (e.g. writing, learning a design software etc.) and tackle them businesslike, and others, like cooking and sewing, kind of happen organically.
Last October I posted a nature drawing tutorial on this blog and really enjoyed it. I’ve been meaning to do more tutorials and was hoping to venture into video making as well. And lo and behold, I was asked to be a guest teacher for the e-course The Journey Within: A Year of Handmade Art Journals hosted by Kiala Givehand in March!
I was honored to be asked, and it’s given me the push I needed to make my very first video tutorial!
I worked on it last week and learned a bunch in the process. I’m all about sharing tools and processes with you in case you find it helpful, too. For the most part, I didn’t use any fancy tools or tricks and hope it’ll make the process more accessible to you if you’re thinking about making a video yourself. This is my first time making a video, so if you’re more experienced, you probably won’t gain very much from it. But if you’ve never made one and are intimidated by it, this post is for you!
Enjoy the behind the scenes peek into my video production!
1. PLANNING
By nature I’m a planner. I like to gather as much information as possible before I get started on something new. I’ve been getting a little more relaxed about not having all the information before I start something lately, though. I know a lot of learning happens during the process of doing, and if you wait till the perfect moment, you may never start anything!
I don’t have unlimited financial resources, so I wanted to make this video without spending a ton of money and wanted to do this with things I already had without compromising the production quality too much.
I really didn’t know anything about creating a video, so I went searching for tutorials about filming and editing your own video on the internet.
Although this is not specifically about making a video tutorial, I found this Skillshare video, “DIY Filming: Creating Pro Video Using Tools You Already Own” by Mark Cersosimo super helpful! It was very easy to follow, and he has lots of practical tips you can use.
I also created an outline and scripts before I started filming so I have the clear vision of the flow and contents. I didn’t do the storyboarding, though, as I was pretty anxious to start filming. It would’ve made the whole process a little smoother if I had done it.
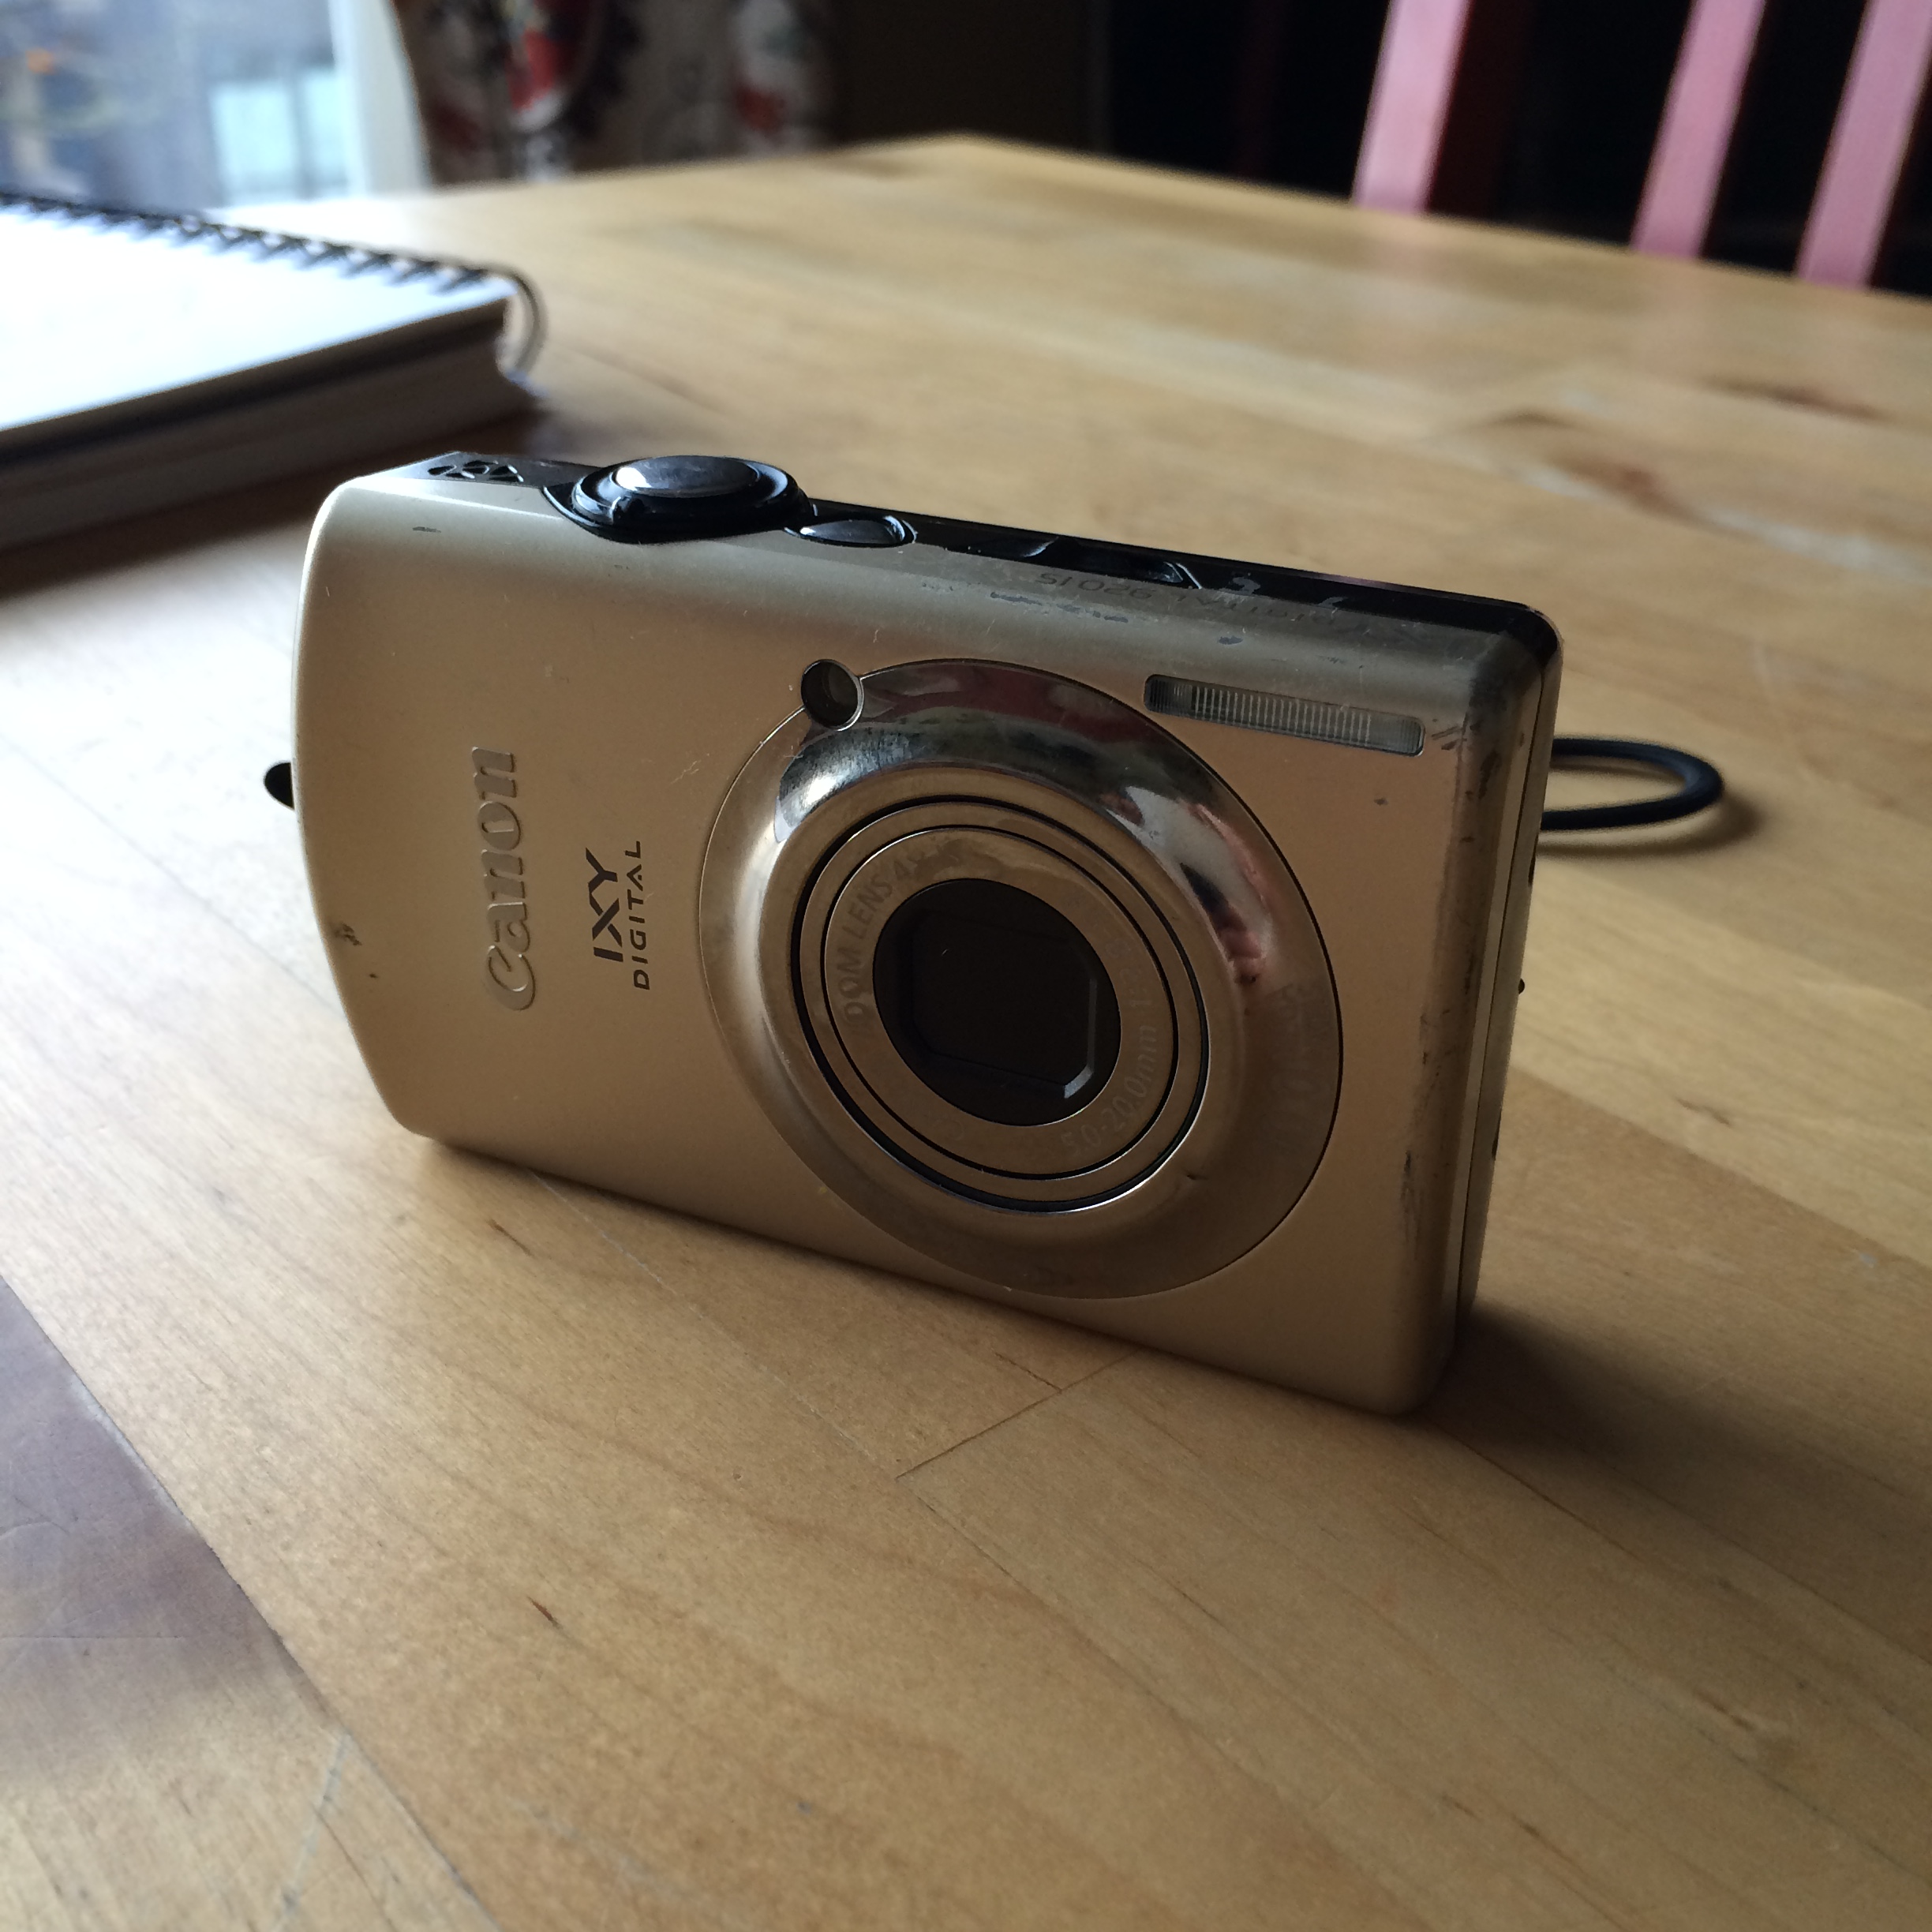
2. TOOLS
I decided to film with my old-school point and shoot camera. It’s Canon IXY Digital 920 IS, and I got it in 2008-ish? I enjoy photography and would love to upgrade to a DSLR camera some day, but this little camera has served me very well all these years and works just fine for now.
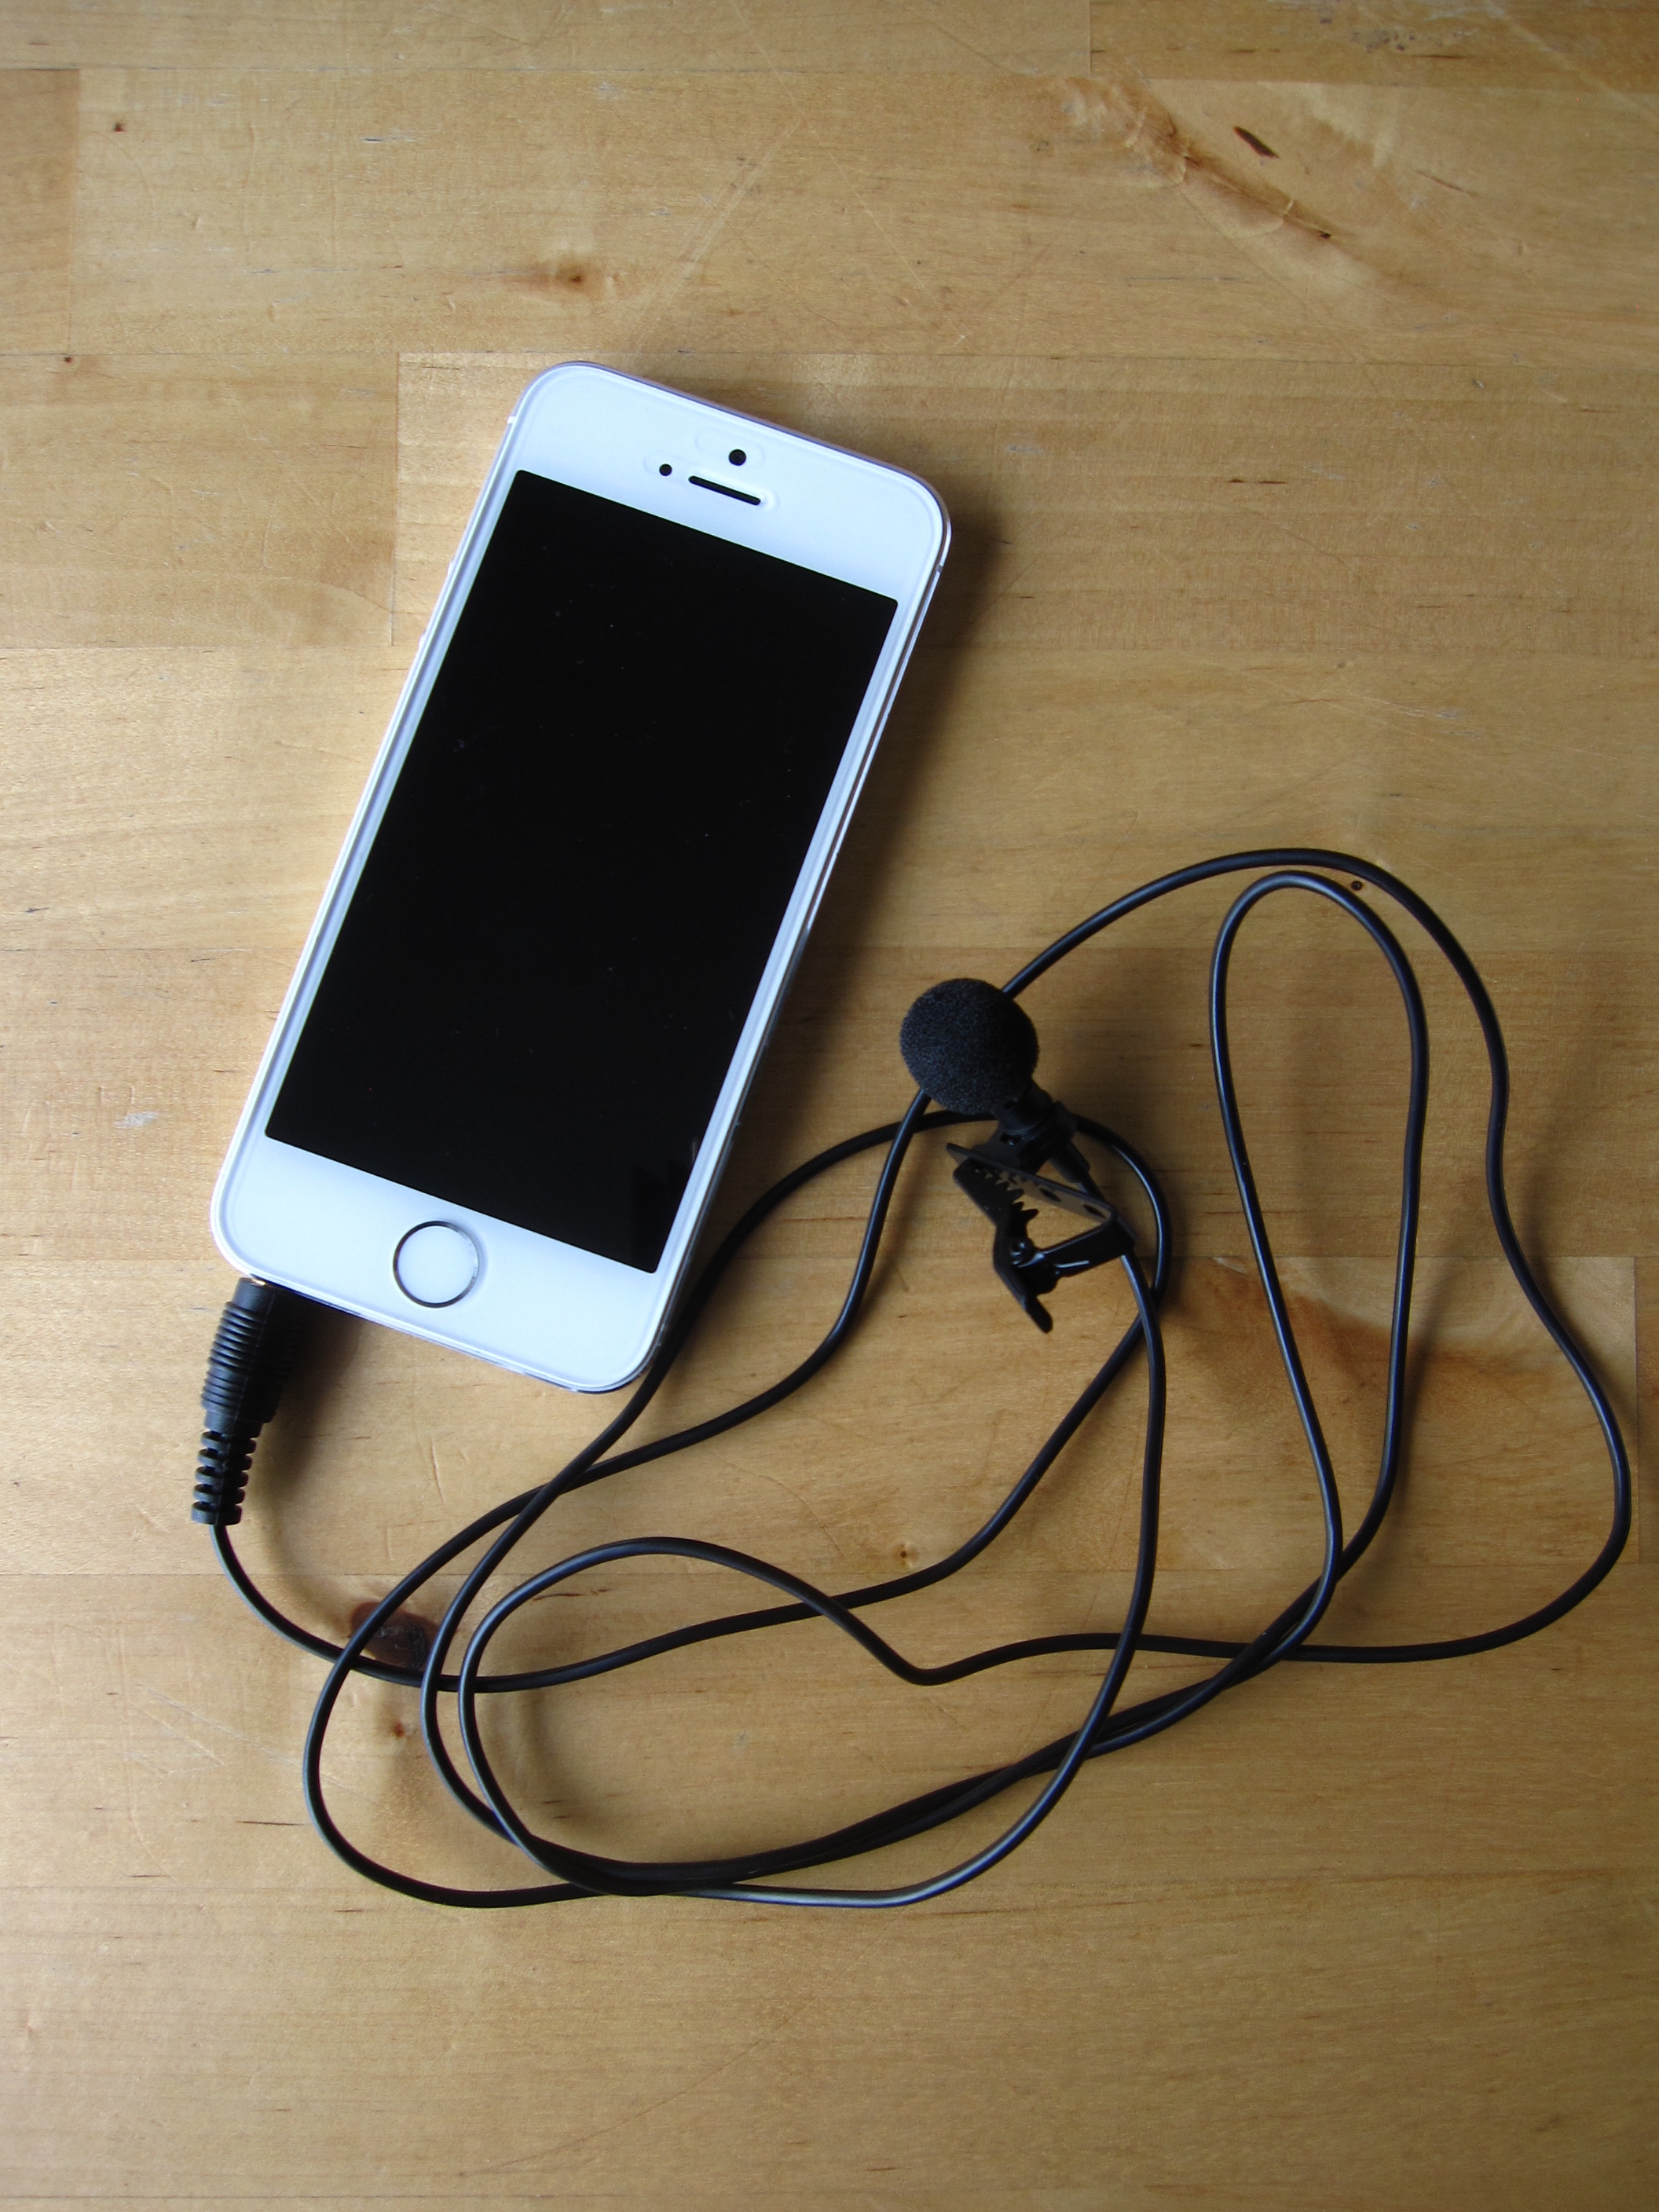
I recorded the audio on my iPhone 5 using the Voice Memos app (comes with your phone for free). I know the camera has a built-in microphone as well, but the quality is not very good. I’ve read that audio quality is more important to the audience than the video quality if you had to choose (here is a quick video to demonstrate the point), so I decided to record the audio separately using my phone.
I could’ve just put the phone in my breast pocket or something like that, but decided to get a clip-on microphone that plugs in to the phone to improve the audio quality just a tiny bit.
We have 2 parakeets in our tiny apartment, and they’re going to chirp no matter what, so I wanted to be extra diligent about getting a good enough quality of audio for this project. I got an inexpensive ($17) clip-on microphone above on Amazon, and it definitely made a difference on the audio quality! Well worth the investment.
Because I was filming this video by myself, I decided to get a tripod. Got this basic tripod on Amazon for $23. It’s got good reviews and seemed fine as a starter tripod.
But when I was doing a trial set-up, I quickly realized my tripod was not quite adequate. It was fine for shooting uplight or angled, but I realized I needed to be able to also get some overhead shots for to show my drawing process more closely.
Dave and I did some creative problem-solving, and came up with this totally DYI set-up to achieve my creative vision 😀
Ta da! OK, I’m a little embarrassed to show you this super DYI set-up, but it totally works! And I didn’t have to spend any more $…which is always a plus 🙂
Basically, the tripod is laying horizontally on a box and a few books I piled at the right hight, with the camera facing down, and I placed a couple of chairs back to back and put a pillow on top for the tripod legs to rest on. You just need to look in the view finder to adjust it to the right hight/angle etc. before shooting.
3. FILMING PROCESS
I set up by the big window in our living room area during the shoot. Since it’s winter in the Pacific Northwest, I got a pretty good overcast indirect sunlight during the day time, which was perfect for the shoot.
While filming different segments, I made sure it was recorded after each take. Sometimes I thought I hit the record button but it wasn’t on, or my video was recording but I forgot to turn on the microphone etc. My camera would also think the memory card was full when it was not (maybe the old age?) and suddenly stopped recording in the middle of the take a few times.
So I’d shoot a segment, stop, check to make sure it’s recorded, upload the good recordings onto my Dropbox, delete the footage from the memory card and reformat the memory card (for some reason, my camera thinks it’s still there even after deleting the footage if you don’t reformat…) and continue shooting again. I did the same thing for my audio. Great thing about recording it on my iPhone app is I can then upload the recordings straight from the phone to Dropbox.
I’ve learned the hard way to label the video and audio files correctly so it’s easier to match them up later when you sync them. For example, I’d shot multiple takes of my introduction and labeled them Yuko’s Intro Take 2, 3, 4, 5 etc. to choose the best one later. But I only uploaded the voice recording that I liked the best and labeled it “Yuko’s Intro” without the corresponding number to match the video, so later when I was editing I had to spend extra time to figure out which footage the voice recording went with.
These are somewhat tedious steps but helped me save a ton of time and frustration when editing the project!
4. MUSIC
How can you tell a good story without music, right? Since I’m not a musician, I looked for some free/royalty-free background music resources online and found these sites helpful!
Incompetech – I found it helpful to start out with their collections rather than searching from a huge database. Their collections are grouped by the genres and feelings you’re looking for.
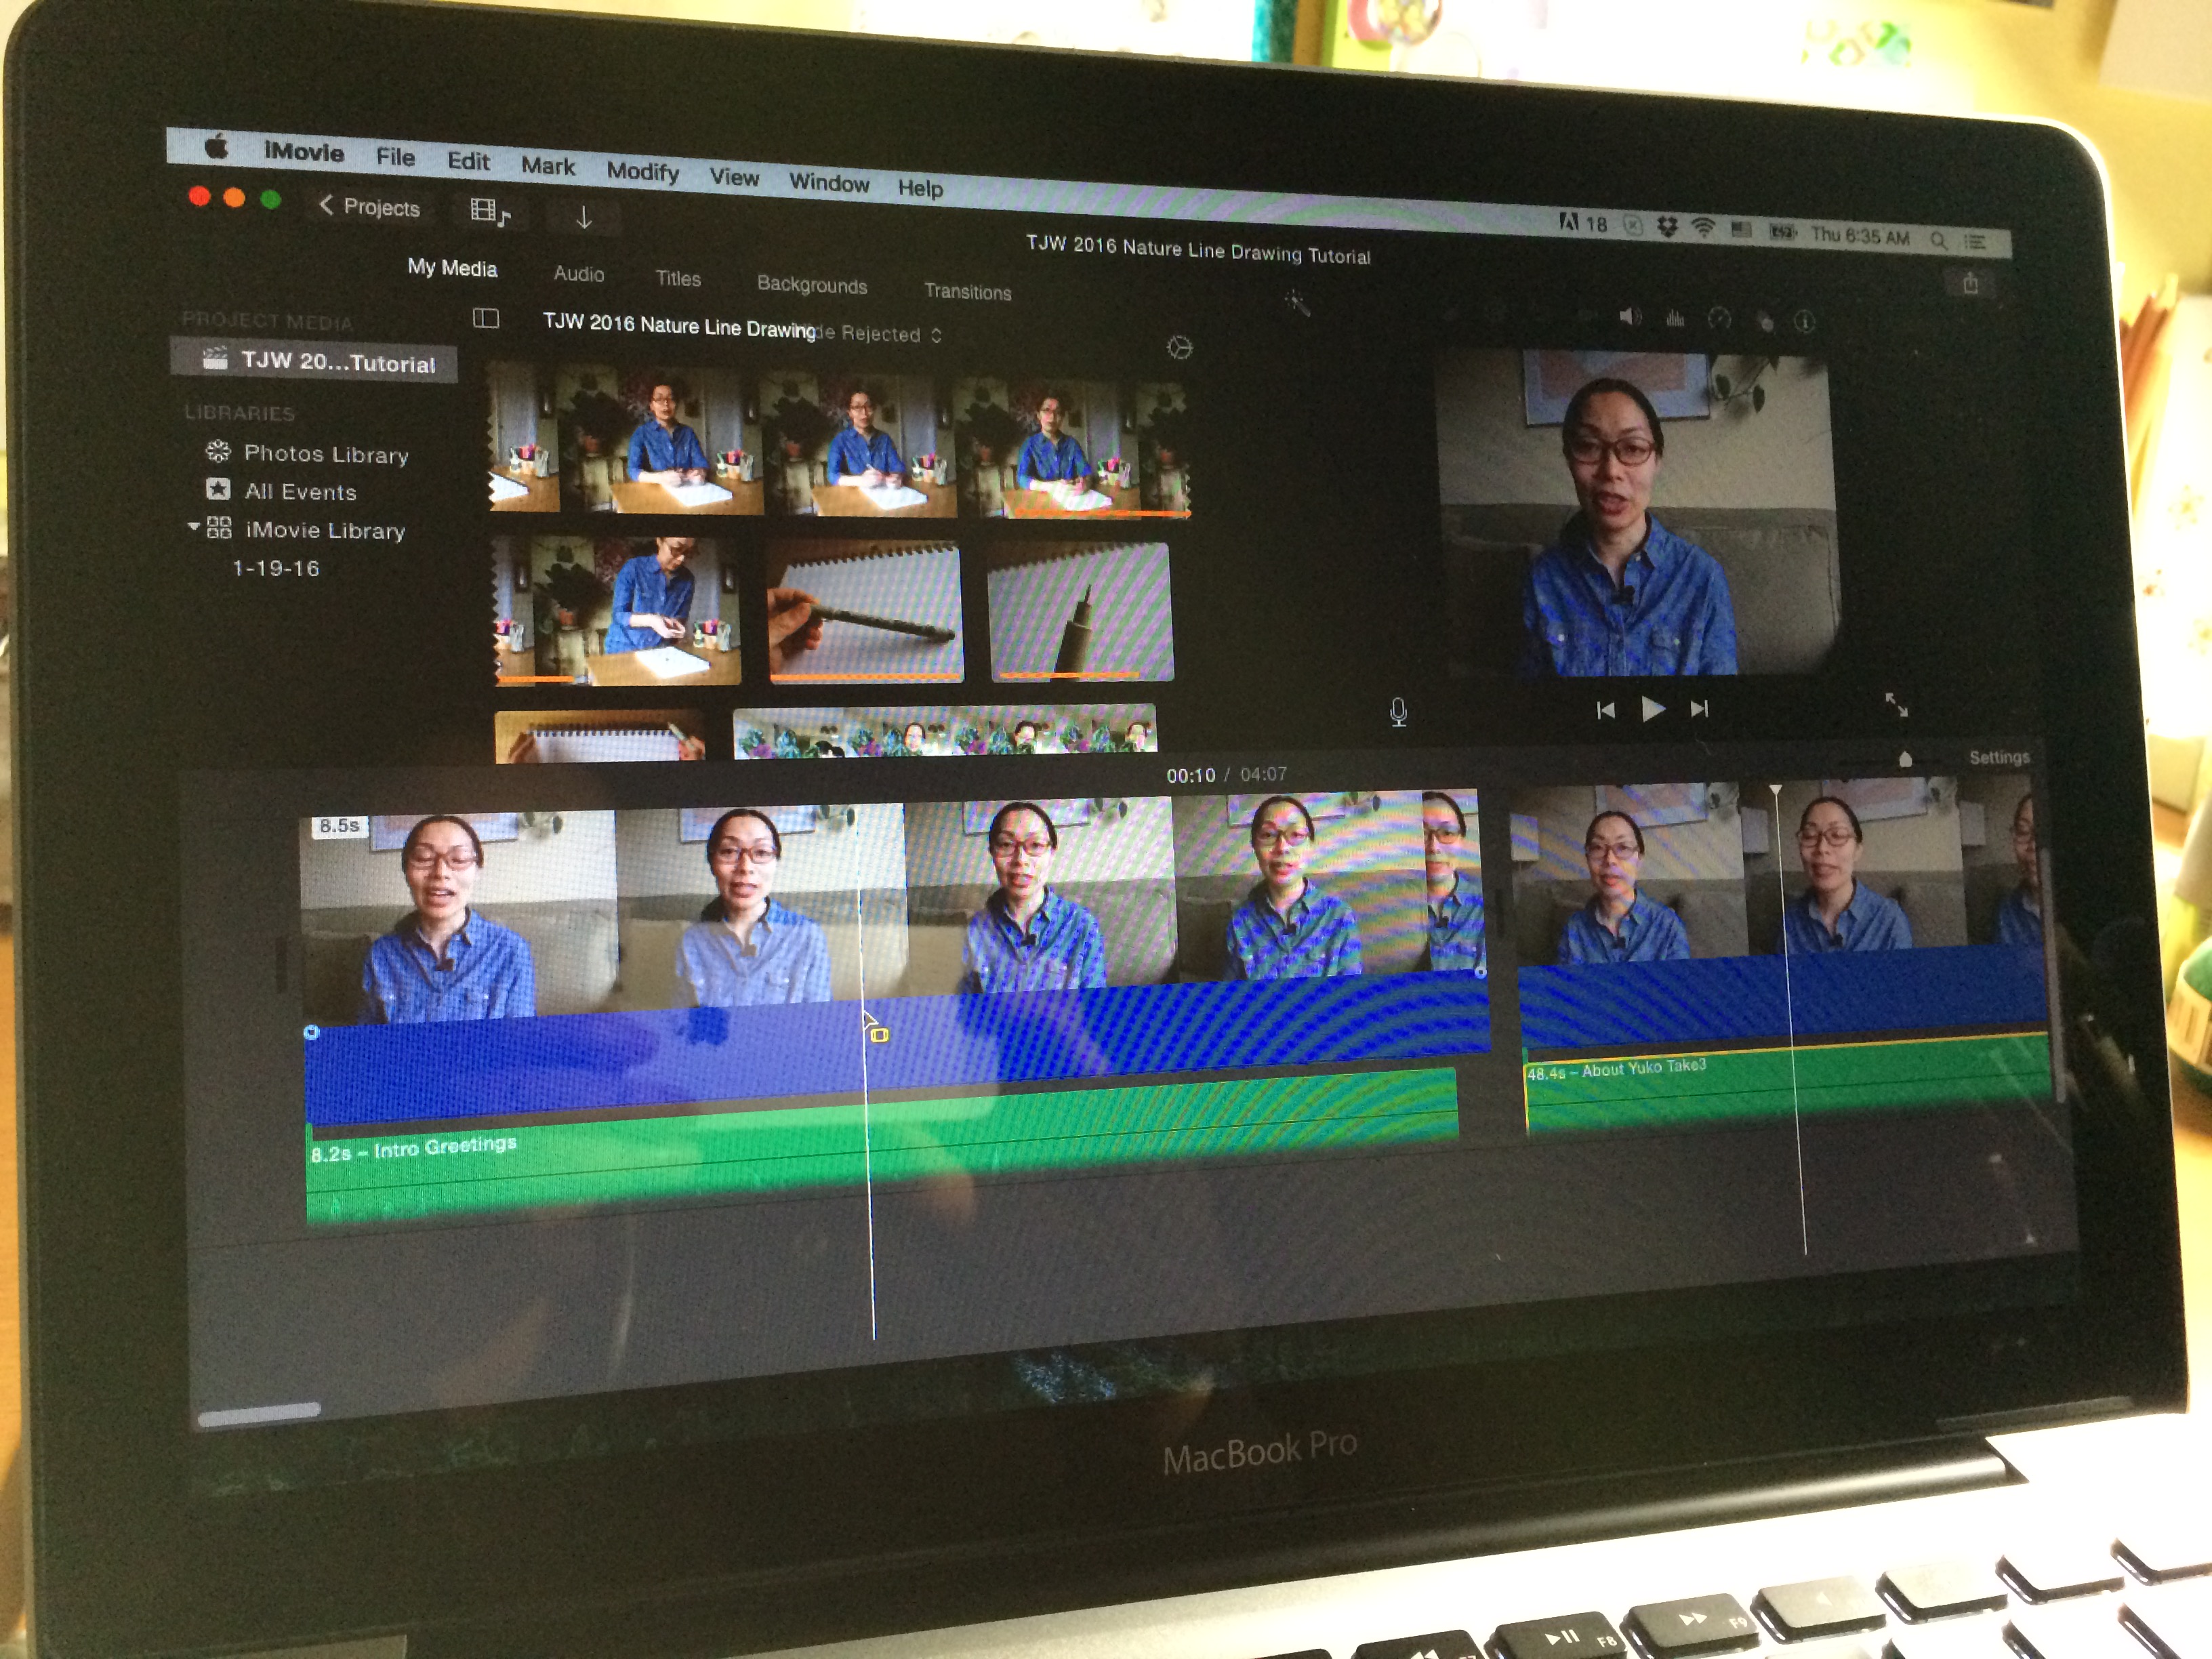
5. EDIT
After I got the footage and audio uploaded in my Dropbox folder, I put together the video in iMovie app. It’s a free app that comes with your Apple computer and lets you produce a basic video pretty easily.
Don’t worry the awkwardness of watching/hearing yourself wears off after a while… 😀
Again, I looked for some tutorials on how to edit your video in iMovie and found these pretty helpful!
1. Syncing Sound in iMovie Tutorial by Matthew Pearce is a short and sweet tutorial about how to sync your audio and video in iMovie. I love his “3 claps before talking” trick! So helpful.
2. iMovie 101 by Simply Mac is a quick introduction to the basic functions of iMovie. Good introduction but it’s for an old version of iMovie, so I got a little confused.
3. iMovie Tutorial for Beginners 2016 by Eric Timmer gave an overview of the basic video editing functions for newer iMovie app. It was a little long form (43 minutes) but gave me pretty much everything I needed to know to put my video together in the newer version of iMovie.
OK, that’s it! I had a lot of fun making this video and hope it was helpful for you!
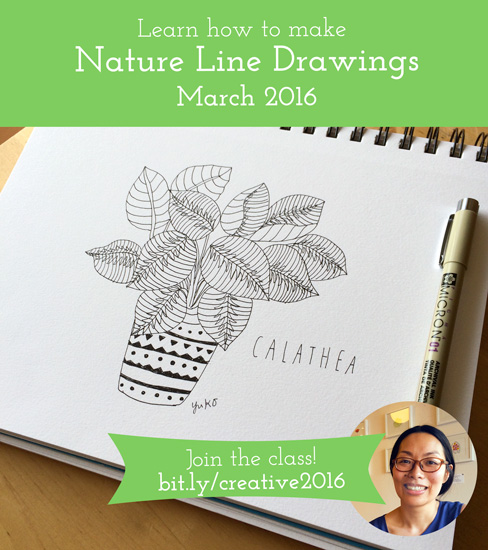
My Nature Line Drawing tutorial will be available for students in the e-course next month. It’s not too late to join the class for this quarter only or for the whole year (definitely more value for the investment!) to get access to my tutorial and tutorials from 18 other teaching artists.
And here is a mini clip of me flipping through my sketchbook 🙂
Learn how to make nature line drawings with me this spring! In case you missed the link, you can learn more and join the class here.
As I’m redirecting my art biz goals this year and subsequently expanding the scope of this blog a bit to bring you more inspirations for creative and happy living, I thought it would be fun to share some of my other creative projects I’m working on from time to time. I always enjoy it when other artists share their non-work-related creative projects, so I hope you’ll enjoy mine, too 🙂
I’m sure many of you creatives can relate, but I like doing/making stuff from scratch (or as “from scratch” as possible). I find it so satisfying and empowering to learn to make something and do it myself. I know it’s not always practical to do things myself, but at least I learn how to do it, and I appreciate having the knowledge.
I’m particularly excited about DIY-ing when it comes to eating healthy. I’m passionate about eating organic, fresh, whole foods as much as I can. Maybe it’s because I’m becoming middle-aged, but I’ve been noticing more and more the effects foods have on my physical and mental well-being. I’m learning to listen to my body more and becoming more proactive about taking care of myself.
I can’t create inspiring and joyful art if I’m not well mentally, physically, or emotionally, you know?
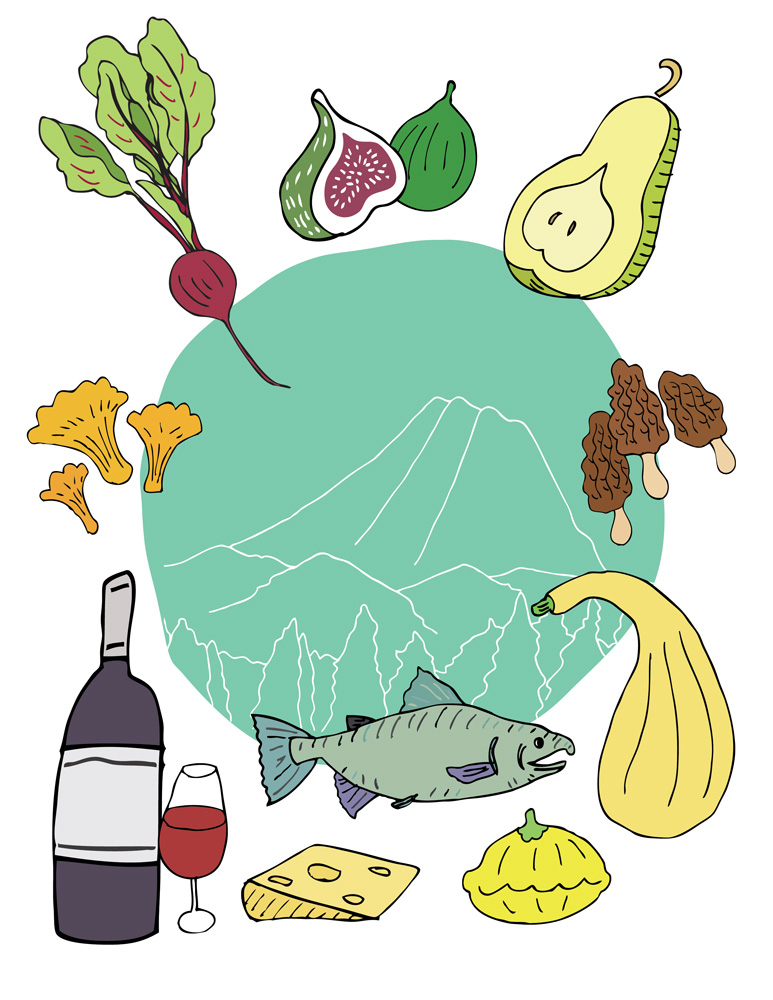
A fun Northwest themed book cover I worked on a few years ago.
I’ve been learning more about food and nutrition and trying different ways to incorporate more healthy eating habits in my everyday life.
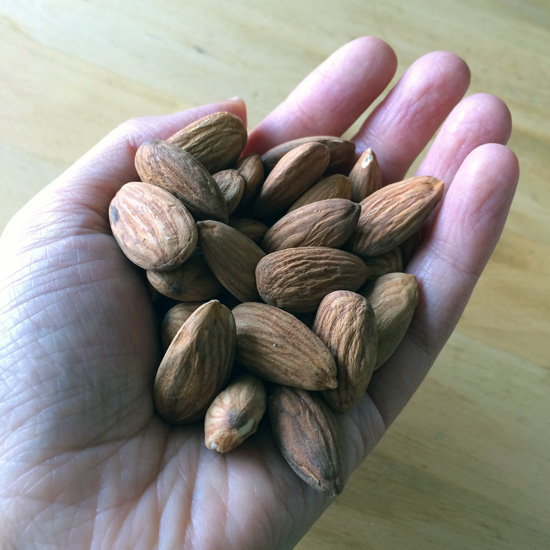
So today, I wanted to share with you how to soak nuts for healthy eating. Enjoy!
First of all, let me confess: I’m nuts about nuts. I’m especially nuts about almonds. It’s kind of an addiction… They’re great snack packed full of beneficial nutrients and taste SO good! Mmmmm.
As much as I love them and want to keep eating them all the time, sadly, my body doesn’t digest them very well, and I’ve noticed weird taste in my mouth if I eat a lot of them. Yuck.
I’ve been reading about nuts and learned that there are some toxins that are present in nuts, seeds, and grains to protect themselves, and soaking them will help remove the toxins and will help make it more digestible in human body. (Just a disclaimer: I’m no nutritionist and haven’t done any extensive study or anything. I got a ton of information about how to soak nuts, seeds, and grains and nutritional benefits of it on this website in case you want to learn more!)
We usually buy our nuts in bulk at our grocery store, but they don’t carry organic soaked almonds there. So I decided to soak almonds myself and see how they turn out!
Here is an illustrated recipe of how to soak and dehydrate almonds!
Information from healthyblenderrecipes.com. Note: you don’t need to dehydrate them if you’re using your almonds for soups or dips right away.
Here are some actual photos from the process.
These almonds had been soaked for a few hours already, and you can see the gunk in the soaking water already.You want to soak them in filtered water (about 2x volume of nuts) with a tea spoon of celtic salt dissolved in it.Cover the bowl with a thin flour sack cloth or other breathable cloth. My 100% cotton block printed artichoke tea towel did a perfect job!After soaking them for about 24 hours, I drained and rinsed them throughly. Then I put them in the dehydrator to dry.They were dried in the dehydrator for about 24 hours. Then I turned them off and let them cool/dry for another 12 hours or so.
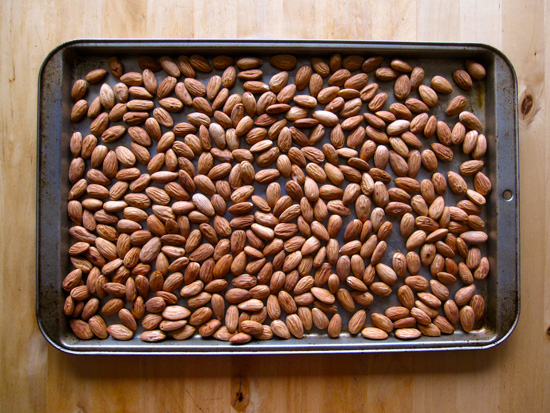
This is an extra step, but I love roasting nuts! I think they taste so much better when roasted. So crunchy and extra nutty.
After the nuts were completely dehydrated, I roasted these in a baking sheet at 350°F for 10-15 minutes. You need to check/stir occasionally to make sure they’re not burned. When they burn, they burn very quickly and will continue to burn even after you take them out of the oven! I had an unfortunate accident a couple of times before 🙂 I listen for the crackling sound and the aroma of almonds and pull them out when I start hearing/smelling them.
Ta da!
I must say, it was kind of a lot of work just to eat some nuts, but I’d imagine it’ll become less of a hassle if I do it more often and it becomes a routine. I hope it makes a positive difference for my system!