I can’t wait to reveal my entire Eat a Rainbow art collection to you in just a couple of days… EEEK!
Eat a Rainbow Art Collection Available on May 1st on Etsy!
Oh, the anticipation is killing me!! (In case you missed it, you can see the bits and pieces of the collection, here, here and here.)
I’ve been working very hard on creating this collection for a few months now. And as a creative and hardworking person, you understand that everything you create is your heart and soul.
It’s physically, mentally, and emotionally exhausting to keep working at your creation to make it the best thing ever.
You make numerous tweaks and revisions, not to mention the never-ending conversations you have with yourself: “Yes, they’re gonna love it!!!” to “Oh man, this sucks. Nobody’s gonna buy this…”
You give it all you got, and at the same time you need to detach yourself emotionally from your creation so you can examine it objectively.
You know what I’m talking about. It’s a hard work.
Your art is not just another pretty thing to look at. It should make you feel something.
My art makes me happy. It makes me feel warm and fuzzy inside. It makes me feel alive. And I’m choosing to make a living out of my passion so I can live my life fulfilled and do the work that makes me happy.
I share my art so you feel the joy and happiness when you see them. And I put myself out there to inspire you to embrace your own creativity and follow your heart. I want you to know that your life is full of possibilities even if you don’t realize it.
I want to brighten your heart when you feel like there is nothing to smile about.
It’s not science or logic. I can’t give you a scale to measure your happiness, either. But I just know that’s what I’m supposed to be doing with my art, and I’m sticking to it.
When I feel discouraged or insecure, I try to remind myself that I’m making a choice to follow my calling. And I realize how lucky I am to be able to lift up others while following my heart ❤
Writing about it is making me all emotional and gushy ❤ I’m so full of feelings, guys.
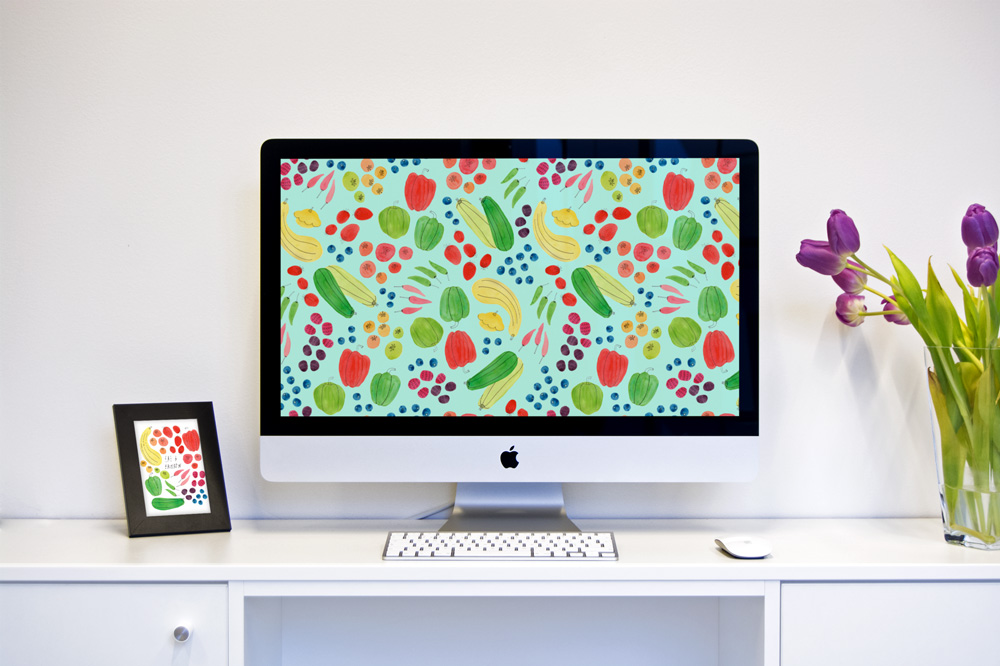
Anyway, to celebrate the big launch, I’ve created these sweet Eat a Rainbow downloadable desktop & smartphone wallpapers!
Get ready for the summer season with the Eat a Rainbow desktop wallpaper! Designed with a soothing blue/green background.It’s like your smartphone is wearing a pretty summer dress ❤
Do you love it? Good!
Sign up at this link and get your goodies for free today 🙂
If you’re already on my email list (THANK YOU!), your gift should have been delivered to your inbox by the time this article gets posted. Enjoy 🙂
I want to create more exclusive freebies in the future for my friends on my email list, so definitely sign up if you haven’t done so yet!
Ok, friend! Get ready for the big launch on Sunday May 1 on Etsy (8:00 AM PST)!
I’ll see you then 🙂
With heartfelt gratitude,
xo Yuko
p.s. In case you missed the link above, you can sign up for my list here and get a free downloadable desktop & smartphone wallpapers today ❤
I’m naturally a pretty structured person and function the best when I stick to some kind of routine.
Since I quit my day job last summer, I’ve been trying out different daily routine to see what works best for me.
When I first started working for myself, I was pretty hard core about making the best out of every waking minute and was working long hours every day. I’ve loosened up a bit since then. Some health issues have also forced me to reevaluate how I’m taking care of myself, too. I’ll share more about that in the future.
Anyway, I wanted to share what my day to day looks like currently in case you’re looking for some ideas on how to organize your work day!
5:30am – Wake up
I use the Sleep Cycle app on my phone as my alarm. The app tracks your movement throughout the night and wakes you up when your sleep is naturally shallow during the time period you set so your wake-up alarm feels a bit more gentle.
I feed our kitty and drink a glass of water when I get up. Our kitty’s VERY excited to see me every morning and starts meowing very loudly as soon as I come out of the bedroom. I’m afraid all our neighbors are getting the wake-up call when I get up 😀
6:00 – 6:30am – Workout
I go to the gym in our neighborhood for a group kettlebell class on Mondays, Wednesdays, and Fridays. It’s a great way to wake up your body and mind and get the energy up for the day.
I love how I can work out my whole body in half and hour with the kettlebell workout! Being in the group workout class is also great because inevitably I’m pushed more than when I work out alone. And you get to know the instructor and the other people in the class, and that helps me with accountability.
Alternatively, on the days I don’t go to the gym, I start my day with writing. I work on my blog or newsletter until 7:30am or so and then have breakfast.
I’ve never liked being rushed in the morning. It sets the tone for the whole day, and I try to start my day with plenty of space and calmness.
After my workout session, I take shower and make myself a good breakfast. I have to eat breakfast every morning to stay well. I don’t eat a lot of sweet sugary stuff, especially in the morning, and it helps with the overall energy level throughout the day. My current go-to breakfast is this Buckwheat Porridge. It’s very easy, satiating, and packed full of nutrients.
After I finish my breakfast, I quickly skim my email and social media on my smartphone. I respond to quick or urgent issues and delete junk mails. I put anything that needs a follow-up on my calendar to take care of later.
Then I do the dishes and take care of pets (we also have two parakeets) among other daily chores.
Contrary to popular belief, I don’t work in my pajamas 🙂 I don’t dress up fancy or anything, but I still get dressed and do my make-up and hair every morning. It’s one of the routines that get me in the work mode!
9:00 – 12:00pm – Morning work
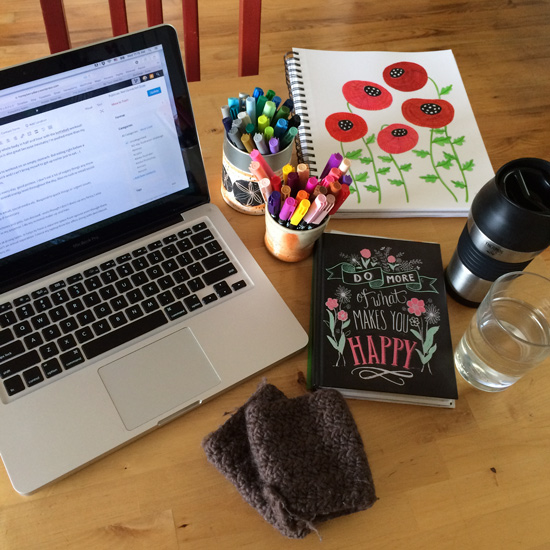
My husband and I share a small office in our tiny apartment, which is also shared by our parakeets. I just can’t focus well in that environment so I’ve been working in our dining area for quite some time. Although I can still see/hear them from the dining area, it helps to be in the separate physical space.
My humble “mobile” office on our dining table. The brown square thingy you see in the photo are my crocheted fingerless gloves I wear to keep my hands in the morning 🙂
I bring my laptop and other materials (like my sketchbook and pens) from the office to set up on the dining table. It’s a very small table but big enough to have all my essentials.
I make myself some tea or pour a glass of water and get started on the tasks at hand.
I usually spend about 15-30 minutes posting an unscheduled visual piece on my social media in the morning. It’s usually a drawing I made the day before. I also check my email again at this time and address quick issues.
The first thing I do after getting the small stuff out of the way is writing. I typically write (blog, newsletter, other contents etc.) for 2 hours every morning. I find the morning time to be the best time to work on my writing. My mind is still clear of information clutter and I can sustain my focus longer more easily.
I write until I’m at a good stopping point. Depending on how much time I have until lunch, I usually go back to the “follow-up” list I made in the morning or the day before and work on that.
I may prepare a package for my Etsy shop sales or respond to inquiries from potential clients in the morning. I also try to use morning time to take care of things I’m not totally excited about, like doing my finances and analyzing my email service data.
12:00 – 1:00pm – Lunch
I take lunch break every day.
Some days I cook myself a simple lunch, and other days I just eat leftovers. I have a tendency to productively procrastinate when I feel stuck or unmotivated to work, and cooking is one of those things I escape to. So I need to pay attention when this is happening and not indulge too much!
I don’t read email or check social media during lunch. I just try to enjoy my food and take a break while I eat.
After I finish lunch, I do the dishes and make more tea to get ready for my afternoon.
1:00 – 5:00pm – Afternoon work
I usually try to tackle tasks that don’t require as much mental focus in the afternoon. As the day goes on, my brain gets filled with more information and thoughts and just doesn’t function as effectively when it comes to focus.
Often I start my afternoon work with a quick drawing in my sketchbook. I find it helpful to refocus my energy and warm up my creative muscle.
My typical afternoon may be filled with tasks like editing and organizing product photos, designing new products, and working on new art pieces.
I also reserve 1-1.5 hours on Tuesday and Friday afternoons to read an article or watch a webinar to learn. I use the Pocket app to save things I want to read/watch later during the week.
At the end of the afternoon, I check my email and social media one last time to tie any loose ends for the day. I respond to questions and comments as much as I can, and anything that requires more thoughtful follow-up, I just put it on my calendar to take care of later.
I also review my calendar for the following day before I close everything up to remind myself what’s coming and if there is any appointments I need to be aware of.
5:00pm – Dinner & rest
On days I cook dinner, I usually start preparing the meal at around 5-5:30pm and we eat at about 6:30pm. We typically watch a couple of episodes of our favorite Netflix shows while we eat.
I used to work after dinner but don’t do that very often any more. I was not being very productive anyway, and the stress tended to get carried over to the next day if I didn’t have enough down time every day.
This is also a great time for me to doodle in my sketchbook!
9:30pm – Bed time
Ideally, I’m in bed by 9pm so I have some time to read before going to sleep. Lights off at around 9:30pm so I get enough sleep and wake up refreshed at 5:30am the following morning.
My husband often makes fun of me for having such an early bed time, but it works for me! 🙂
Other things to note:
Breaks & snacks
Throughout the day, when I get to a natural stopping point for whatever I’m working on, I take a quick break. I get up and get something to drink or eat as needed. I try to have handy snacks, like cut fruits and veggies, ready so I don’t have to spend a ton of time preparing them during a work day.
I also check my social media and email when I have break from my focused time.
Music & podcast
I often listen to music or podcast while I work. I wear earphones as it helps to create my own “quiet” space in our somewhat noisy household. It also sends my husband my “do not disturb” signal (though it’s not always effective…)
I listen to music when I write. I’ve heard this from other non-native English speakers too, but songs in English don’t seem to bother me when I write. It’s probably because English is my second language and the words don’t automatically enter my brain or something. It’s a background sound to me if I’m not intentionally listening to the music to really get into it.
I usually play my “Laid Back Beach Music” station on Pandora exclusively when I write. I made this station when I was in San Diego last spring. It just seemed so perfect there, and I wanted to have that relaxed beach-y feeling with me at all times. I like how mellow and no-drama this station is. I can’t be on an emotional rollercoaster when I write!
Podcasts, however, are reserved for when I’m not writing. I definitely can’t focus on writing and listening to a podcast at the same time!
My new art collection, Eat a Rainbow, will launch exactly two weeks from today on Sunday May 1!
Woo hoo! I’m very excited 🙂
By the way, if you’ve missed the previous behind the scenes sneak previews, you can check them out here and here.
Today, I want to introduce you to my new notecards!
Eat a Rainbow, Bell Pepper, Summer Berry, and Tomato Notecards!
Just like my new art prints, the notecards come in 4 new designs: Eat a Rainbow, Pepper, Tomato, and Summer Berry.
These are going to be available as single card or as a set. I mean how could you choose, right?
I love pretty notecards. Whenever I’m at a craft show or visiting a cute gift shop on vacation, I pick up a few. They’re like a tiny gift of art that is also practical.
But I also admit that I have piles of pretty notecards I have accumulated over the years.
If you’re thinking – what do I do with more notecards? Fear not.
I’ve compiled 6 creative ways you can use these watercolor art notecards this summer!
1. Start a new tradition and send your handwritten season’s greetings to your friends and family during the summer.
Bell Pepper Notecard on 19pt Natural Savoy, 4.25″ x 5.5″
Do you send your family and friends greeting cards during the winter holidays? Well, it’s been almost 6 months, isn’t it?
How would they feel if they received an unexpected season’s greetings from you this summer?
I would think happy, delighted, and loved.
In Japan there is a custom to send a letter or a greeting card to friends and family during the summer months to wish them well – or more like “I hope you’re surviving the super hot and humid summer season OK.” If you ever lived or visited there in summer, you know how miserable it gets… 😀
I love traditions like that where it’s not related to any particular holidays. You simply reach out and say “I hope your summer is going well!”
Help them cool down with these refreshing watercolor art notecards!
2. It’s a perfect summer birthday card.
Each of the notecards feature my colorful and refreshing drawings of summer’s bounty and makes a perfect summer birthday card!
These cards are printed on a cotton savoy card stock and feel very soft and luxurious. It can totally be enjoyed as a framed mini-art after they read your thoughtful birthday message 🙂
Bonus if your birthday people are also into gardening, farmers’ markets, cooking, and, of course, eating good food ❤
3. Write a thank you note to your neighbor who brings you her homemade blueberry jam every summer.
Summer Berry Notecard on 19pt Natural Savoy, 4.25″ x 5.5 “
Are you one of the lucky people who have that special neighbor who loves to make jam with fresh, seasonal berries AND share them with you?? Homemade blueberry jam is my favorite, by the way!
Write a thank you note in my Summer Berry notecard and tell her how much you appreciate the delicious gift!
(Hint: she’ll probably bring you more goodies if you do :))
4. Your tomatoes are doing a little too well and you don’t know what to do with all of your bounty?? Invite your friends over for a tomato canning party!
Tomato Notecard on 19pt Natural Savoy, 4.25″ x 5.5″
I have a friend who plants lots and lots (I mean LOTS) of tomato plants every year, and she turns them into delicious tomato sauce and cans them.
If you’re a canner, you know it is a “process.” You need to clean, peel, chop, measure, season, and cook your veggies or fruits. You prepare your jars and lids and can them in boiling water in a hot kitchen.
I love canning but it can be quite time consuming and labor intensive.
It’d be a lot more fun if you have your friends over and enjoy the process while catching up on your summer happenings.
Make it a special event by sending them my Tomato notecard as a handwritten invitation!
5. Send your family an illustrated report of what’s growing in your garden.
Eat a Rainbow Notecard on 19pt Natural Savoy
If you live in a similar climate to Seattle and have a vegetable garden, you’re probably growing many things (if not all!) that are illustrated on my Eat a Rainbow notecard.
Perhaps your parents are retired in Hawaii, or your brother lives in New Zealand. These everyday veggies we take for granted may be quite interesting to those who are not familiar.
Show and tell what you’re growing in your garden this summer with your loved ones living far away.
6. Invite your friends to a garden potluck party!
Are you planning an outdoor potluck, wedding, birthday, anniversary, or retirement party this summer? Get your guests excited about the fun you’re about to have by sending an invite with these notecards!
The colorful and fresh vegetables and berries on these notecards scream garden party.
Send your invitations early before everyone’s calendar starts filling up this summer 🙂
Invitations have already gone out? (You, organized you!) You can send your guests these notecards as a thank you card later for making your party special.
How cute is this??
However you decide to use these notecards, you’re sure gonna make them (and you!) smile 🙂
I’ve been dealing with a few different digestive issues lately and discovered that eating small meals and munching on snacks between meals help me feel good physically and mentally.
There is a Japanese phrase, “eating until 80% full,” as a good practice for your digestive and overall health. I guess it’s kind of a common sense that overeating is not good for you, but I’ve become more aware of it as it relates to my own health lately.
When I snack (and I LOVE to snack), I try to eat whole foods that are nutritionally rich and filling. I’m a very practical person, and if I can eat only a small portion of food at one sitting, I want more bang for the buck!!
Meet avocados.
I love avocados. I’m sad that we can’t grow them here (who knows what’ll happen in some years with the climate change and everything…?) but we buy them regularly because they’re SO GOOD.
I love its creamy texture and how versatile it is. It’s packed with beneficial nutrients and vitamins (you can learn more here) and goes with practically everything. And the “good” fat and fiber it contains allow me to feel full even if I eat just a small amount of it.
Easy & Healthy Avo Toast Recipe
This Avo Toast has been my go-to snack between breakfast and lunch lately. The buttery, creamy avocado with a hint of refreshing lime juice and a tiny bit of sea salt on a warm, crunchy toast is simply divine.
And it only takes 5 minutes to prepare, if that! I’m always looking for a recipe that takes only a handful of ingredients to make (I often get turned off when I see 7 or more ingredients in a recipe…:D), and this Avo Toast recipe is definitely a keeper!
Lisa Congdon is an artist, illustrator, and an author I admire SO much. She’s one of my art heroes not just because her art is so amazingly beautiful but also her way of being in the world – hardworking, honest, compassionate, and always challenging herself creatively – resonates with me so deeply.
I’m so honored to be contributing this review for her latest book The Joy of Swimmingtoday! It’s due to be released a week from today on April 19 from Chronicle Books.
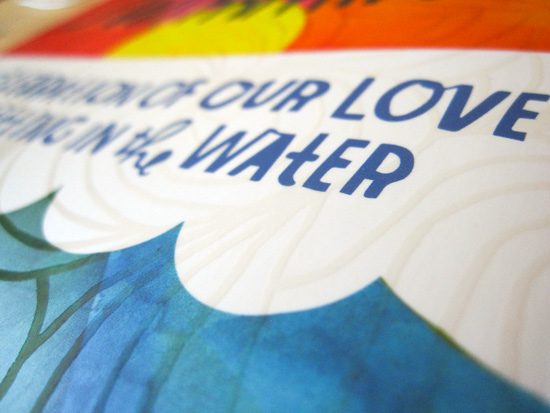
In this book, Lisa shares in depth about her passion for swimming and her love of being in the water. Lisa fell in love with swimming as a child and has been a lifelong avid swimmer herself. She has swum competitively for many years with very impressive achievements I might add!
While she was working on the book, I was catching the glimpse of her work on her Instagram feed and grew very curious about her path as a swimmer. Since I started following her work a couple of years ago, I’ve gotten to know more about her life as an artist. Naturally as an artist myself, there is so much I can relate to and learn from.
But it’s always so fascinating to learn more about the person I admire and learn what else drives them and gives them the strength and inspiration.
So, I was very excited when I received my copy in the mail! I took it out of the mailer and immediately noticed the beauty and the details of the book itself. I don’t know about you, but I do judge the book by its cover! All the time. A beautifully designed cover can add so much to the reading experience, don’t you think?
Lisa’s illustration and hand lettering on the cover drew me in right away. I had to just admire it for a couple of minutes before I dove in (pun so intended!) to the contents.
Love the beautiful details on the cover of The Joy of Swimming!
The highly saturated colors and the simple, bold design is so eye-cathing. It’s also textured with a slightly raised pattern, so you get the added sensory experience while you hold the book in your hands. Swoon!
Once you open the book, you’ll be overwhelmed by the charming watercolor portraits of the swimmers, along with the beautifully photographed collections of vintage swimming paraphernalia, Lisa’s hand-drawn infographics about swimming history around the world, illustrations of vintage swim gears, and encouraging handlettered quotes about swimming.
Loved all of the quotes in this book ❤“You cannot swim for new horizons until you have courage to lose sight of the shore.” – William FaulknerSome Dogs Who Are Great Swimmers ❤Loved this spread on Women’s Bathing Suits Over the 20th Century
Of course, the majority of this book is filled with fascinating stories of swimmers, from world-famous to everyday. And each swimmer’s story is accompanied by a beautiful watercolor portrait Lisa created, which adds so much warmth and personality.
This page featuring an 88-year-old Charlotte Jilleba, who has been a lifelong swimmer and still swims laps 3 days a week!
When you’re reading the profile of each one of the swimmers, you’re not just learning about swimming – you’re learning how ordinary people from all walks of life find who they are and become empowered to achieve their full potential both physically and mentally.
Many of the swimmers in this book share how the water acts as an equalizer, and I can totally relate to that.
Growing up, I was not very athletic and couldn’t run fast or jump high to save my life and dreaded every P.E. class. Except, I felt somewhat average in the swimming pool. I wasn’t a fast swimmer by any means, but I felt more comfortable moving around in the water and didn’t feel as clumsy or inadequate while swimming. I even looked forward to the P.E. class during the summer because I actually enjoyed swimming!
As an adult, I joined an aquarobics class at a local community pool and worked out in the water for a couple of years after repeated injuries from jogging.
Aquarobics was so much fun! I was able to participate in a vigorous workout without the fear of re-injuring myself. I felt empowered and invigorated every time I worked out in the water.
But more than anything, I appreciated the friendship I made with the ladies in the class. As you might have guessed, aquarobics attract people who have some mobility issues or otherwise unable to do high-impact workout. Naturally, there were mostly older women in the class, and I felt like I gained a bunch of moms and grandmas all of a sudden!
I’ve since transitioned to working out on the dry land, but I still cherish the fond memories of my aquarobics days ❤
I’m so grateful that The Joy of Swimming has reminded me of what I’m capable of and the fun memories I had created in the water.
You can place your pre-order now or purchase the book on Tuesday April 19 on The Joy of Swimming Book website (note: the “Buy the Book” button on the upper right will give you options of where to get your copy.)
Lisa’s also going to be touring with the book! You can check out the schedule here and be sure to go say hi when she visits a bookstore near you 🙂 You can also sign up for her book newsletter here so you won’t miss any updates about the book!
Whether you’re a swimmer or not, The Joy of Swimming will bing you joy, delight, and inspiration for your eyes and the heart ❤
I hope you got a chance to see the sneak preview of my new summer product line, Eat a Rainbow, that’s going to launch on Sunday May 1 last week. If you missed it, go here to get a sneak preview now!
It’s my first attempt to release a cohesive art product line on a regular basis (my goal is one collection per season). I’m starting small with just a handful of new art prints and notecards.
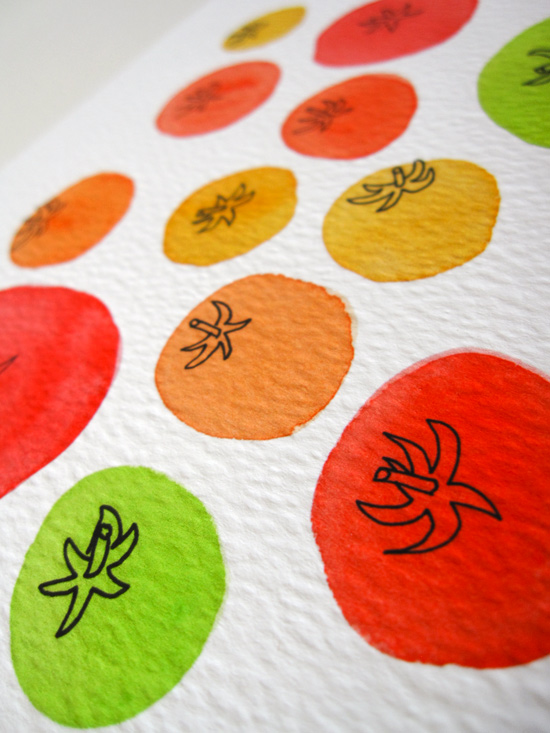
In this new collection, I’m releasing 4 new designs: Eat a Rainbow, Bell Pepper, Tomato, and Summer Berry. All things I love and look forward to in summer!
For the new art prints, I selected the Premium Giclee Paper as recommended by the printshop I work with (I work with FinerWorks, and they’re great by the way!), and I couldn’t be happier with the quality of the products! I gasped when I opened up the mail to see these prints for the first time because they’re so beautiful ❤
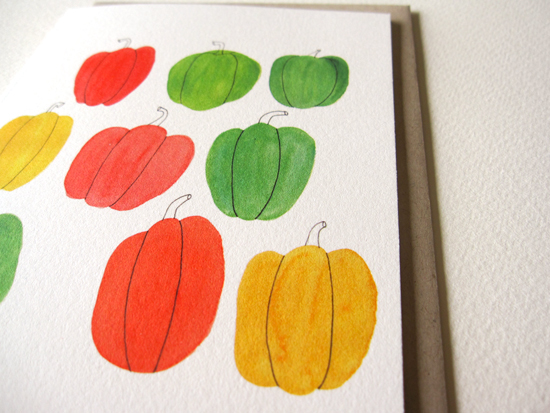
The texture on the paper adds so much to the luminosity of the watercolor illustration. To be completely honest, it looks even better than my original 😀
Take a closer look and you’ll totally agree.
Eat a Rainbow Watercolor Illustration and Handlettering by Yuko MikiEat a Rainbow Watercolor Illustration and Handlettering by Yuko MikiBell Pepper Watercolor Illustration by Yuko MikiBell Pepper Watercolor Illustration by Yuko MikiTomato Watercolor Illustration by Yuko MikiTomato Watercolor Illustration by Yuko MikiSummer Berry Watercolor Illustration by Yuko MikiSummer Berry Watercolor Illustration by Yuko Miki
Just picture these vibrant watercolor drawings of fresh vegetables and berries hanging in your dining room. Imagine how inviting your home will be for your friends and family. You’ll be treating them to a feast not only to fill their bellies but their heart, too ❤
Eat a Rainbow art collection will launch on Sunday May 1 🙂 Stay tuned for more updates next week!
We’ve been having many beautiful sunny days in Seattle lately, and it’s getting me in the mood for drawing colorful poppies in my sketchbook!
Flower is one of my favorite things to draw, and even though it’s not summer yet, I’m inspired by the beautiful poppies in my imagination 🙂
Here are some of my recent poppy drawings. I used Sakura Koi Brush pens and Micron pen (size 01).
Red & Purple PoppiesPink & Purple PoppiesOrange & Pink Poppies
Pink & Red PoppiesOrange & Pink Poppies
I’m going to be working on a drawing tutorial video for Sakura of America in the near future and think it might be fun to show you how to draw these? 🙂 I’ll keep you posted!
Oh, and speaking of floral drawings, I just added a new Pink Blossoms Mother’s Day greeting card to my Etsy shop! You can get yours here 🙂
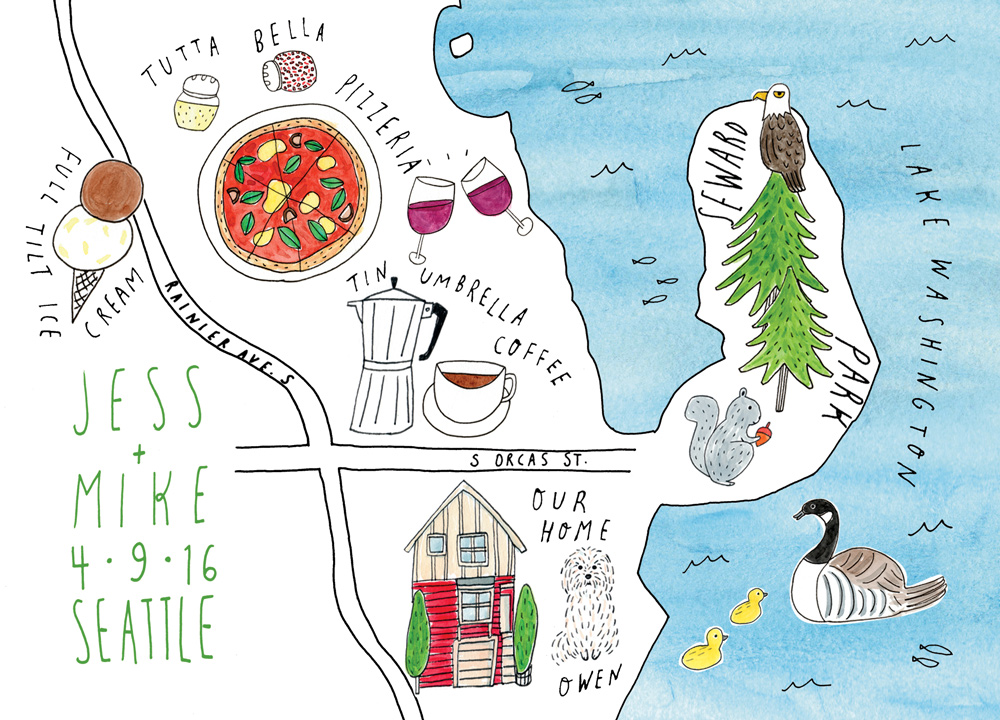
I recently worked on a map illustration for a couple for their wedding invitation. It was a really fun project, and I want to share my behind the scenes case study with you today!
Jess and Mike approached me last fall after seeing my work from one of my 365 Day Happiness Is art shows in Seattle. They said they liked my simple pen and ink drawings with watercolor and wanted something similar done for their wedding invitation.
1. Client Questionnaire
The first thing I do when I receive an inquiry for a commission work is to thank them for their interest and send them my client questionnaire to find out more specifics about the project.
My client questionnaire includes 17 questions to discover what the project goals are, what deliverables are expected, if there are any timelines, what would be a successful project, and what inspired them among other things.
I got many of the questions from Seanwes’ Value Based Pricing. They teach how to charge your client based on the value you create for them rather than charging flat fee for every project or asking for a budget up front. I was really inspired by this concept that lets you position yourself as an investment rather than an expense to your client.
I like having my potential client fill out the questionnaire first because it helps to clarify what the project is really worth for them. I find it especially helpful when a client says they want something quick and simple… because nothing is ever quick or simple!!
And even though many clients want to know how much the fee is up front, I can’t even begin to imagine how much it’s going to be without knowing what the goal is and what will take to achieve that goal.
2. Client Consultation
After I got their questionnaire back, I reviewed their information and believed I could help them with what they needed. So we met for a coffee to discuss further.
In our conversation, we went over their answers to the questionnaire more in depth and I was able to learn more about their personality and what they value. In a more personal project like this, it’s important that I get a picture of who they are because that’s essentially their “brand” and my final work will need to reflect that.
Both Jess and Mike are from out of state and have lived in lots of different places before they moved to Seattle and met a few years ago. They had recently moved to their new home in the neighborhood and love exploring what their new neighborhood has to offer.
Many of their wedding guests will be coming from out of town and have never been to Seattle before. They wanted the illustration to give their friends and family a glimpse into their new life together and get excited about visiting Seattle.
From our discussion, we decided it’s going to be an illustrated map of the neighborhood, including some of the landmarks that are meaningful to them.
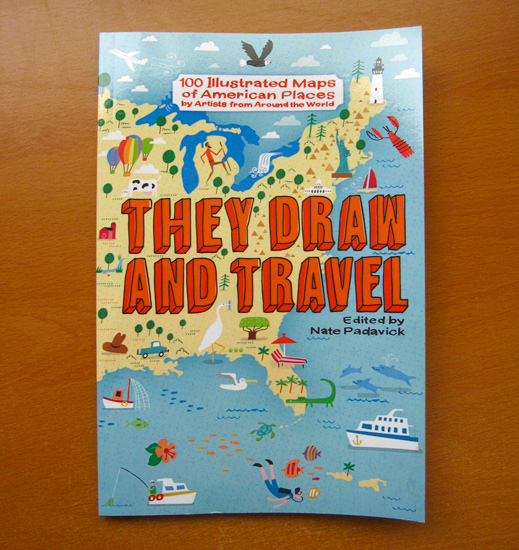
I’ve always liked illustrated maps. One of my favorite illustration websites, They Draw and Travel, had just released their book of illustrated maps so I got it for more inspiration and research.
Ah, the things I get for the name of research… 🙂
It was a perfect timing and the book is a treat for the eyes!!
3. Project Proposal, Contract & Payment
After our meeting, I put together a proposal (which also doubles as the contract) outlining my understanding of the objectives, timeline for everything, what deliverables they’re going to receive and how they’re going to receive them, and the fee estimate.
They agreed on the terms and paid the fee (I typically ask to be paid up front), so I put them on my project queue to work on.
The nice thing about requiring a payment up front is at least you know you don’t have to worry about getting paid afterwards! It really helps me focus on the project, and as a result, do a better job for my clients. It’s a win-win!
4. Research & Gather Reference Materials
I start my work by researching and gathering reference materials. I want to understand the subject as much as possible so I can translate their vision into a visual representation in a best way possible.
During my discovery process, it became apparent that my illustration needed to reflect their love for the neighborhood and how it’s a big part of their new life together. Since I also live in the neighborhood, I’m familiar with the landmarks and the feeling they’re referring to. But I’ve never really paid attention to the details of what’s there, so I took an afternoon to walk around and explore more.
For example, I went to their house and took some photos and got the feel for what’s around. I also visited the other landmarks they mentioned and looked around a bit and snapped some photos. I gathered some other reference photos online as well and read about what animals and trees grow around here.
5. Conceptualizing & Sketching
After I get my research done, I start sketching elements and concepts.
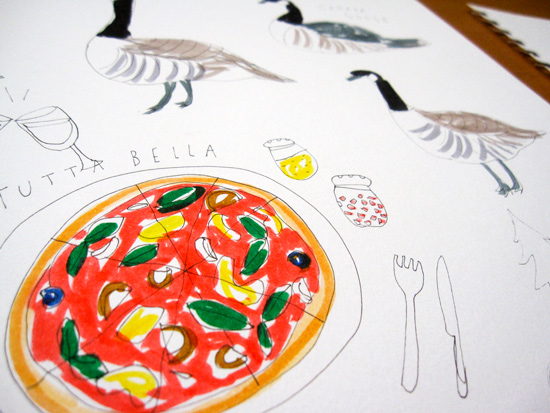
A loose pen and marker drawings of potential conceptsOne of their favorite restaurants in the hood. Mmmmm, pizza…I make several concept sketches in pencil.
When I get a good idea of what to include in the piece, I create a rough sketch with pencil on paper. Here, I drew a couple of boxes in the same size as their invitation so I knew exactly the size I was working with.
After I decide on the general concept, I trace several aspects of different versions of my rough sketch on to a tracing paper and create a little more polished version of my concept sketch.
The way I typically approach my client work is – and I always explain this to my client and get them on board before starting anything – is that I get all the information I need up front and then go away and do my work. I don’t create multiple options for them to choose from or do revisions based on arbitrary feedback. (You can learn more about the One Concept Approach here. )
I do however show my client the initial concept sketch just so they know which directions I’m headed. If they have any objective feedback, like hey, you misspelled a name or it is way outside of the vision for the project, then I’ll take that into consideration moving forward.
6.Drawing, Digitizing & Refining the Artwork
Once we agree that we’re on the right track, I’ll continue working on the piece, revising and refining it many times to ensure it is going to meet the project goal.
I create drawings of each of the elements separately in my Canson Mixed Media sketchbook. I usually start drawing with pen and ink directly with my Micron pen (used size 08 for this project) to create my whimsical and organic illustration style.
And then I colored them with watercolor and gouache (various brands). I wanted to make sure the overall feel of the piece fits my signature drawing style, so I paid attention not to overdo anything.
I drew a few versions of each elements (i.e. building, trees etc.) and chose the one that would work the best. I then cut them out of my sketchbook pages and taped them on to a sheet of paper and scanned them in.
I do this because my scanner is not very big, and it’s kind of a pain to scan the 9×12 page, and I can save time by scanning only pieces I needed.
Bits and pieces of my illustrated elements to be included in the map.
Once I scan the hand-drawn pieces, I bring them into Photoshop and edit them (e.g. enhance colors, clean up the messiness etc.) to get them ready to be added to the map.
To draw the outline of the map, I pulled up Google map of the neighborhood and sketched it a few times on paper to practice. Drawing maps can be tricky. Though I’m not trying to create a realistic map, it still needs to be somewhat recognizable as the map of the area.
I ended up using a grid drawing method (here is a quick tutorial about the method if you’re interested) to get the general shape and proportions accurately.
Here is the outline of the map created using the grid drawing method.
I traced the map with the pen on the tracing paper and scanned it to be digitally manipulated.
Once I have the outline of the map and the illustrated pieces scanned and edited, I began to put them together in Photoshop, referring to the concept sketch I made initially.
I also print out the artwork several times during this process to make sure it’s legible and readable in the format the artwork is going to be used. Although you can’t really guarantee how the colors will be rendered on their end, it’s a good idea to check how they turn out from your printer. It’s always little different than what you see on your monitor!
I print out the artwork several times during the process. I print it out in a larger size to look at the details and also in the smaller size (the size of the wedding invitation) to make sure everything still looks OK.
I keep revising and tweaking. It could be a pretty tedious process!
Once I’m happy with the general layout, I create the lettering pieces to fit in the space. Again, I make a few different options, decide which ones would work best, scan them in, edit them in Photoshop, and bring them in to the artwork.
With the lettering pieces in a general place, I do the layout, tweak it a little bit, look at it carefully, print it out if necessary and repeat the process until I feel good about it.
Getting close!
7. Preparing & Delivering the Final Files
Once you’re done with all the revisions, it’s time to submit the final files to your client! Hooray!
For this client, I created a high-resolution PDF file for print and a low-res jpeg file for web (in case they wanted to share the work online with friends and family) and sent them via Dropbox.
It’s always a little nerve-racking to wait to hear back from the client after you hit the “send” button. Even though I know my work is good and I did everything I could to meet the project expectations, I often get anxious wondering if they’d agree!
Jess and Mike wrote back a few days later to tell me how much they loved the artwork 🙂 They loved it so much that they asked me to create the lettering work that goes inside of their invitation. I love it when a client is so happy with my work that they give me more work immediately!
And here is the final artwork for their wedding invitation!
Here is the final illustration for their wedding invitation. Congratulations to the happy couple ❤
I hope you enjoyed the behind the scenes look into my illustrated map project! Jess and Mike were great to work with, and I had a lot of fun creating this custom piece for them.
I’m trying to focus more on my art products this year, and my goal is release a cohesive new product line every season.
And I’m excited to tell you that my Eat a Rainbow summer product line will launch on Sunday May 1!!
I love sharing my behind the scenes creative process with you, so I’m going to share bits and pieces of my new art product line in the coming month.
When I decided the art product was going to be my new goal this year, it was already mid-winter and was too late to produce and market anything for the spring. So I decided to start with creating new products for this summer.
My first step when I start something new is to educate myself on the subject matter as much as possible. So I read a bunch of articles and watched webinars about making successful product business.
You probably already know this, but starting a product business is expensive!! You have to make an up-front investment in inventory and supplies, and it can take a few years for you to actually profit from your sales. Yikes.
I don’t believe in debt and since I’m still learning, I decided to start small and invest in paper products (e.g. art prints and notecards) for the summer season. Prints and cards are not as expensive to produce as compared to other products like mugs and bags, and you can expect a higher profit margin.
I also learned that you need to be on top of your schedule for your product launch and promotion and you need to start designing and producing your products waaaay early. Like, I need to be thinking about fall and winter holidays now. But it’s not even summer yet!!!
That unseasonal aspect of the product business feels very awkward to me, but I gotta start somewhere and am willing to try! So I put the tentative dates and reminders for my product designs, promotion, and launch on my Google calendar for the rest of the year. I’m so patting myself on the back for that one!
Once I made a decision about what kinds of products to create, I worked on creating a cohesive theme for the products. I did some research to find out the visual trend for this summer, especially for stationery and surface design. Which I must say was not very easy to find for some reason.
I thought someone must’ve created a list of themes that are hot this summer, but I didn’t find anything that was so simple or easy. I guess nothing is easy when it comes to learning?
But one website I found based in the U.K. did mention urban gardening/homesteading theme is one of the more popular themes this year (hasn’t it been kind of popular for the past few years, though? Maybe it’s different for different counties…?), so I decided to tackle that theme for my summer art products.
I’m a gardener, and as you know, I love anything related to food 🙂 Summer is the time for abundant vegetable production, and why not celebrate it with art??
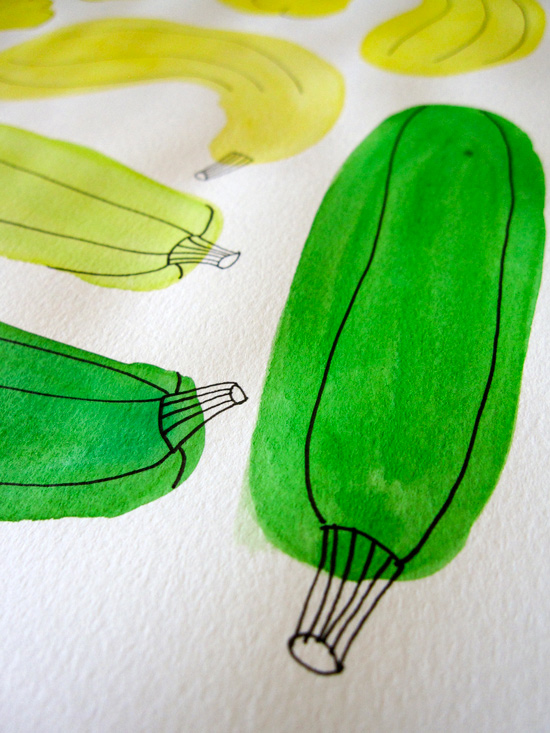
When I was designing for the summer product line, I had many ideas. Simple line drawings, fun veggie-related puns (though I’m bad at coming up with puns…), vintage seed packet designs etc. But I was particularly inspired by the beautiful food gradient art by Wright Kitchen.
I was introduced to her website a few months ago and have been following her beautiful food photography on Instagram. Her art is absolutely stunning!! Definitely follow her feed if you’re looking for delicious eye candy!!
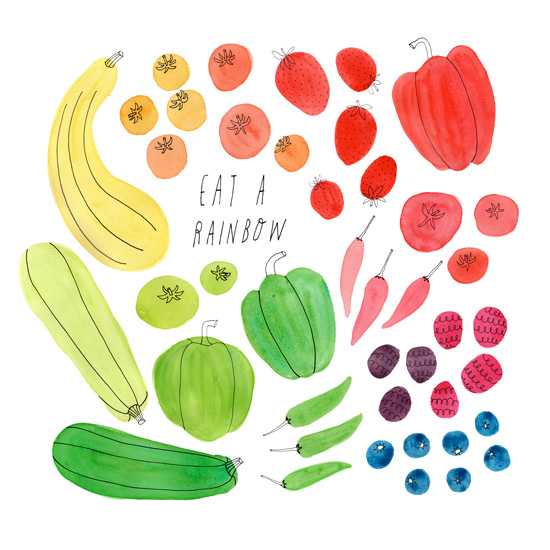
So anyway, I started drawing and sketching some of my favorite summer vegetables in watercolor, gouache, and my favorite Micron pen.
And then I scanned my drawings in to create several fun compositions digitally in Photoshop.
I named the series Eat a Rainbow, and I imagined my colorful art prints hanging in someone’s kitchen or dining room, where they’re going to be cooking and enjoying the meals made with fresh vegetables with their family and friends 🙂
This one is my favorite ❤
My Eat a Rainbow summer product line will launch on May 1, 2016 on my Etsy shop! I’ll be sharing more sneak previews in the coming month, so stay tuned!
Happy April! Wow how time flies! I hope you’re adjusting to the seasonal changes OK!
I’ve said this before but when I quit my day job last summer, I thought I was going to have all the time I wanted to make art every day. It turns out there are so many other business-y things I needed to take care of, and sadly making art for the sake of making art had taken a back seat in my life.
I was feeling a little burnt out leading up to my last sabbatical and was worried I was losing my sparks.
So during my sabbatical, I was determined to just relax and make whatever, whenever I felt like it. As a result, I felt rested and spacious. I got to rediscover the joy of making art as a way of relaxation and self-care.
After all, that is what art was to me in the beginning – something that fed my soul, and it can still be that if I created a space for it. I was definitely losing touch with that aspect of art making as I was buried deep in the day-to-day, trying to make my creative business happen. And I really wanted to have it again in my everyday living.
I realize it’s nearly impossible to create art just for fun any more. I’m always thinking about what’s next for my business and how even my fun, “non-work” art can help me achieve my goal.
But I’ve been attempting to restore the balance and making art as part of my daily relaxation practice as well. I’ve been taking time off from my business/admin stuff mid-day or at the end of the day to draw something fun and joyful. Some of them will be part of my portfolio or my future work, and others will just live in my sketchbook.
It’s been so nice to have that space in my life again. I didn’t realize how much I craved it and how good it is for me personally and professionally.
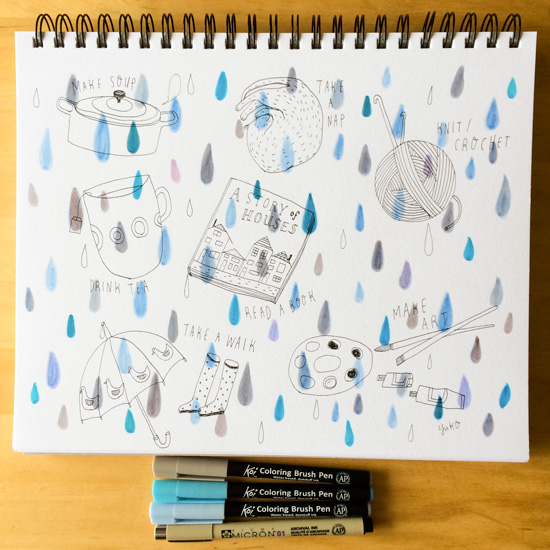
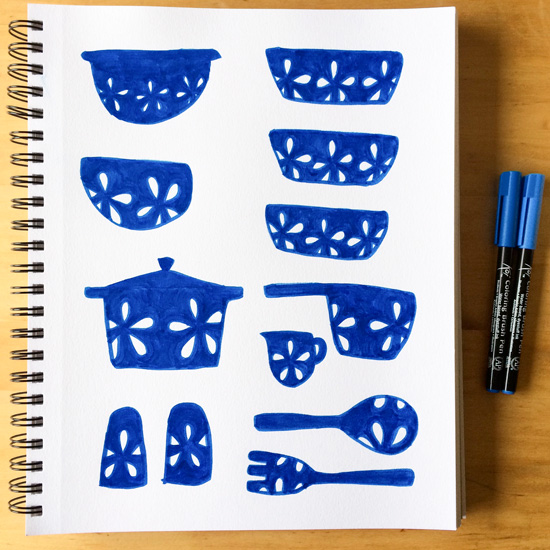
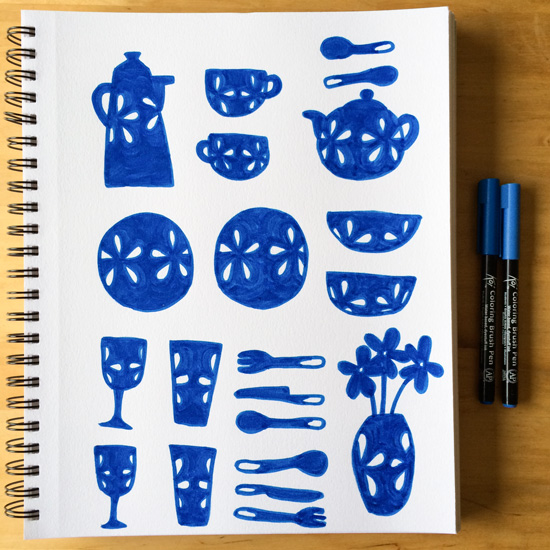
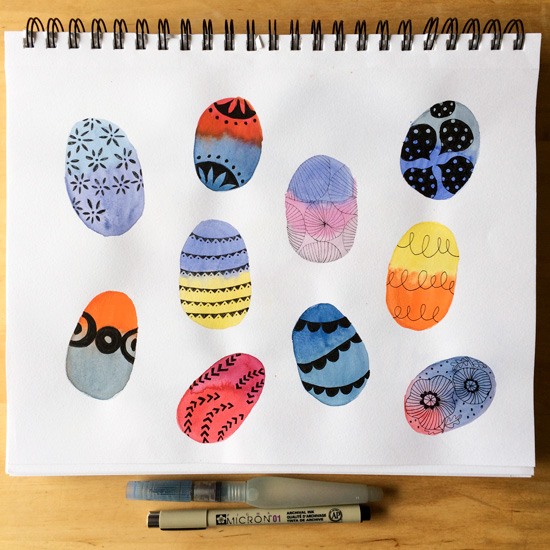
Here are some of my recent drawings from my sketch book! Enjoy 🙂
Asparagus, watercolor and micron penThings to Do on a Rainy Day, Sakura koi pens & micron penWatercolor Wheels, watercolor, gouache, and micron penBlue Cookware, Sakura koi pensBlue Kitchenware, Sakura koi pensEaster Eggs, watercolor, gouache, and micron penFlower Clock, watercolor, gouache, micron pen, and gellyroll pen