I just wanted to let you know that I’ll be on my sabbatical week this coming week and won’t be posting any blog for a week. Since I’ve increased my blog output lately, my absence might be more noticeable during this sabbatical, and I didn’t want you to worry 🙂 It’s intentional!
In case your’e not familiar, I’m borrowing this idea of Small Scale Sabbaticals from Seanwes and have been taking every 7th week off since last October. And let me tell you, it’s a life saver!!
Since I started pursuing my passion full-time last summer, I’ve been working very hard. Like Sean says in his article, it’s hard to stop working sometimes when your work is something you love, and working towards your dream feels so fulfilling.
But if you don’t stop and take care of yourself, you’ll burn out. And if you’re burnt out, the quality of your work will suffer, and eventually you’ll stop enjoying what you love. So sad! I’ve noticed signs of burn-out creeping up several times in the last 6 months and am glad I have a system in place to regularly step back and recharge. In fact, it’s one of the most important investments I make for myself and my business.
A friend recently asked me what I do during a sabbatical week. Basically, it’s a time for me to step back from my day-to-day and spend time doing things I don’t normally get to do.
During my past sabbaticals, I’ve done some of these things:
Cook and bake more
Work on creative side projects for fun
Spend more time with friends and family
Take webinars and classes
Do long-term business planning and goal-setting
Work on big picture projects
Organize and declutter the office
And, relax and veg out!
I don’t do client work and stay away from my daily blog-writing routine during my sabbaticals. I engage in the social media on and off to post about things I’m working on (mostly for fun) during the sabbaticals, but I’m more relaxed about posting consistently.
You might be surprised to see things like long-term business planning on my list above, but I find it refreshing to focus on some of the bigger-picture thinking during my sabbaticals. It’s so important to do, yet I never seem to make the time for it when I’m buried in the day-to-day of growing a creative business!
At the end of the day, you can spend your sabbaticals however you want as long as you come out of it refreshed and energized. It may mean a relaxing vacation on a tropical beach (I wish!) or maybe it’s spending a day in the kitchen labeling everything in your pantry… The world is your oyster, my friend!
Although taking a regular time off feels a bit scary at times, it also makes me stay productive during my “on” weeks because I don’t want to worry about any loose ends during my sabbaticals. I remember being extra motivated to get stuff done before a vacation at my old day job. It’s the same thing! Except, when you work for yourself, you get to decide how often you take your time-off and you don’t need anyone’s permission 😀
If you’re curious about it, I say just do it! I wasn’t sure if it was going to work at first but once you do it a couple of times, it just becomes something you do. I schedule all of the future sabbaticals on my calendar so I know when it’s happening and can plan other things around it.
If every 7th week off seems too much, you can start small and take a long weekend or even a day off to remove yourself from the everyday busyness. I do recommend you schedule it regularly and follow through with it so it doesn’t get put on a back burner.
I honestly don’t know how I stay motivated and focused without my sabbaticals. It’s definitely a game changer!
I usually write a blog post about what I did during my sabbatical week and you can expect a report from me after I come back 🙂 You can check out my past posts here if you want to know more!
Have a wonderful week! Looking forward to seeing you after my sabbatical 🙂
You know I LOVE making simple line drawings of flowers and plants. When Kiala asked me to guest teach for this e-course, I was really honored and excited.
This course is year-long, and each month features different teachers and themes. Students are encouraged to follow along tutorials and learn different techniques every month, and there is a private online group to share their work and get to hang out with the teachers live on a monthly live session!
Look at the monthly theme here. Isn’t this great?? Kiala put this together to bring personal enrichment through art and creativity and did an awesome job at that!!
January = Explore & Discover
February = Self-Love & Intentional Living
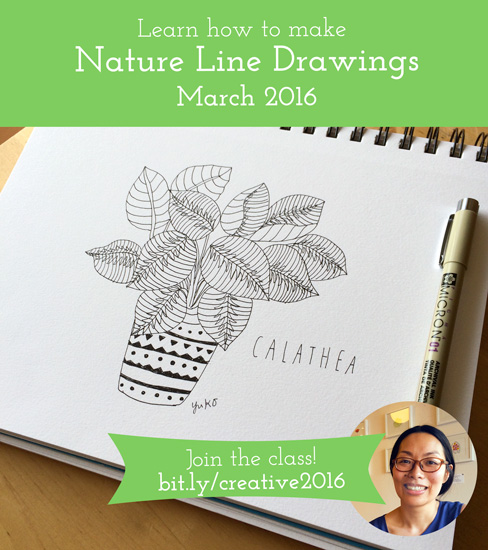
March = Nature & Natural Living <– this is what I’m teaching!
April = Poetry & Music
May = Creative Empowerment
June = Wonderment & Dreams
July = Sanctuary & Silence
August = Harvest & Family
September = Memories & Archives
October = Devotion & Meditation
November = Gratitude & Words of Wisdom
December = Reflection & Memory
Here are 3 things that make this course unique:
1) It’s online, so you can access it anywhere, anytime that’s convenient for you. It doesn’t matter if you live in a rural area where you don’t know anyone creative like you – you get to participate and interact with others in this supportive on-line community!
2) You get to learn from different teachers with different styles and perspectives. It makes the learning experience more interesting, and it will help you get out of a creative rut if you’re experiencing one!
3) The materials are very accessible. You don’t have to be an experienced artist to enjoy it – Anyone with a creative mind will have lots of fun exploring different themes and techniques!
Many people start out the new year with a goal of having a consistent creative practice and have a hard time continuing the momentum without the on-going encouragement and guidance.
This course will be a (gentle) kick in the pants to reenergize your intention to embrace creativity throughout the year. It’ll give you fresh contents every month and a supportive community to learn in so you can incorporate creativity in your everyday living and meet your goals.
And get this – you only pay $120 to access everything for the whole year. Yup, everything: the tutorials, support, community, live sessions, and most importantly your motivation. For the whole year. Talk about getting bang for your buck!!!
It’s definitely not too late to enroll in the course! You’ll still get access to all the materials for the past two months as well when you register.
This short video about my creative inspirations may give you a better sense of who I am as an artist and what my class is going to be like 🙂
I’ll be on the live session on Sunday 3/13 (11:30am PST) and would love to see many of you there! ❤ Join me today!
I like reviewing my sketchbook because it tells me how I was feeling and what I was interested in at that time. When I look at my old sketchbooks, I realize 1) my drawing was not as bad as I thought and 2) I’ve gotten better 🙂 It’s a great way to gauge where you were and how far you’ve come!
Also, it’s more playful and experimental. It’s so important for artists to not lose touch with our playful side and not be afraid to try something new. I get most of my product ideas from my casual drawings in my sketchbook by the way.
I want to share some of the recent drawings from my sketchbook today! Enjoy 🙂
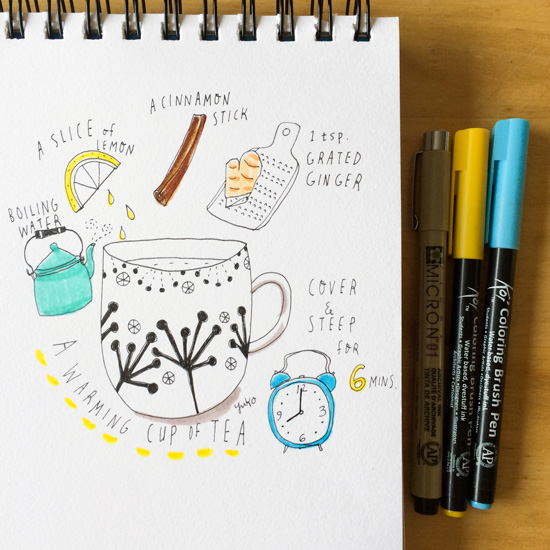
As always, I enjoy drawing food! I’ve been interested in making more illustrated recipes lately. It’s a fun way to to combine my love of drawing, handlettering, and eating 🙂 This simple ginger tea is awesome on a cold day or if you’re having an upset stomach.
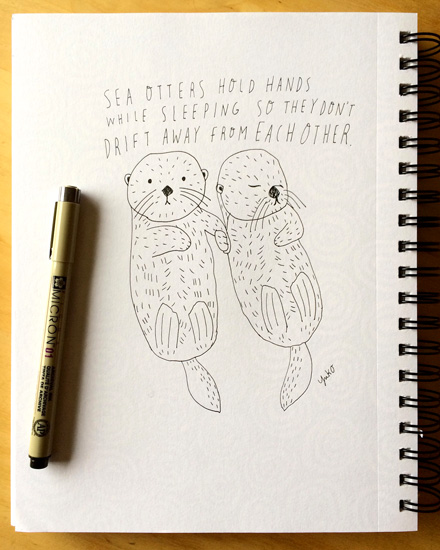
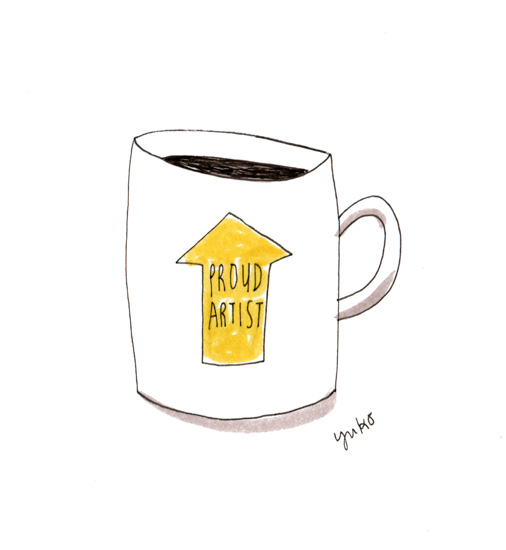
I made this lettering piece for one of the blog post. It’s such a simple message and drawing but makes me happy and inspired 🙂
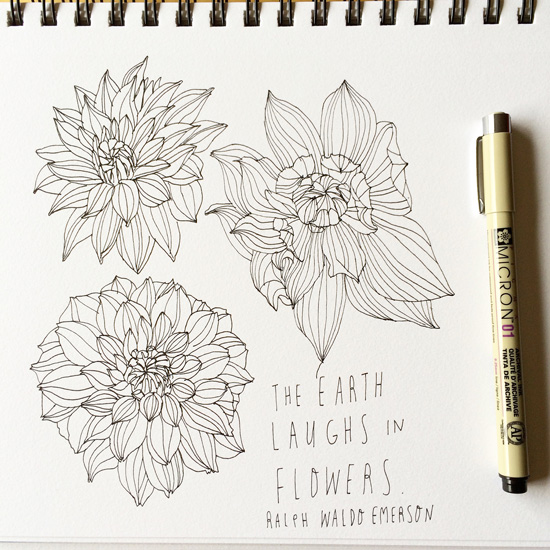
Whenever I feel stuck creatively, I draw flowers. I just love them so much! I bought dahlias at the farmers’ market almost weekly this past summer. I just couldn’t get enough of them! I usually photograph them to draw/enjoy later 🙂 And I added this beautiful quote by Ralph Waldo Emerson. Swoon!
It’s time for me to start designing new products for summer! I think it’s going to be veggie/summer garden themed 🙂 Some warm-up sketches to get my creative juice going. Excited to see where this will lead me.
Though I love simple pen & ink line drawings a lot, I was missing more colorful watercolor drawings the other day. Dave gave me beautiful roses for Valentine’s Day so I decided to make a painting of it to encapsulate their beauty 🙂 It’s always fun to make a loose painting with watercolor and brush.
And just in case you’re wondering what kind of sketchbook I use, my current favorite is this Canson Mix Media sketchbook! I like the thickness of the paper, and the size is great, too. I used to work in a much smaller sketchbook but wanted to challenge myself to work a little bigger. Granted this is not that big, I’m learning to expand my horizon a bit 🙂
I hope you enjoyed getting a peek into my sketchbook today! Have a great day 🙂
I shared a behind the scenes look into the DIY filming process of my first drawing video tutorial last week (if you missed it, you can check it out here.)
I made a short video introducing myself using some of the footage from that project, and I’m excited to share it with you today!
Here it is, me as a living and breathing person, talking about my work and inspirations.
Not too bad, yes?? Since I’m very new to video making, it took me many hours to put my videos together, but I had so much fun!
I just enjoy learning something new so much. I’m often fighting the “shiny object syndrome,” but I still like to celebrate the new knowledge and want to inspire my audience in new and exciting ways.
I’ll be working on a new drawing tutorial video for Sakura of America next and can’t wait to share it with you when it’s done!
One of the things I’d like to share more in my blog is to share the tools and apps I love!
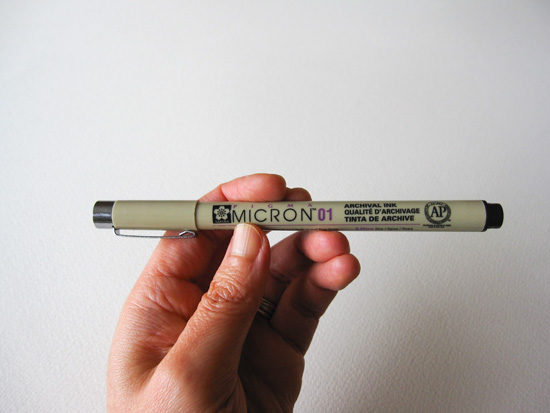
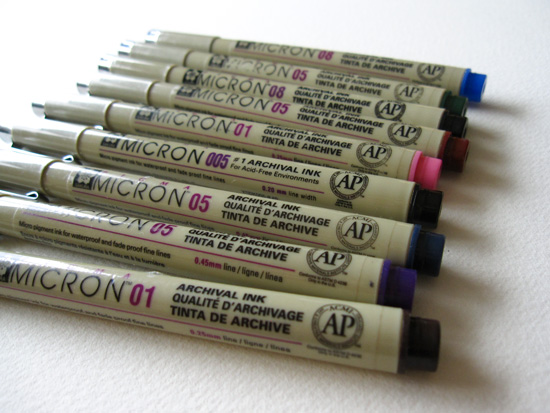
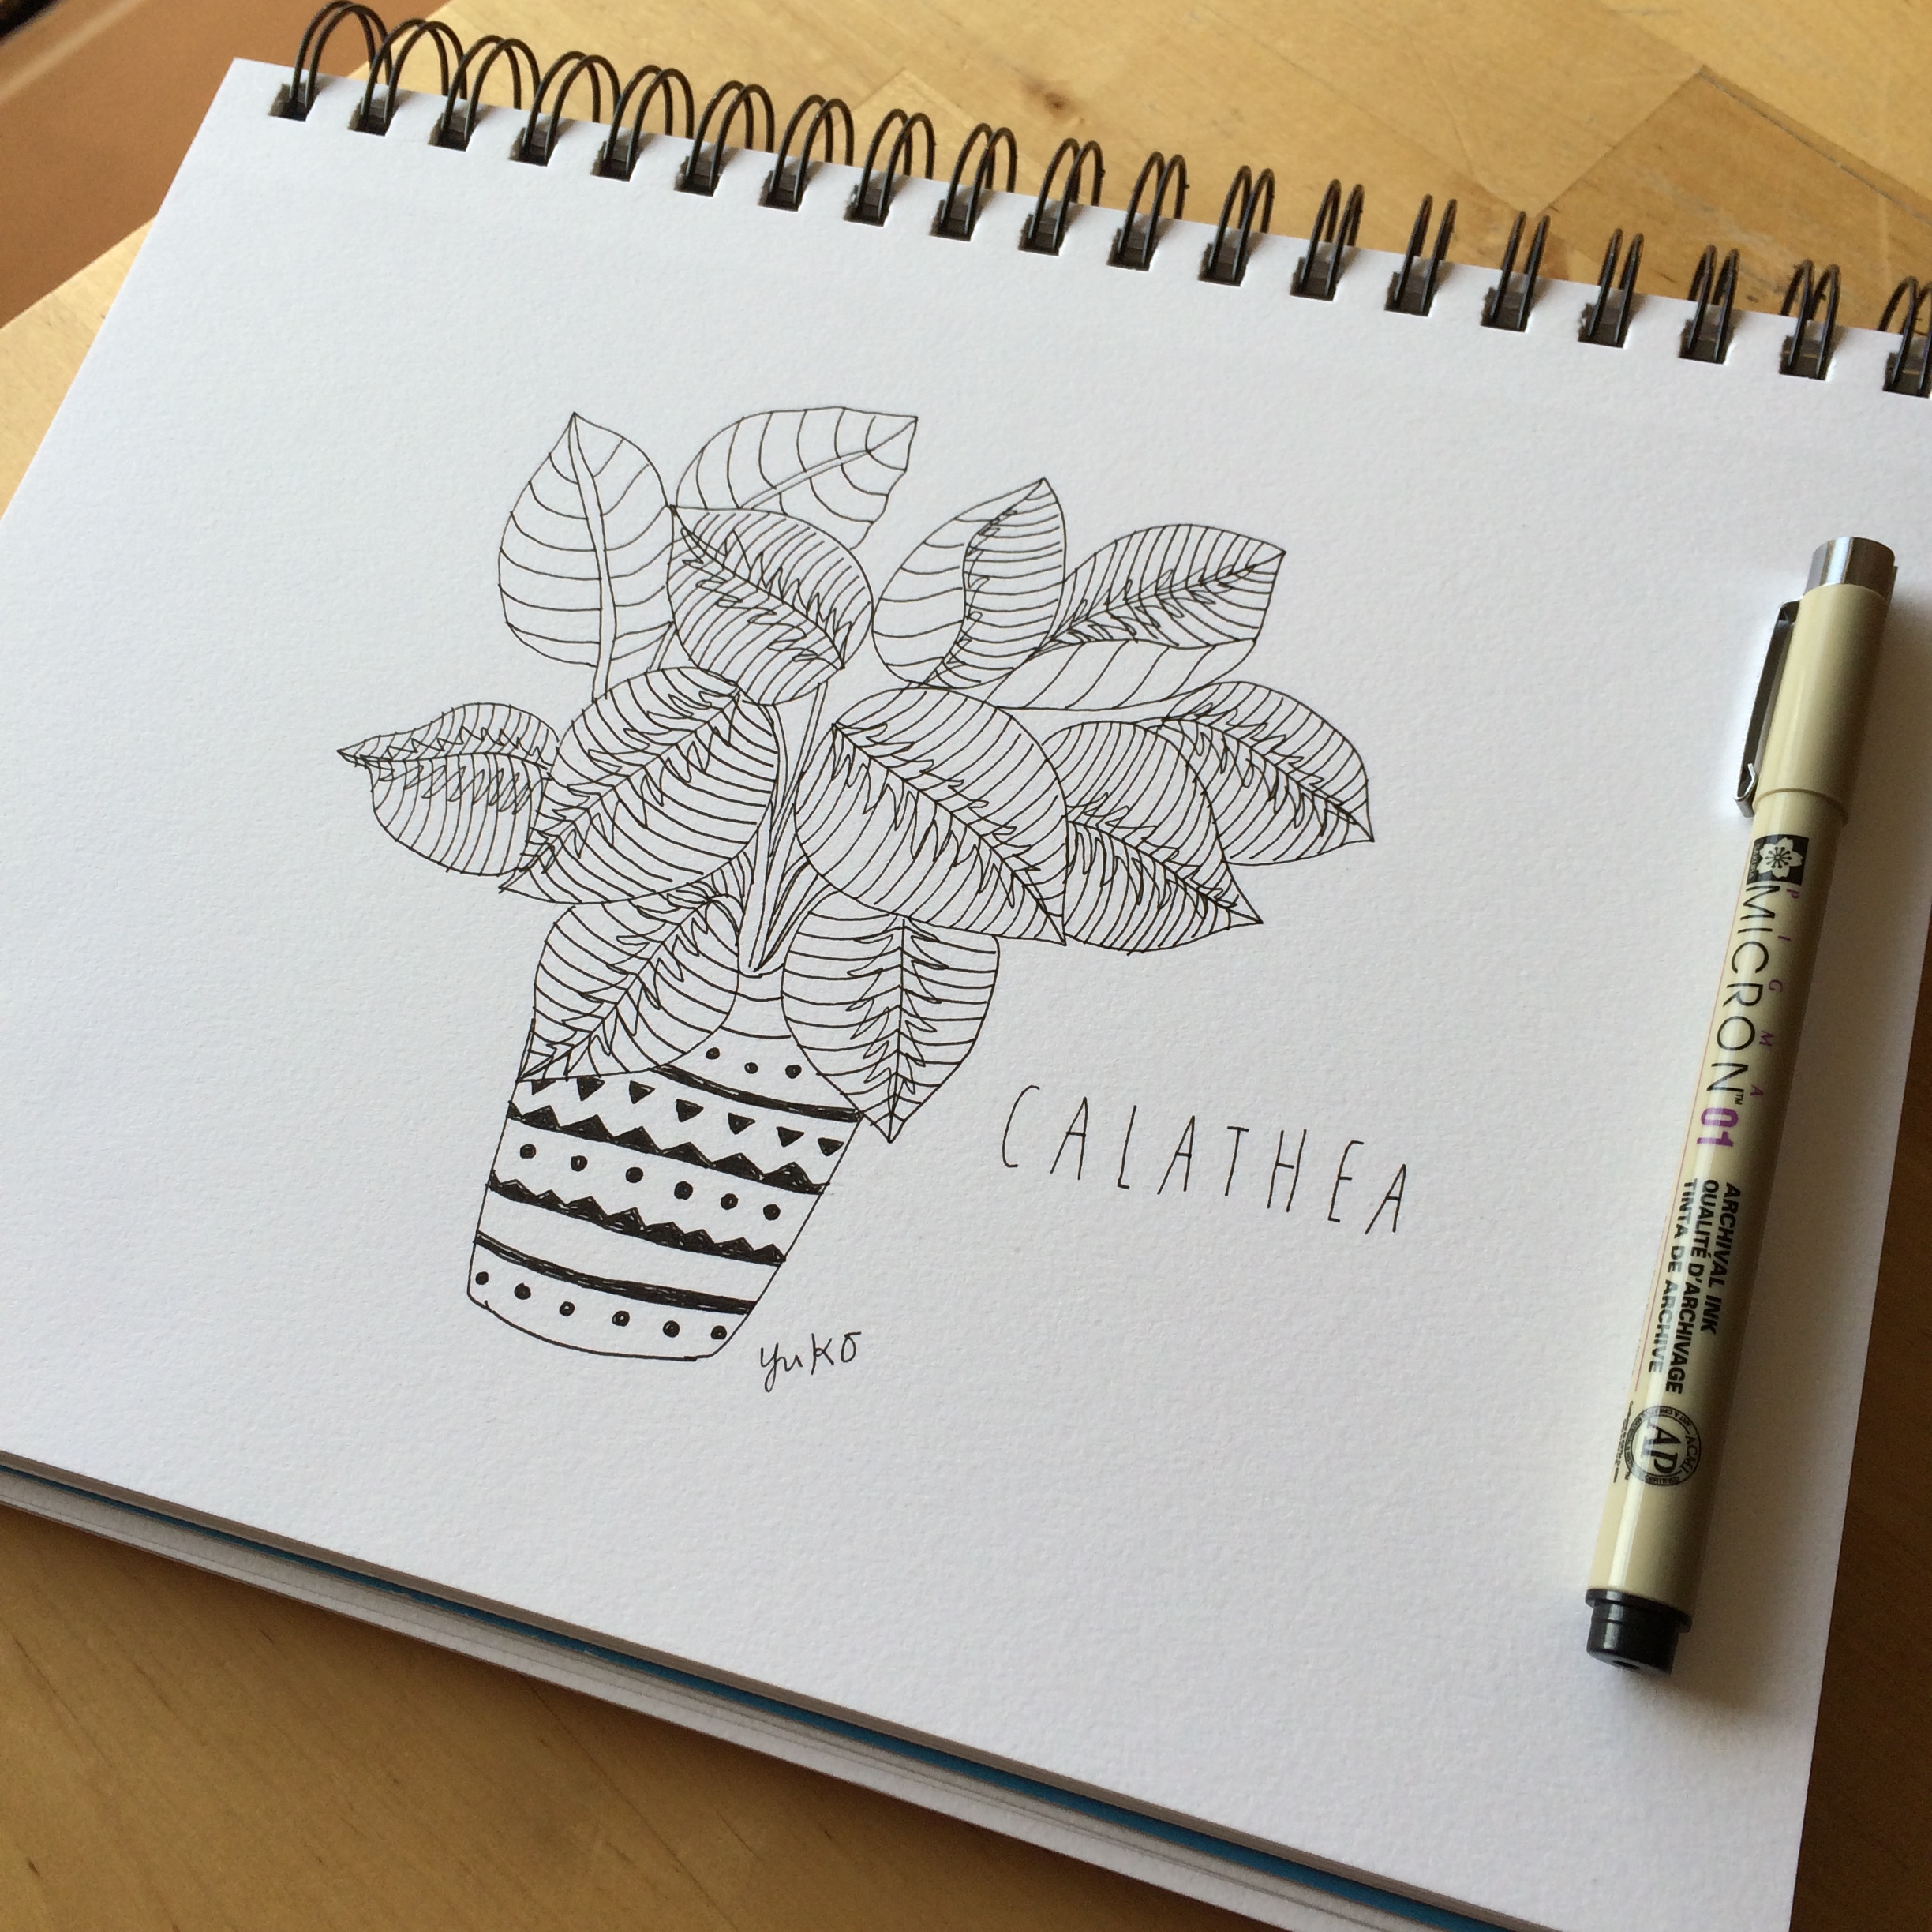
I want to start out by sharing the drawing tool I use the most in my work and play: Pigma Micron Pen by Sakura a.k.a. “Microns.”
You might have seen many of my sketchbook photos I share have Microns, and I was recently asked why I like drawing with them, so let me tell you why!
I started using Micron pens for drawing only a couple of years ago. I chose them simply because some of the artists I admire, like the handlettering artist Sean McCabe and artist Lisa Congdon, use and recommended them.
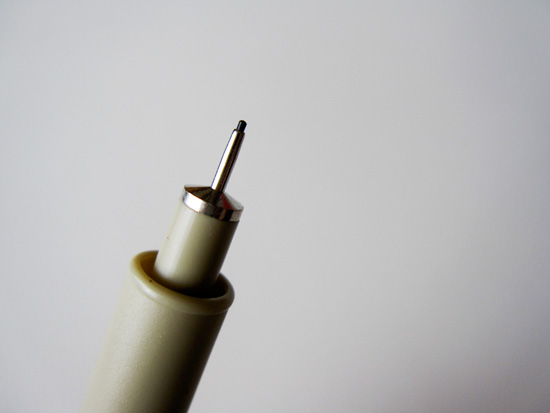
My favorite thing about it is how smoothly and evenly it writes/draws. Its pigment based ink is waterproof and fade proof as well, so I feel confident that my artwork will maintain its quality for a long time.
I like and use size 01 (0.25mm) for most of my work. It’s pretty fine, but since the ink flows out so evenly and the line is so consistent, I can trust it to handle some small detail work nicely.
It works well with my simple and clean illustration style as well. I also like to add my handwriting/handlettering to the piece and this size is my personal favorite to do so.
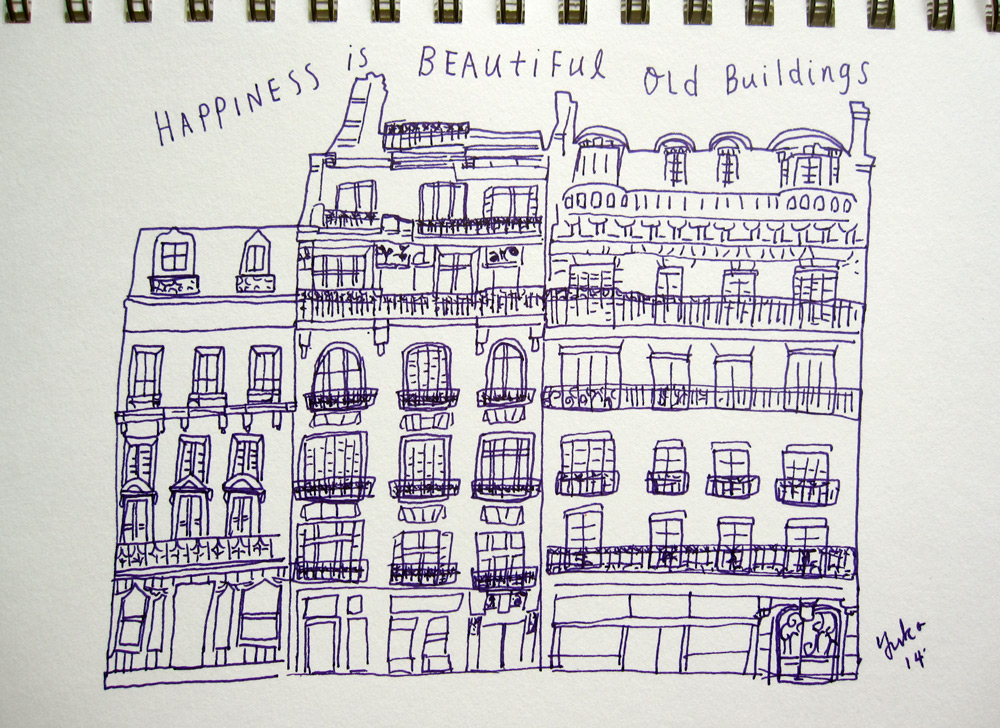
I use size 08 (0.50mm) sometimes when I want a little bit more boldness. This drawing was done in size 08 Micron.
No matter which size I use, I typically stick to using just one size within the same piece. I like the consistency of the look.
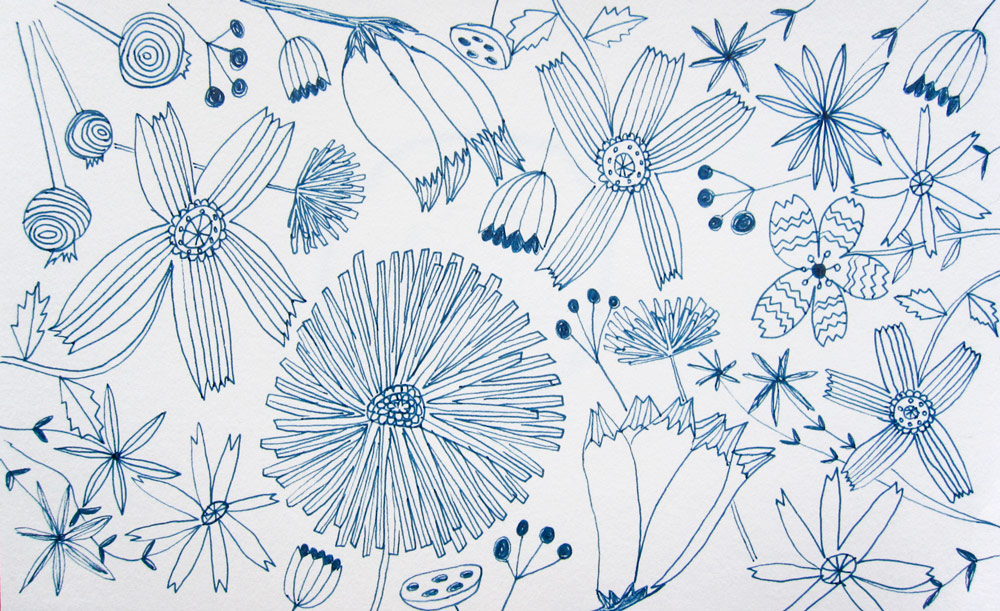
As far as colors go, I like drawing in black ink the best. I do like other colors and do draw with them occasionally to switch things up.
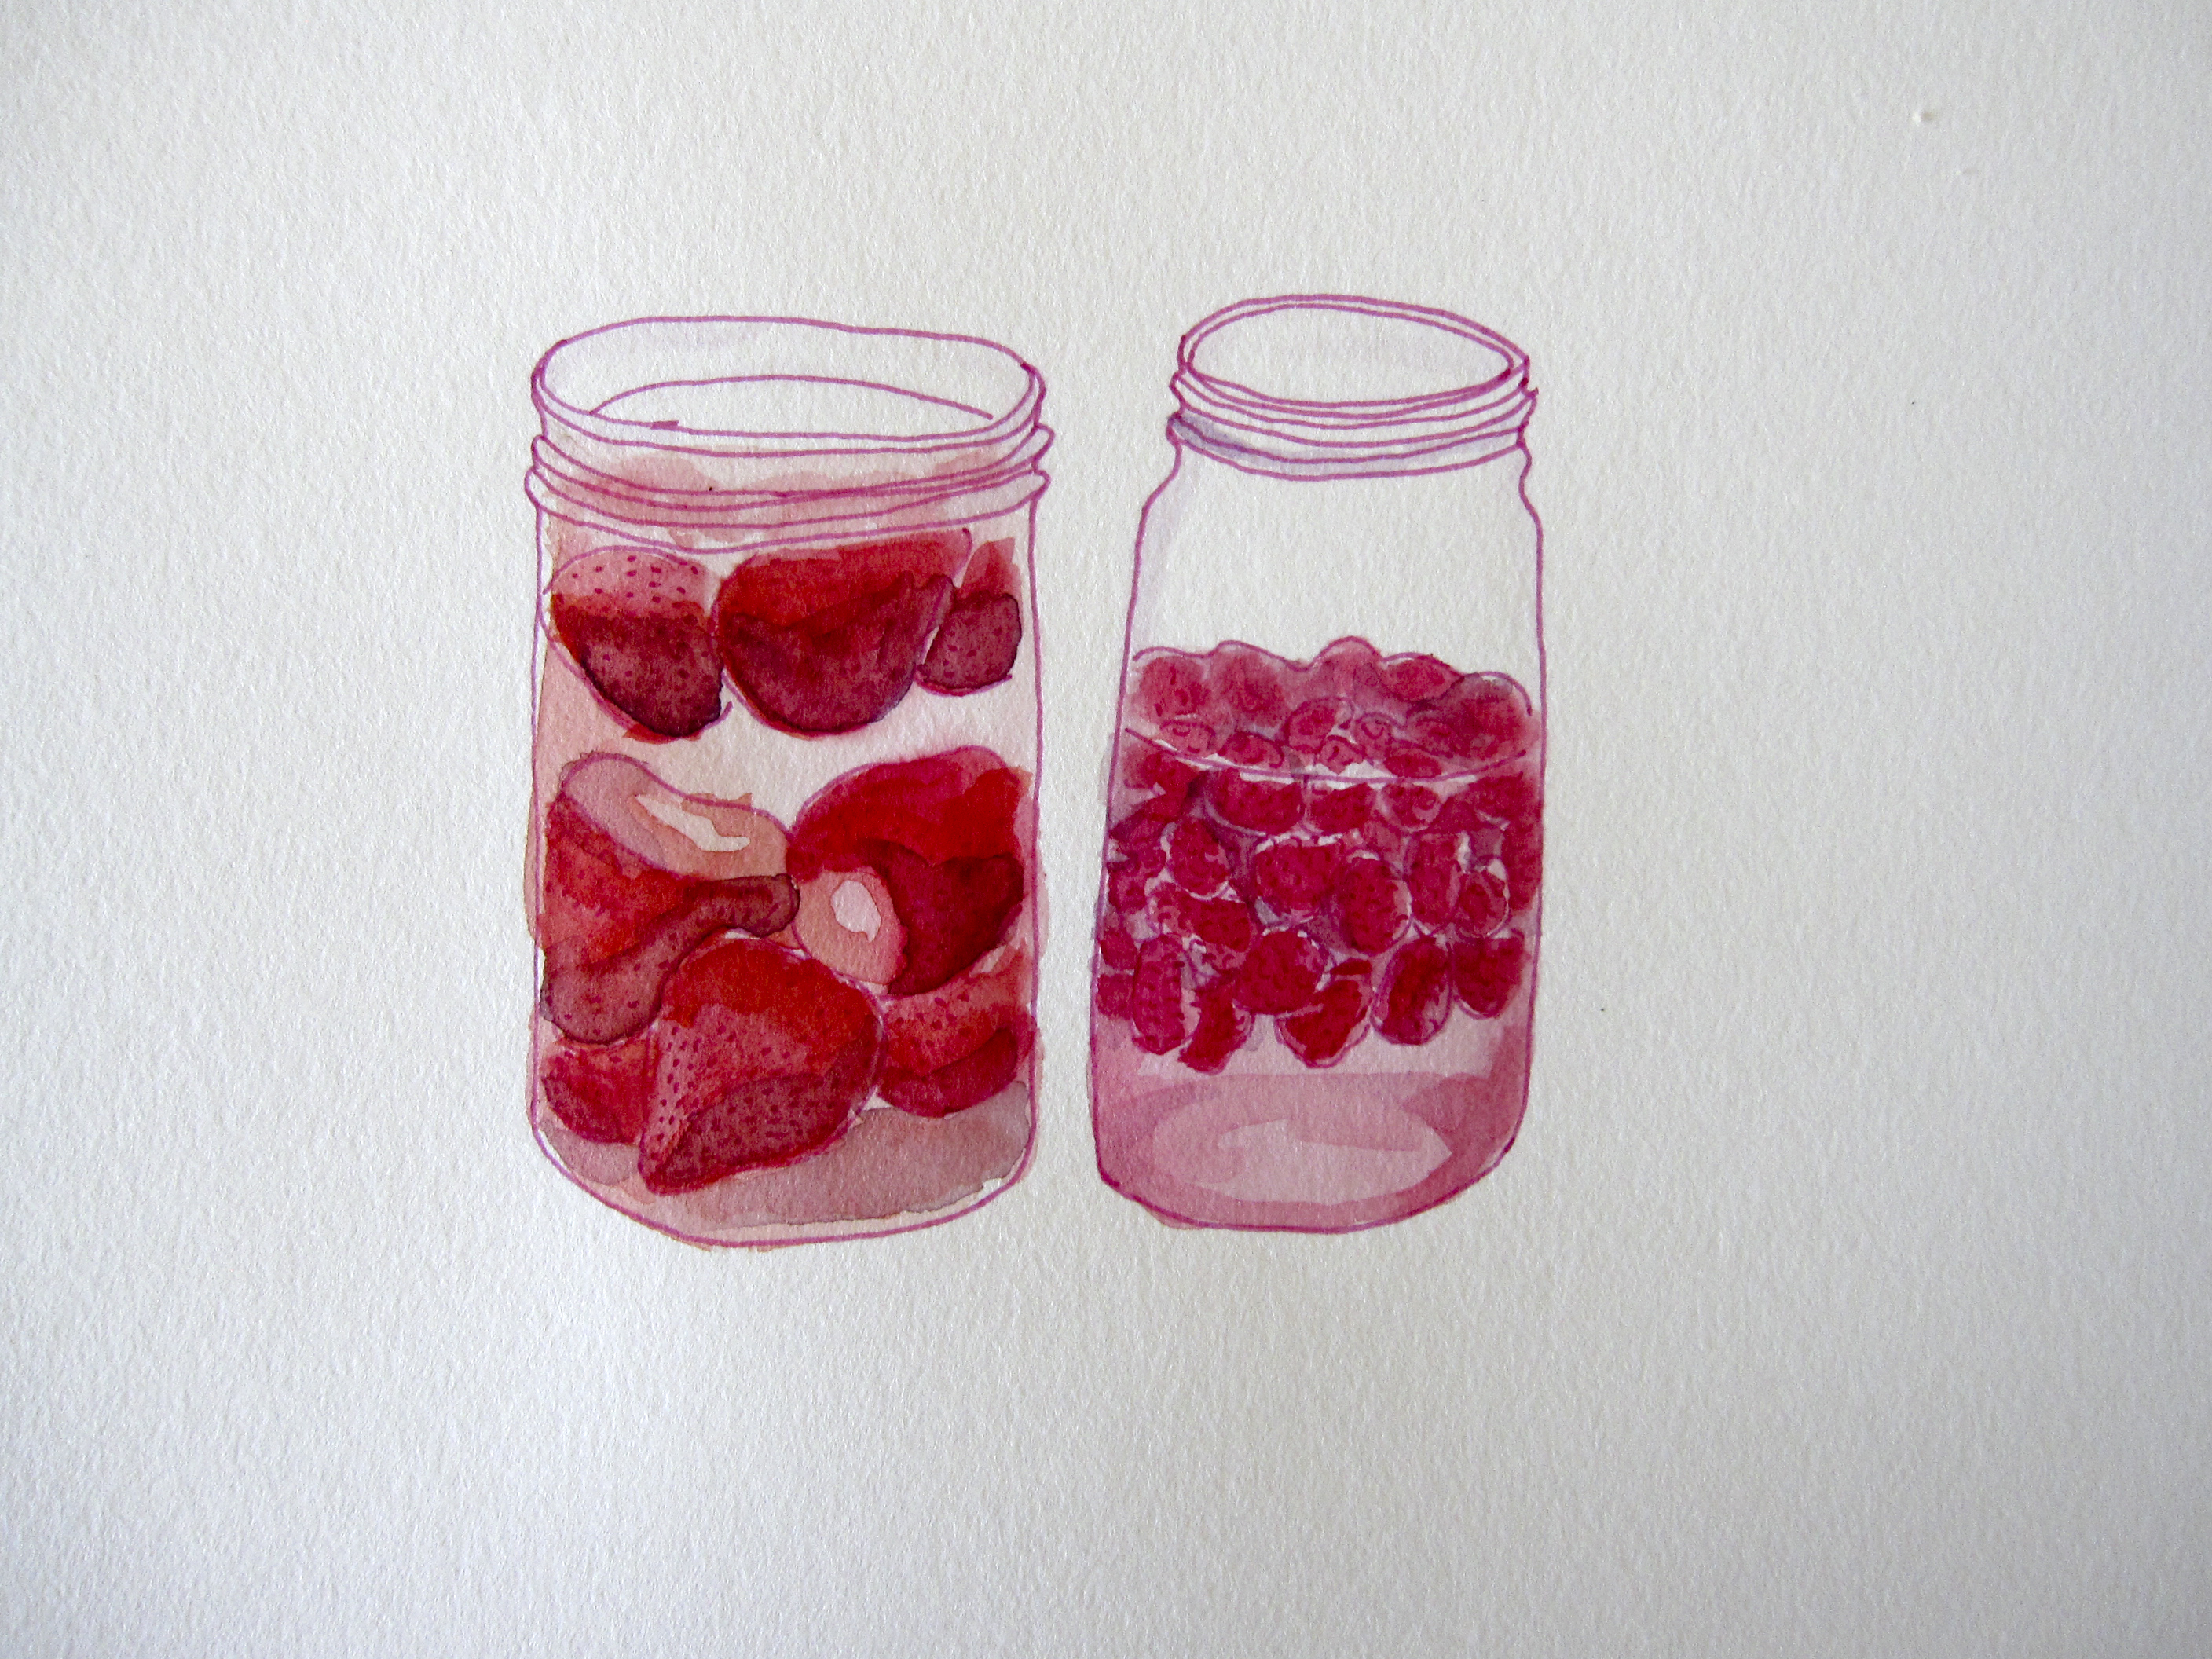
Floral line drawing in blue/blackOld buildings in Paris in purpleMushrooms in blueBerries in Jars in rose
I pretty much use my favorite Micron for all my writing and journaling too.
When I make my drawings, I typically just draw with the pen and no pencil sketch first. I used to sketch with pencil first and trace over it with pen, but when I did my 365 Day Happiness Is drawing project in 2014, I quickly realized that I simply didn’t have the time to be sketching first and making a perfect drawing every day!
When I draw with pen, my drawings have more spontaneous and organic look. It’s the key factor that makes my drawings wonky 🙂 Of course, I don’t always get it the first time when I draw with pen. So I start out sketching or practice drawing with pen or pencil a lot before I work on the actual piece. It’s a bit scary but I like the drawings I make this way better than any other! Plus you can use Photoshop later to touch up small mistakes 😀
If you want to see how I make my line drawings with a Micron pen, I share my steps in my upcoming tutorial here. And I’m guest Instagramming on Sakura’s feed this week in case you’re looking for more inspirations!
I’ve used other pens to draw before, but this is the one I keep coming back to. If you’re in a market for good quality drawing pens, give them a try 🙂
Are you on Instagram? If so, check out Sakura of America‘s feed this coming week! I’ll be their guest Instagrammer 🙂 Woo hoo!
I’ve loved using their products for several years, especially the micron pen (I often use black micron size 01) and Koi Coloring Brush Pens. So I was super excited when they reached out to me and invited me to be their guest Instagrammer.
Looks like I’m not going to run out anytime soon…
They first contacted me last summer after I competed my 365 Day Happiness Is drawing project from April 2014 to April 2015. When I say put your work out there consistently and the opportunities will come, I’m not kidding!
I’ll be posting new drawings on their feed every day this coming week 🙂 Hope you will follow along for daily inspirations!
I offered a free 4-week Creative Coaching email challenge during the month of January. I had about 40 creatives join me and sent out one prompt/challenge every Monday. I had a great time coming up with the challenges and enjoyed helping other artists explore their creative passions and make plans to achieve their goals.
First week’s challenge was to create an artist manifesto. What the heck is an artist manifesto, you might ask? Well, you can think of your manifesto as your personal or professional values statement. It’s a set of guiding principles to live your creative life by.
No matter what your creative pursuit is or where you are in your journey, it’s absolutely critical for you to understand why it’s important to you. Following your creative passion is a very rewarding but often lonely and scary journey. When the road gets rough and you start wondering if it’s all worth it, I want you to remember that you’re choosing this path for yourself. You’re saying yes to your creative passion because you want to, not because someone is forcing you to!
Your artist manifesto is like your compass. When you feel lost in your creative endeavor, you can always come back to it, and it’ll help you make a decision that is best for you.
I thought this was a perfect way to kick off our challenge for the month, and a lot of participating artists thought so too!
I asked if I could share their beautiful work and the process with you, my lovely blog readers, and I’ve got an enthusiastic YES from a handful of the artists!
I hope you enjoy meeting these artists and get inspired by their work as much as I did 🙂
Lisa Kaye
I am a painter/mixed media artist. I am truly my best self when I am immersed in the creative process. I was struggling with self-promotion, balance and finding a direction that was authentic to who I am as an artist. I was growing in many different directions at once without any real focus.
Working with Yuko I was able to create a plan and even narrowed down a direction (for now) that will support my continued growth as an artist (just even being ok with referring to myself as artist was a big deal).
I liked creating my personal manifesta because instead of just writing about my creative process or who I wanted to be as a painter; I was able to shift my focus to the bare bones of who I am and how I move through life as artist.
Lisa’s Artist Manifesto, or as she likes to call it her manifesta 🙂
Beth Colletti
I’m a mixed media and embroidery artist living in New Jersey and am always on the lookout for moments of wonder that I can capture in my work. I love to combine paint and thread to highlight beauty in places that are easily overlooked. My desire is to invite my audience to find reasons to delight in life’s ordinary, yet magical moments. Currently I’m working on expanding my product line beyond wall art to include other home decor items.
I actually had a lot of fun working on my manifesto – it came at just the right time when I was floundering a bit with my work and feeling a little lost. This project helped me really drill down to why I’m doing what I’m doing and gave me the momentum I needed to keep pushing forward. I find without reminders like this, I can get lost in the weeds of busyness and start comparing myself to other artists too much. My artist manifesto reminds me I’m on a unique journey filling a role that only I can fill.
You can find out more about me and my art at www.bethcolletti.com or follow me on:
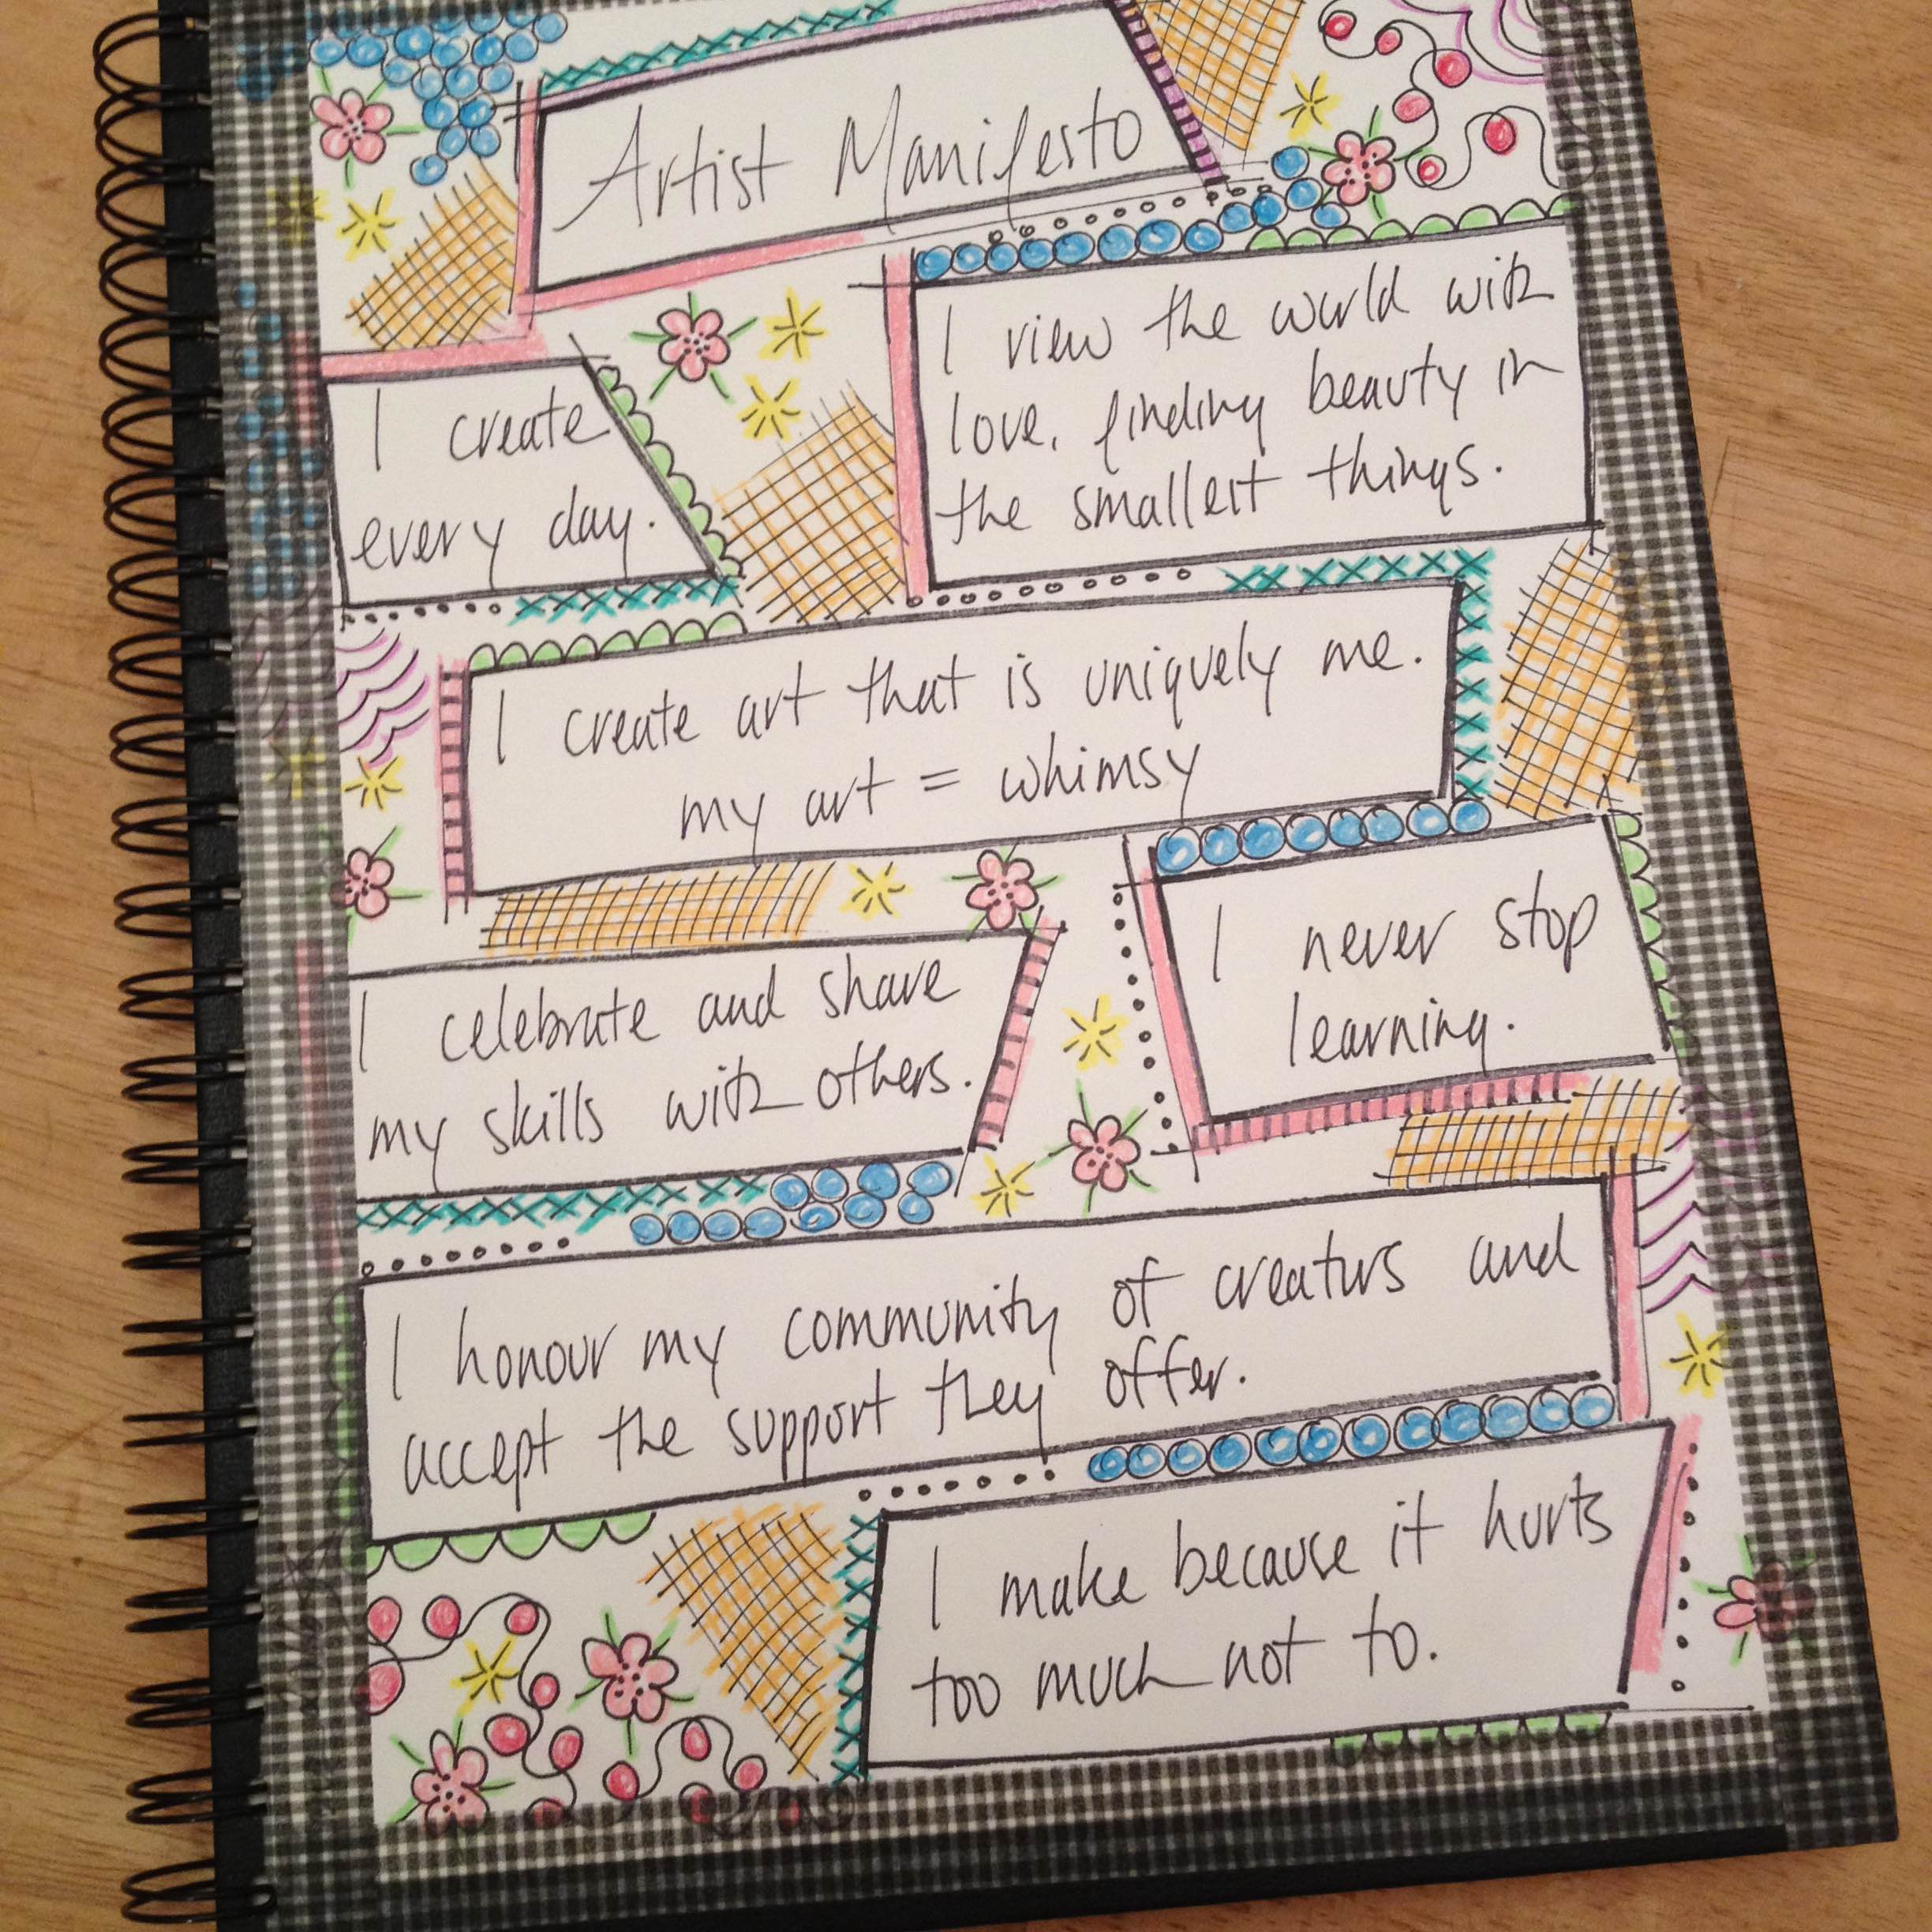
Tania Denyer, 46 years old, have been an artist since ever I can remember. I sew, crochet, draw, paper craft, cook, bake… if it requires my hands and my heart, I am there. In 2014 (after an unexpected and traumatic job loss) I decided to start my business, Ginger Quilts.
I make custom quilts, teach quilt classes and do longarming for hobbyist quilters. Just before I lost my regular job, I was reading The Artists Way by Julia Cameron on the train and her introduction had me in tears. It was the start of realizing that my creativity was not something crazy I had to hide but a gift that I could celebrate and share 🙂
Creating my artist manifesto was at first a bit daunting, then as the thoughts came and I worried less over what I should and should not say (silencing the critic) it was fun! I felt empowered. I decided to write it out and doodle a bit (I have a doodling heart) and tape it somewhere I would see it instead of hiding it away. I felt it needed to be somewhere I could see it, read it and remember it… putting it on my sketchbook (I try to sketch everyday) was exactly where it needed to be.
My name is Emily Vanderlinden and I’m a volunteer, artist, and self-guided learner. This means I have decent say in how I spend my time so I try to balance it between being in community with those around me, researching topics related to my Open Masters (find out more at www.openmasters.org), and block-printing on fabric.
Most days I manage the social media accounts and website for Innisfree Village, a lifesharing community with adults with disabilities, and participate in art making with those adults. Whenever I can squeeze in some time, I read books about the optimal human experience, how to find flow and happiness in our work, art therapy, and printmaking.
I also go on walks and hikes to get inspiration from nature and create block-printed patterns according to those findings. I have a degree in Graphic Design, so I also do some freelance work for friends when I can!
I do a lot of my work on the computer so most of my brainstorming for this manifesto happened in rapid typing and stream-of-consciousness sentences! I’ve thought a lot about this in the past so it wasn’t particularly difficult, though finding a format that made sense was a challenge!
I chose to do my artist manifesto in a circular form to remind me that this is continuous and I can always add to it. After completing the writing, however, the paper felt boring and I wanted to leave the text clean so I chose to attach with a brad it to a colorful backing by one of the artists I work with. This way it spins for easier reading and reminds me what colorful people I have in my life to draw from!
By the time my manifesto was finished I realized that content AND function are a huge part of why I do what I do.
Isn’t it so cool to see how different artists come up with their artist manifesto? Every time I received an email from the participating artists and read/saw what they were working on, I got the chills. It was such a humbling experience to be the witness to their struggles, joy, and growth.
I was so honored to have them and others join me and learn with me in January! Make sure to check out their work and follow them on various social media platforms 🙂 BIG thanks to everyone who participated!!
I’m pretty sure I’ll be hosting a challenge like this again in the future – if you want to be kept in a loop, you can sign up for my e-newsletter here.
The other day, I was at a craft show with my booth selling my paper and hand block printed goodies.
It was going pretty slow for me. But I always enjoy getting to know my fellow vendors and chatting with the people who stopped by my booth.
In the afternoon towards the end of the day, this mother and daughter stopped by to look at my products. They were saying to each other how cute they thought my stuff was, so I thanked them and let them know they can pick up/touch anything and ask me any questions.
The mom started chatting with me about what I do and asked me how I became an artist. So I gave her a short version of my background and told her how I started making art for fun as an adult and gradually became serious about pursuing it as a career and eventually quit my day job at a non-profit social service organization last summer.
She seemed delighted to hear my story and proceeded to tell me her daughter is an aspiring artist. Her daughter was standing next to her looking a little uncomfortable now the focus was on her. She was about 13-year-old and wasn’t saying very much at this point.
Her mom started showing me the pictures of her drawings on her phone and was so proud of all of her daughter’s work.
I told them I liked her drawings – they were Manga drawings she’d made on her mom’s phone, and it reminded me of my Manga-drawing days of my pre-teen years, too. She smiled a little shy smile. She started scrolling the photos and showed me more work and told me a little bit about each – about the outfit her character was wearing, what the scene was about etc.
Her mom then asked me if I had any advice for her daughter for becoming a working artist some day. I thought for a second and shared my thoughts with them.
You’ve gotta work hard.
Practice drawing every day. Don’t try to make your work look like someone else’s. Your skills are important, and having your own style is even more important. Find something that’s uniquely you and let it shine through all of your drawings. Enjoy the process. And put your work out there! Let people find your gift.
I get pretty fired up about people pursuing their passion, so I may have been a little intense. But that’s the best advice I’ve gotten and wanted to pass on to anyone who is wanting to choose a creative path.
She nodded as she listened to what I had to say. After our little chat, they thanked me for my time and advice and left my booth to get on with their afternoon.
As they walked away, I felt a huge sense of fulfillment and truly wished her dream would come true some day. And I was once again reminded of how privileged I was to be able to pursue my creative passion so wholeheartedly in my current life.
And also, how cool is it that her mom is super supportive of her daughter’s creative passion? It’s so important for creative people, especially young people her age, to know that what they create is valuable and internalize that message.Having a parent who is so excited and encouraging of her creative path would help her future endeavors tremendously!
Try to encourage young people in your life to stay creative. And you can be a role model by staying creative yourself 🙂
Like many of you creative people, I love to learn. I love learning new skills and tools to create something new. Sometimes I set goals to learn specific skills (e.g. writing, learning a design software etc.) and tackle them businesslike, and others, like cooking and sewing, kind of happen organically.
Last October I posted a nature drawing tutorial on this blog and really enjoyed it. I’ve been meaning to do more tutorials and was hoping to venture into video making as well. And lo and behold, I was asked to be a guest teacher for the e-course The Journey Within: A Year of Handmade Art Journals hosted by Kiala Givehand in March!
I was honored to be asked, and it’s given me the push I needed to make my very first video tutorial!
I worked on it last week and learned a bunch in the process. I’m all about sharing tools and processes with you in case you find it helpful, too. For the most part, I didn’t use any fancy tools or tricks and hope it’ll make the process more accessible to you if you’re thinking about making a video yourself. This is my first time making a video, so if you’re more experienced, you probably won’t gain very much from it. But if you’ve never made one and are intimidated by it, this post is for you!
Enjoy the behind the scenes peek into my video production!
1. PLANNING
By nature I’m a planner. I like to gather as much information as possible before I get started on something new. I’ve been getting a little more relaxed about not having all the information before I start something lately, though. I know a lot of learning happens during the process of doing, and if you wait till the perfect moment, you may never start anything!
I don’t have unlimited financial resources, so I wanted to make this video without spending a ton of money and wanted to do this with things I already had without compromising the production quality too much.
I really didn’t know anything about creating a video, so I went searching for tutorials about filming and editing your own video on the internet.
Although this is not specifically about making a video tutorial, I found this Skillshare video, “DIY Filming: Creating Pro Video Using Tools You Already Own” by Mark Cersosimo super helpful! It was very easy to follow, and he has lots of practical tips you can use.
I also created an outline and scripts before I started filming so I have the clear vision of the flow and contents. I didn’t do the storyboarding, though, as I was pretty anxious to start filming. It would’ve made the whole process a little smoother if I had done it.
2. TOOLS
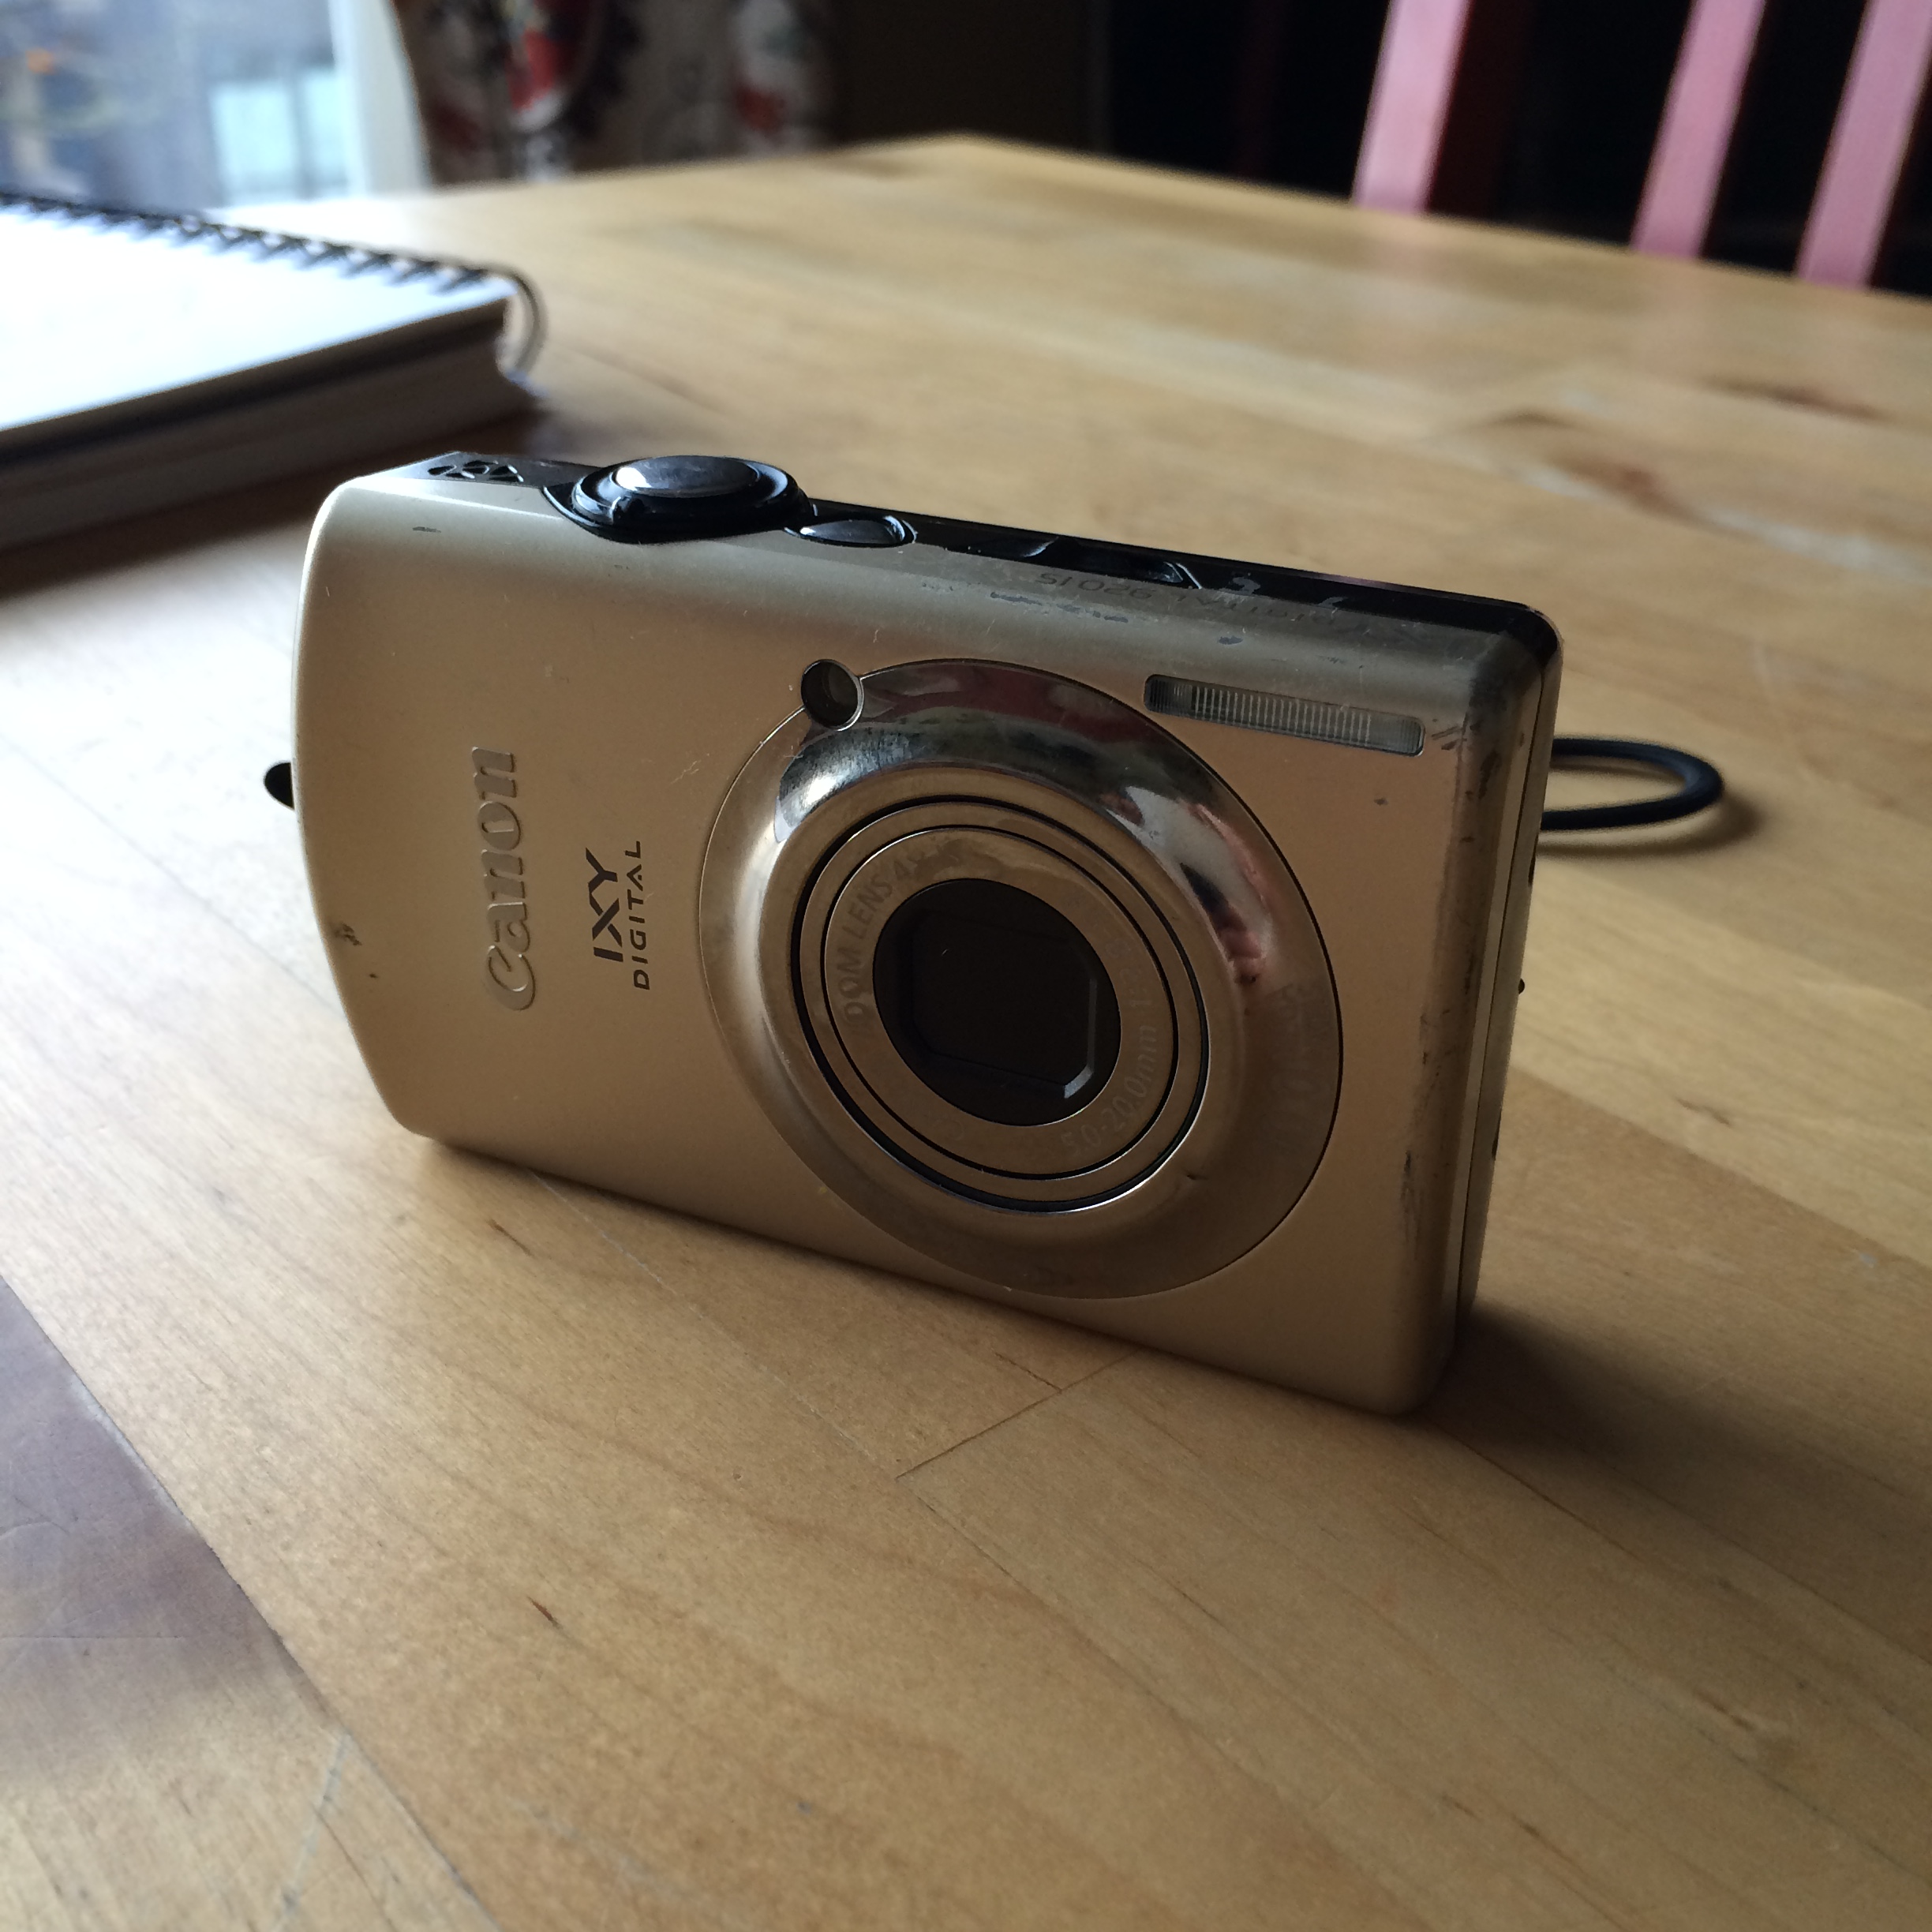
I decided to film with my old-school point and shoot camera. It’s Canon IXY Digital 920 IS, and I got it in 2008-ish? I enjoy photography and would love to upgrade to a DSLR camera some day, but this little camera has served me very well all these years and works just fine for now.
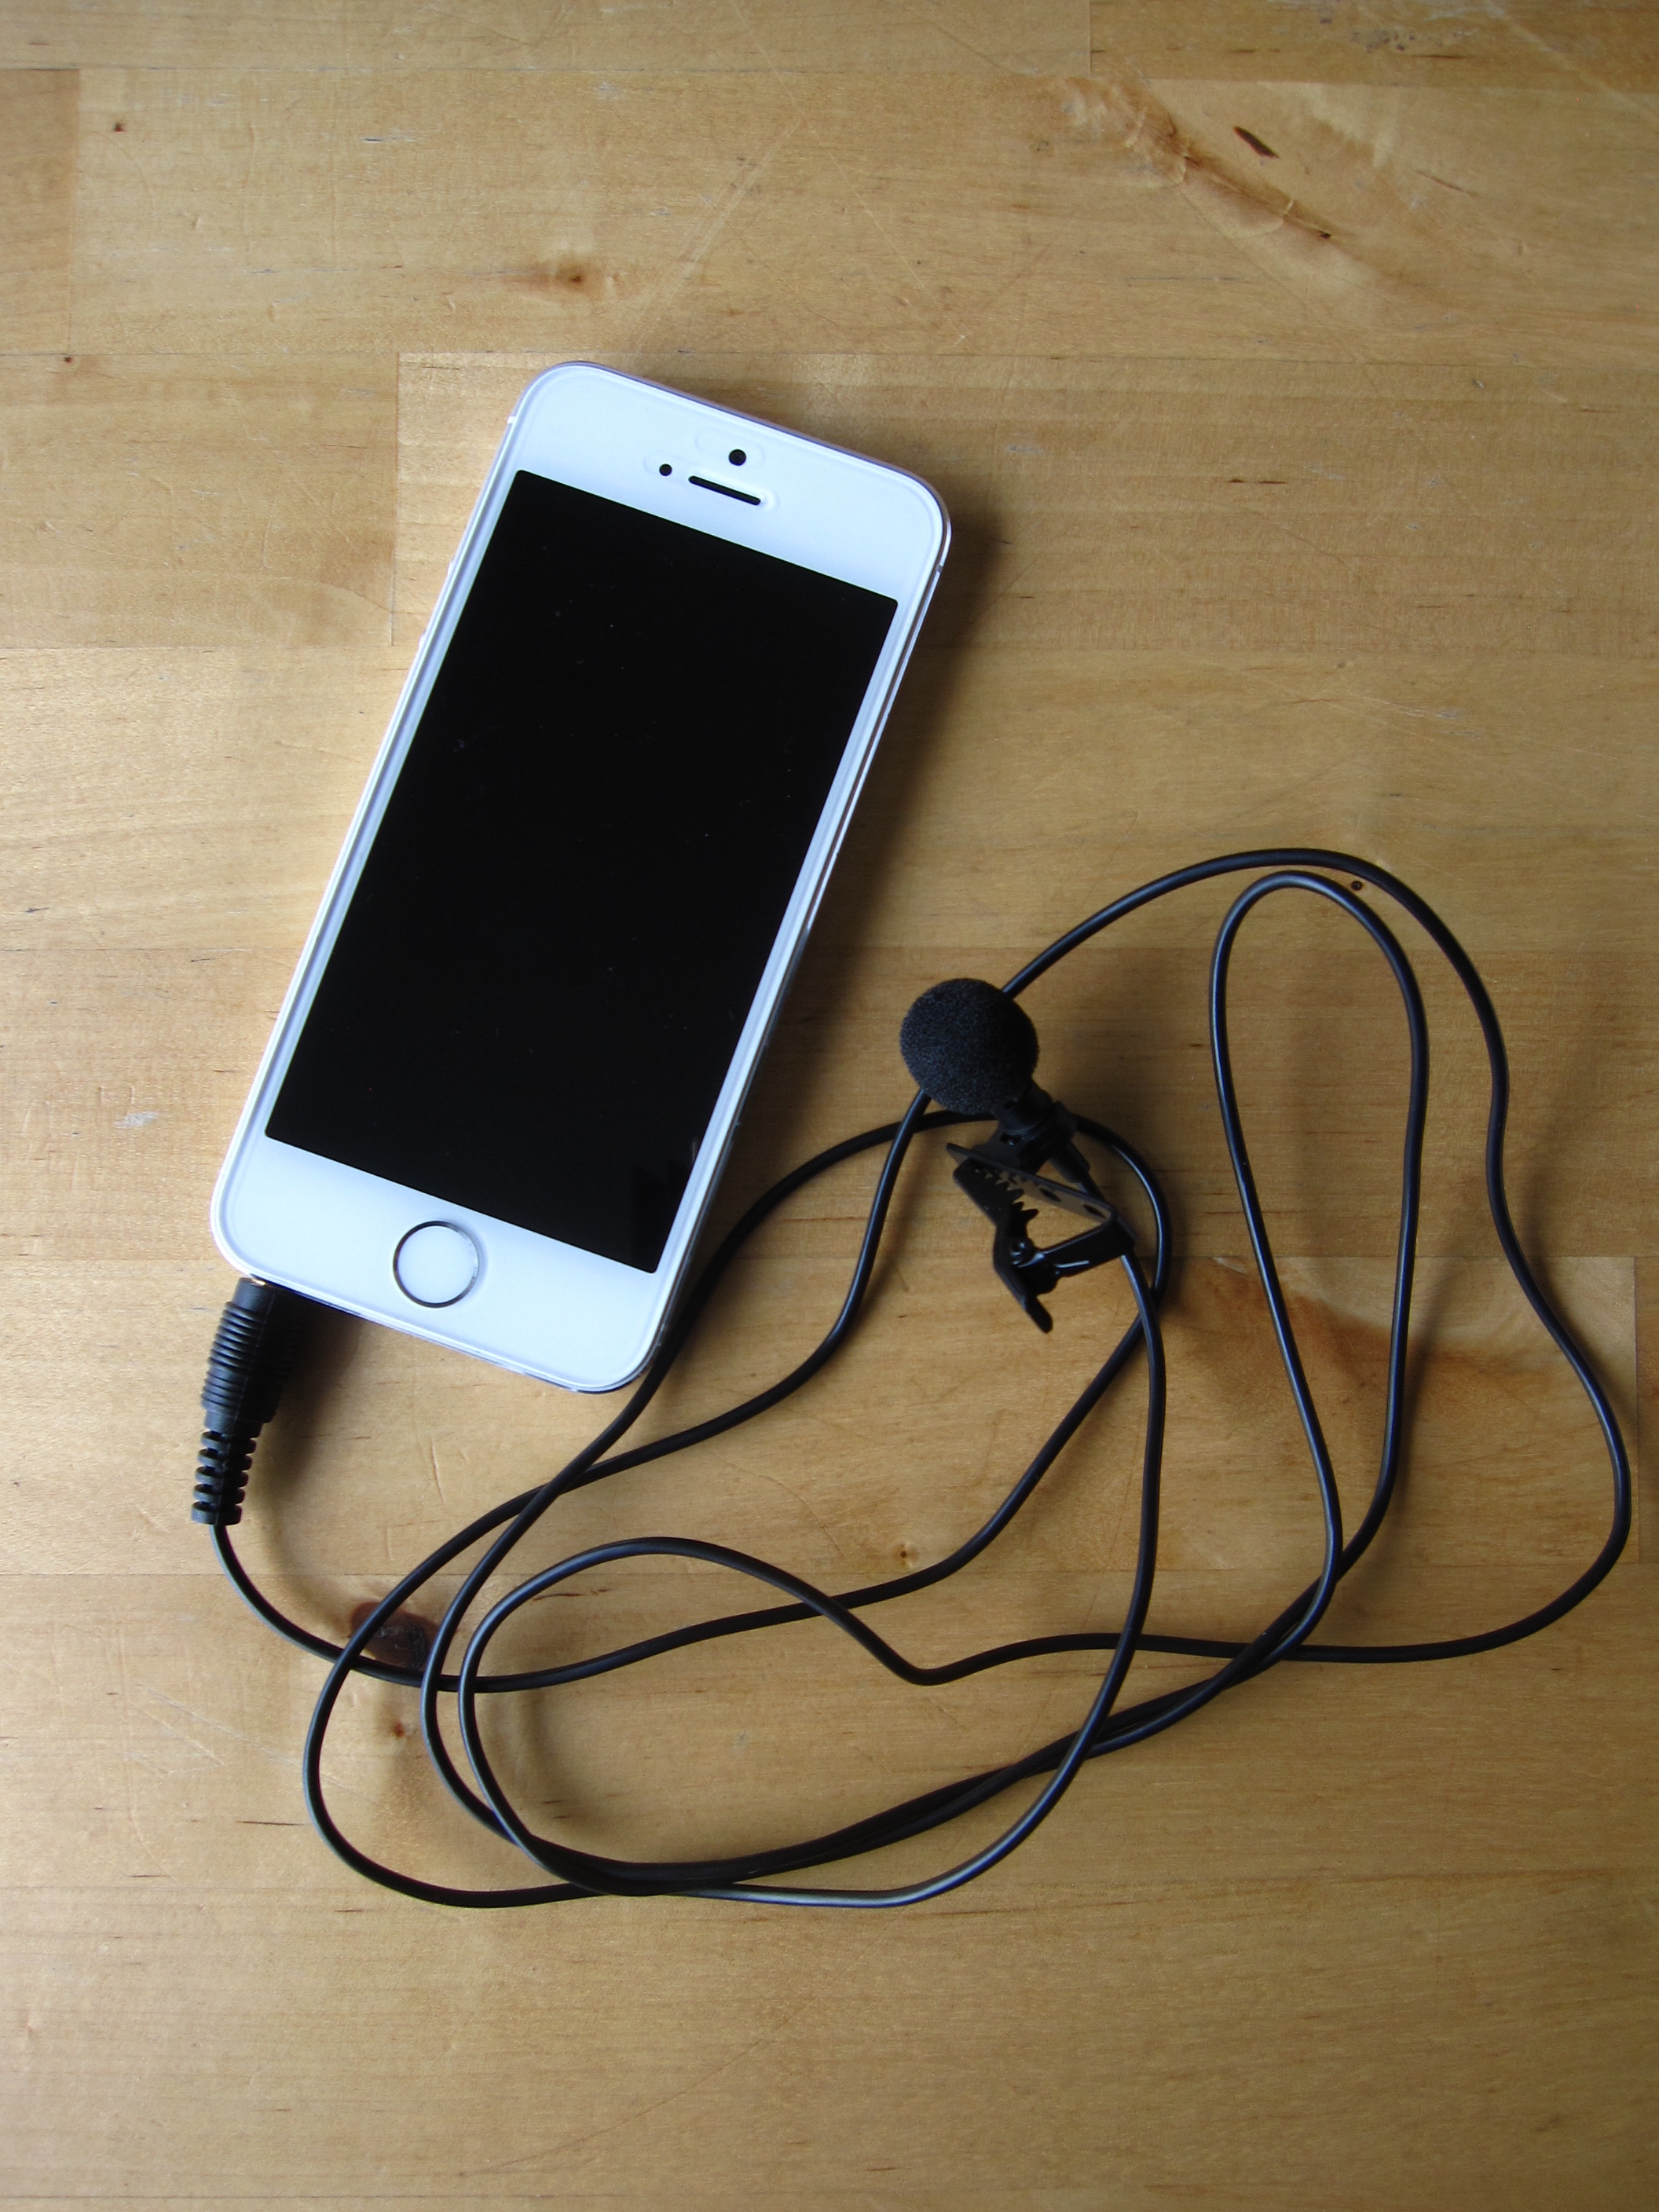
I recorded the audio on my iPhone 5 using the Voice Memos app (comes with your phone for free). I know the camera has a built-in microphone as well, but the quality is not very good. I’ve read that audio quality is more important to the audience than the video quality if you had to choose (here is a quick video to demonstrate the point), so I decided to record the audio separately using my phone.
I could’ve just put the phone in my breast pocket or something like that, but decided to get a clip-on microphone that plugs in to the phone to improve the audio quality just a tiny bit.
We have 2 parakeets in our tiny apartment, and they’re going to chirp no matter what, so I wanted to be extra diligent about getting a good enough quality of audio for this project. I got an inexpensive ($17) clip-on microphone above on Amazon, and it definitely made a difference on the audio quality! Well worth the investment.
Because I was filming this video by myself, I decided to get a tripod. Got this basic tripod on Amazon for $23. It’s got good reviews and seemed fine as a starter tripod.
But when I was doing a trial set-up, I quickly realized my tripod was not quite adequate. It was fine for shooting uplight or angled, but I realized I needed to be able to also get some overhead shots for to show my drawing process more closely.
Dave and I did some creative problem-solving, and came up with this totally DYI set-up to achieve my creative vision 😀
Ta da! OK, I’m a little embarrassed to show you this super DYI set-up, but it totally works! And I didn’t have to spend any more $…which is always a plus 🙂
Basically, the tripod is laying horizontally on a box and a few books I piled at the right hight, with the camera facing down, and I placed a couple of chairs back to back and put a pillow on top for the tripod legs to rest on. You just need to look in the view finder to adjust it to the right hight/angle etc. before shooting.
3. FILMING PROCESS
I set up by the big window in our living room area during the shoot. Since it’s winter in the Pacific Northwest, I got a pretty good overcast indirect sunlight during the day time, which was perfect for the shoot.
While filming different segments, I made sure it was recorded after each take. Sometimes I thought I hit the record button but it wasn’t on, or my video was recording but I forgot to turn on the microphone etc. My camera would also think the memory card was full when it was not (maybe the old age?) and suddenly stopped recording in the middle of the take a few times.
So I’d shoot a segment, stop, check to make sure it’s recorded, upload the good recordings onto my Dropbox, delete the footage from the memory card and reformat the memory card (for some reason, my camera thinks it’s still there even after deleting the footage if you don’t reformat…) and continue shooting again. I did the same thing for my audio. Great thing about recording it on my iPhone app is I can then upload the recordings straight from the phone to Dropbox.
I’ve learned the hard way to label the video and audio files correctly so it’s easier to match them up later when you sync them. For example, I’d shot multiple takes of my introduction and labeled them Yuko’s Intro Take 2, 3, 4, 5 etc. to choose the best one later. But I only uploaded the voice recording that I liked the best and labeled it “Yuko’s Intro” without the corresponding number to match the video, so later when I was editing I had to spend extra time to figure out which footage the voice recording went with.
These are somewhat tedious steps but helped me save a ton of time and frustration when editing the project!
4. MUSIC
How can you tell a good story without music, right? Since I’m not a musician, I looked for some free/royalty-free background music resources online and found these sites helpful!
Incompetech – I found it helpful to start out with their collections rather than searching from a huge database. Their collections are grouped by the genres and feelings you’re looking for.
5. EDIT
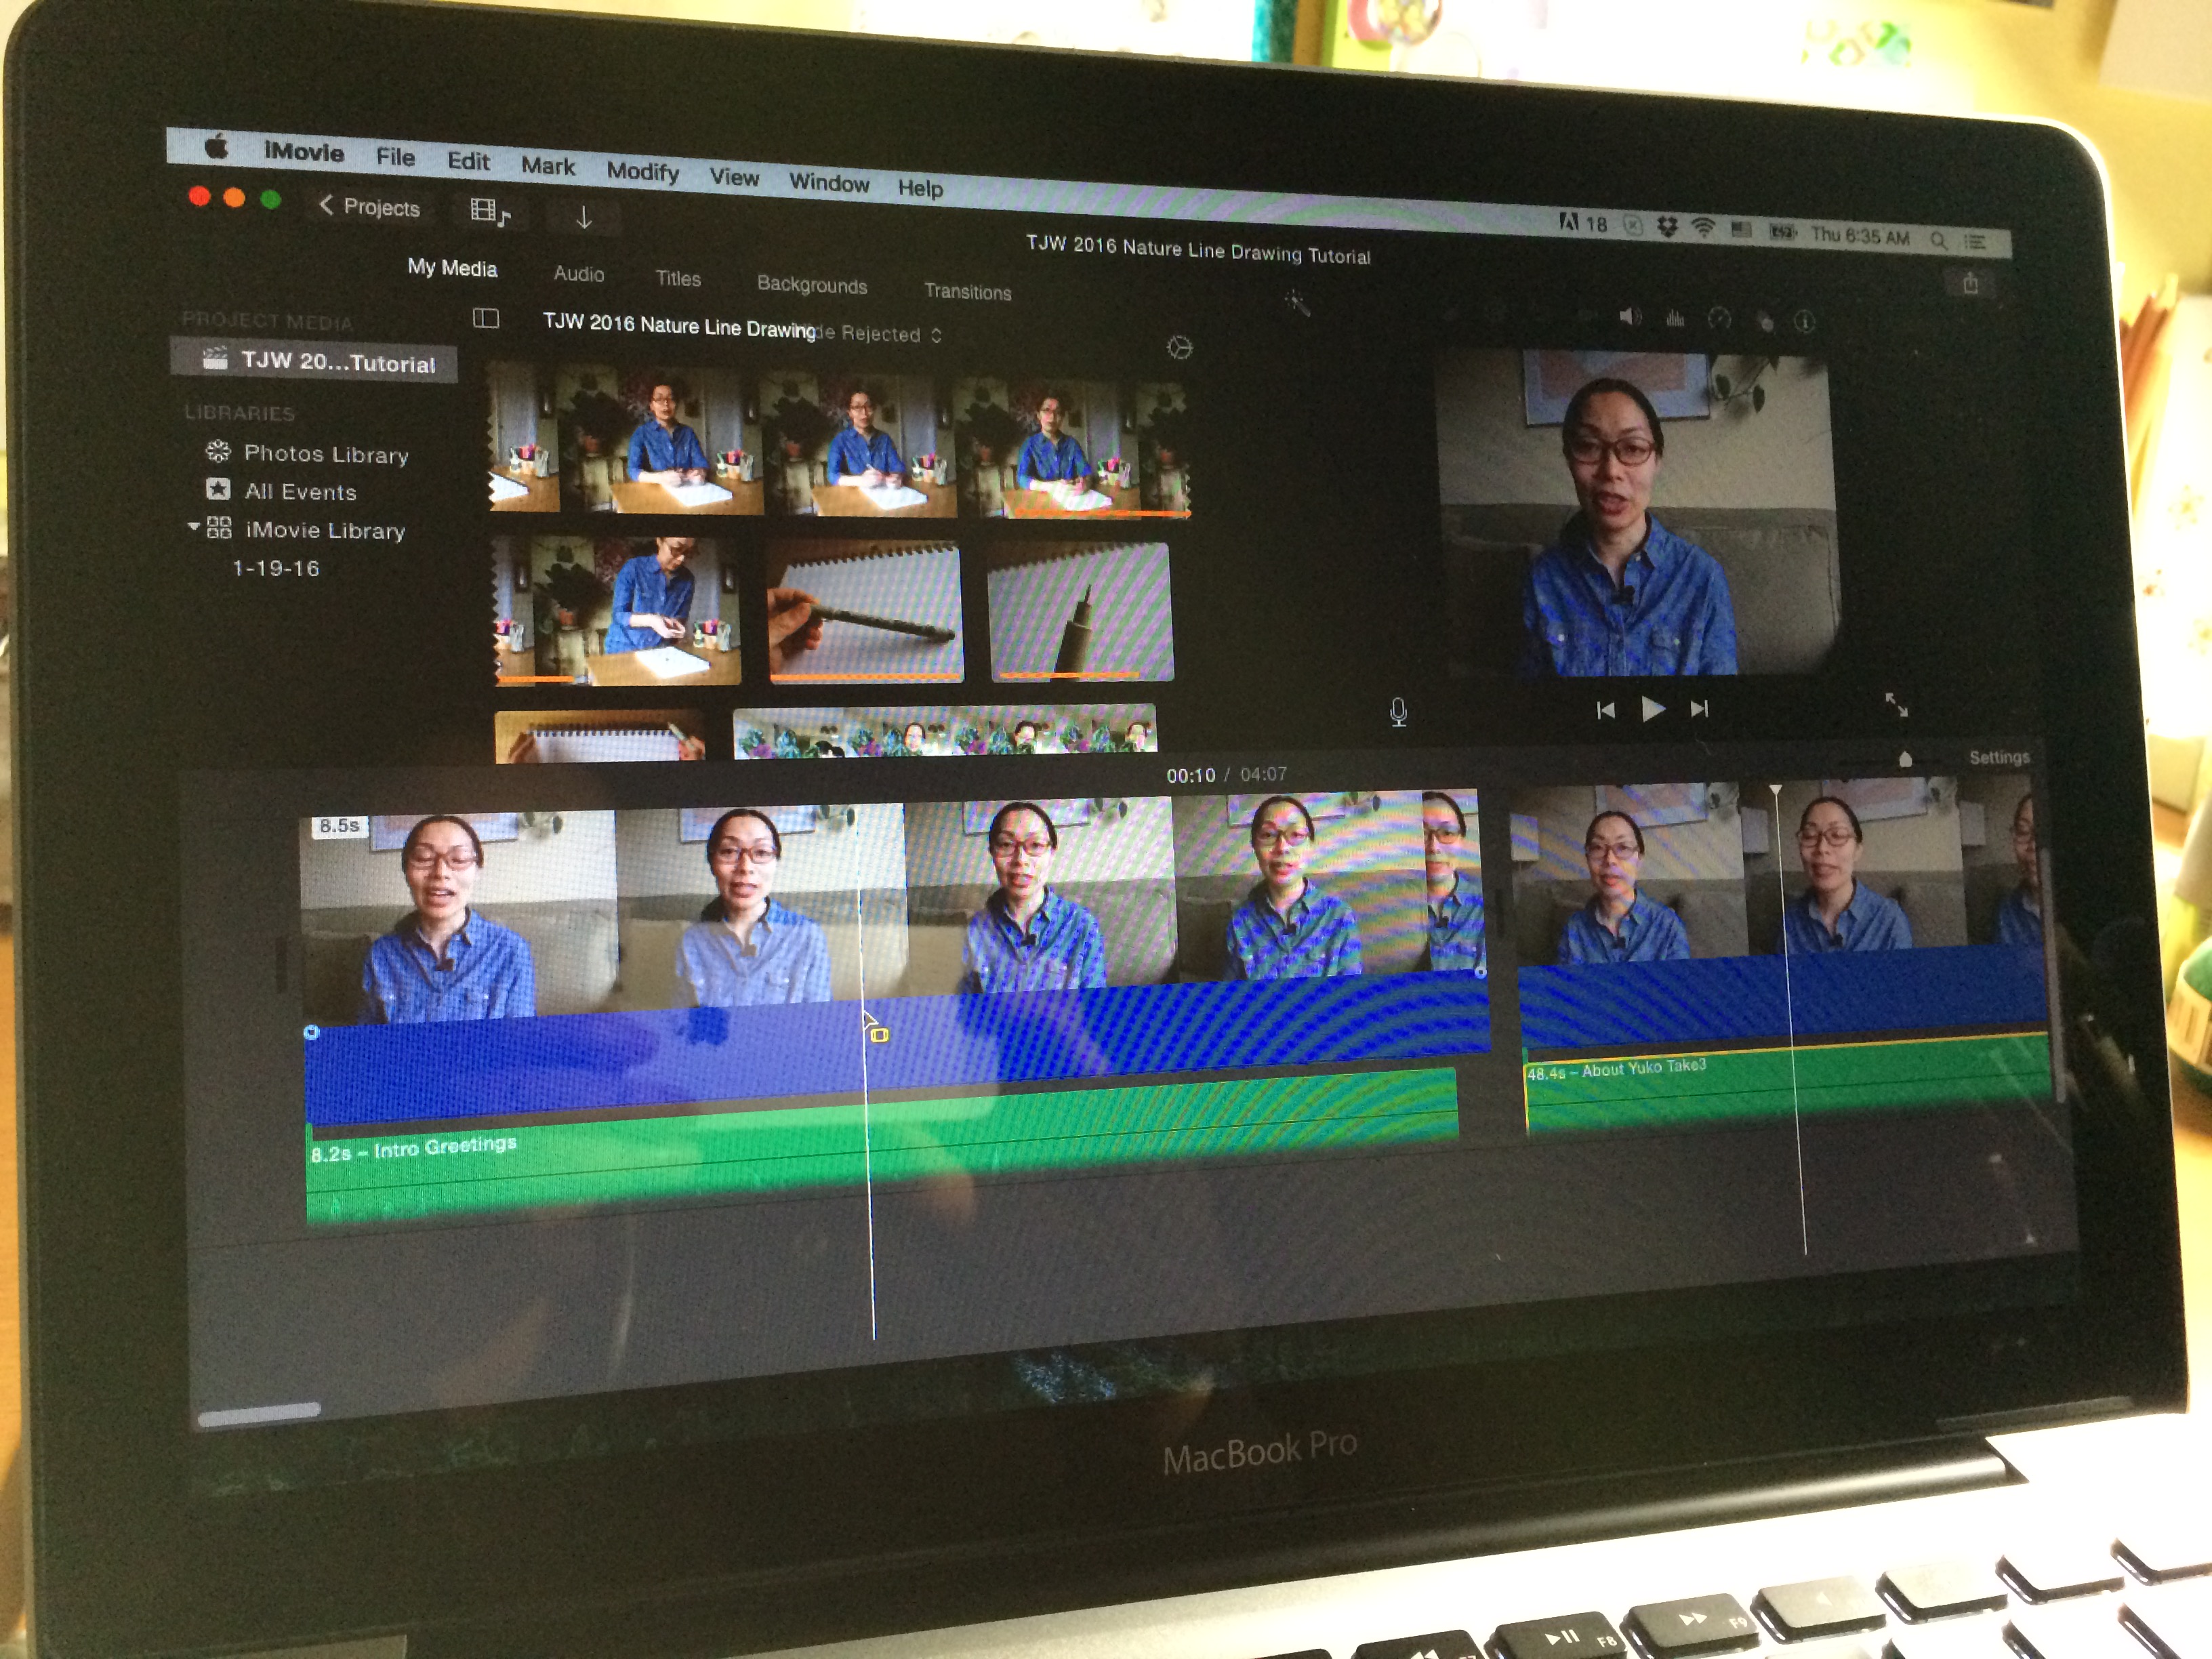
After I got the footage and audio uploaded in my Dropbox folder, I put together the video in iMovie app. It’s a free app that comes with your Apple computer and lets you produce a basic video pretty easily.
Don’t worry the awkwardness of watching/hearing yourself wears off after a while… 😀
Again, I looked for some tutorials on how to edit your video in iMovie and found these pretty helpful!
1. Syncing Sound in iMovie Tutorial by Matthew Pearce is a short and sweet tutorial about how to sync your audio and video in iMovie. I love his “3 claps before talking” trick! So helpful.
2. iMovie 101 by Simply Mac is a quick introduction to the basic functions of iMovie. Good introduction but it’s for an old version of iMovie, so I got a little confused.
3. iMovie Tutorial for Beginners 2016 by Eric Timmer gave an overview of the basic video editing functions for newer iMovie app. It was a little long form (43 minutes) but gave me pretty much everything I needed to know to put my video together in the newer version of iMovie.
OK, that’s it! I had a lot of fun making this video and hope it was helpful for you!
My Nature Line Drawing tutorial will be available for students in the e-course next month. It’s not too late to join the class for this quarter only or for the whole year (definitely more value for the investment!) to get access to my tutorial and tutorials from 18 other teaching artists.
And here is a mini clip of me flipping through my sketchbook 🙂
Learn how to make nature line drawings with me this spring! In case you missed the link, you can learn more and join the class here.